1. Convert to ISO image
First we need the MacOS Mojave image.
Download the official only on the Mac
Follow the link: support.apple.com/macos/mojave
You will transfer to iTunes, agree with the license agreement, remove all the checkboxes about the update, and choose to download the image.
After the download is complete, you need to convert the downloaded image into ISO, for this we will download the repository:
git clone https://github.com/kholia/OSX-KVM.git
And run the script:
./mojave/create_iso_mojave.sh
Upon completion of which, the converted ISO image will appear on the desktop.
2. Host machine preparation
To run MacOS Mojave, you need a processor with support for sse4.1 and sse4.2 instructions
All actions were performed on OS Ubuntu 18.04, CPU: Intel Xeon E3-1270 v6
Make sure the processor supports virtualization:
egrep -c '(vmx|svm)' /proc/cpuinfo
If the match is "0" – does not support, if non-zero, it supports.
Enable forwarding packages:
vim /etc/sysctl.conf
Add a line:
net.ipv4.ip_forward=1
Apply the changes:
sysctl -p
Install all necessary packages:
apt install -y qemu qemu-kvm libvirt0 virt-manager bridge-utils libvirt-daemon-system libvirt-clients uml-utilities libguestfs-tools
Create interface "tap0"
ip tuntap add dev tap0 mode tap
ip link set tap0 up promisc on
brctl addif virbr0 tap0
Now on the host machine we also need the following repository:
git clone https://github.com/kholia/OSX-KVM.git
Copy our ISO image directly to the root of the downloaded repository.
Create a disk for a future virtual machine:
qemu-img create -f qcow2 mac_hdd.img 128G
3. Installing MacOS Mojave
We are interested in the script "boot-macOS-Mojave.sh" in the root of the repository
Correct the name and, if necessary, the path to the ISO image. Since we have Ubuntu without a graphical shell, we need to add the following options for forwarding an image via VNC:
-vga std -nographic -vnc :1
Where 1 – screen numbers, 1 – corresponds to port 5901. Counting from zero.
And delete the line: "-monitor stdio"
To get the following:
qemu-system-x86_64 -vga std -nographic -vnc :1 -enable-kvm -m 3072 -cpu Penryn,kvm=on,vendor=GenuineIntel,+invtsc,vmware-cpuid-freq=on,$MY_OPTIONS\
          -machine pc-q35-2.11 \
          -smp 4,cores=2 \
          -usb -device usb-kbd -device usb-tablet \
          -device isa-applesmc,osk="ourhardworkbythesewordsguardedpleasedontsteal(c)AppleComputerInc" \
          -drive if=pflash,format=raw,readonly,file=OVMF_CODE.fd \
          -drive if=pflash,format=raw,file=OVMF_VARS-1024x768.fd \
          -smbios type=2 \
          -device ich9-intel-hda -device hda-duplex \
          -device ide-drive,bus=ide.2,drive=Clover \
          -drive id=Clover,if=none,snapshot=on,format=qcow2,file=./'Mojave/Clover.qcow2' \
          -device ide-drive,bus=ide.1,drive=MacHDD \
          -drive id=MacHDD,if=none,file=./mac_hdd.img,format=qcow2 \
          -device ide-drive,bus=ide.0,drive=MacDVD \
          -drive id=MacDVD,if=none,snapshot=on,media=cdrom,file=./'Mojave.iso' \
          -netdev tap,id=net0,ifname=tap0,script=no,downscript=no -device vmxnet3,netdev=net0,id=net0,mac=52:54:00:AB:F8:B7
Run the script:
./boot-macOS-Mojave.sh
Connect via VNC to the port specified in the startup script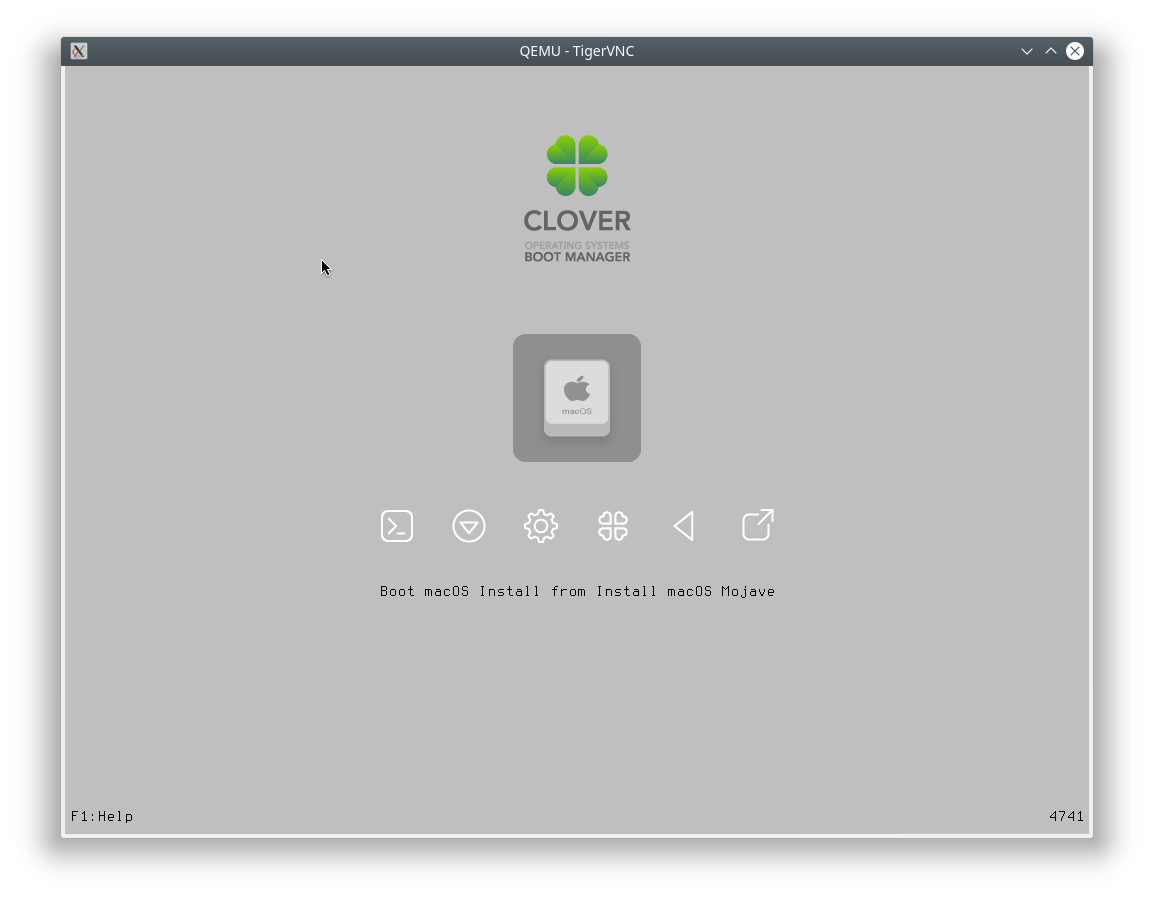
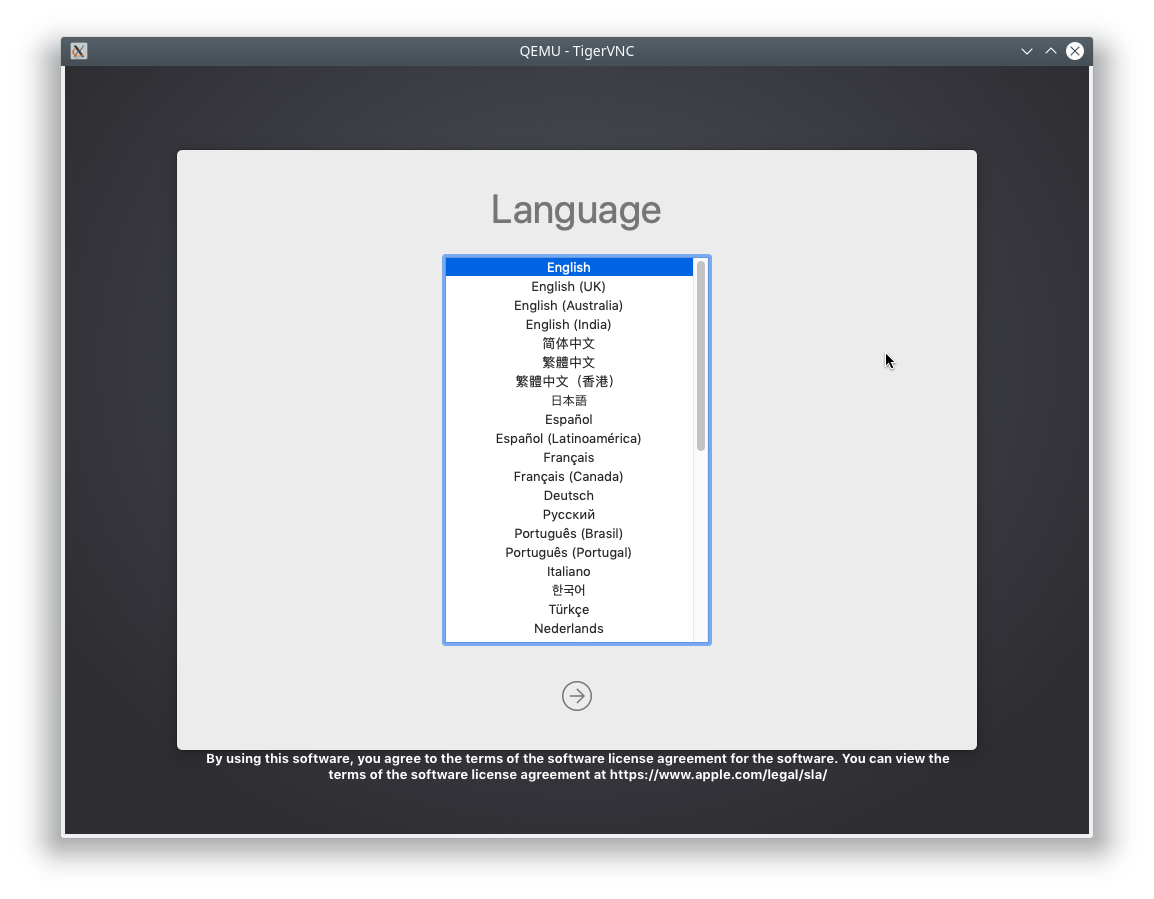
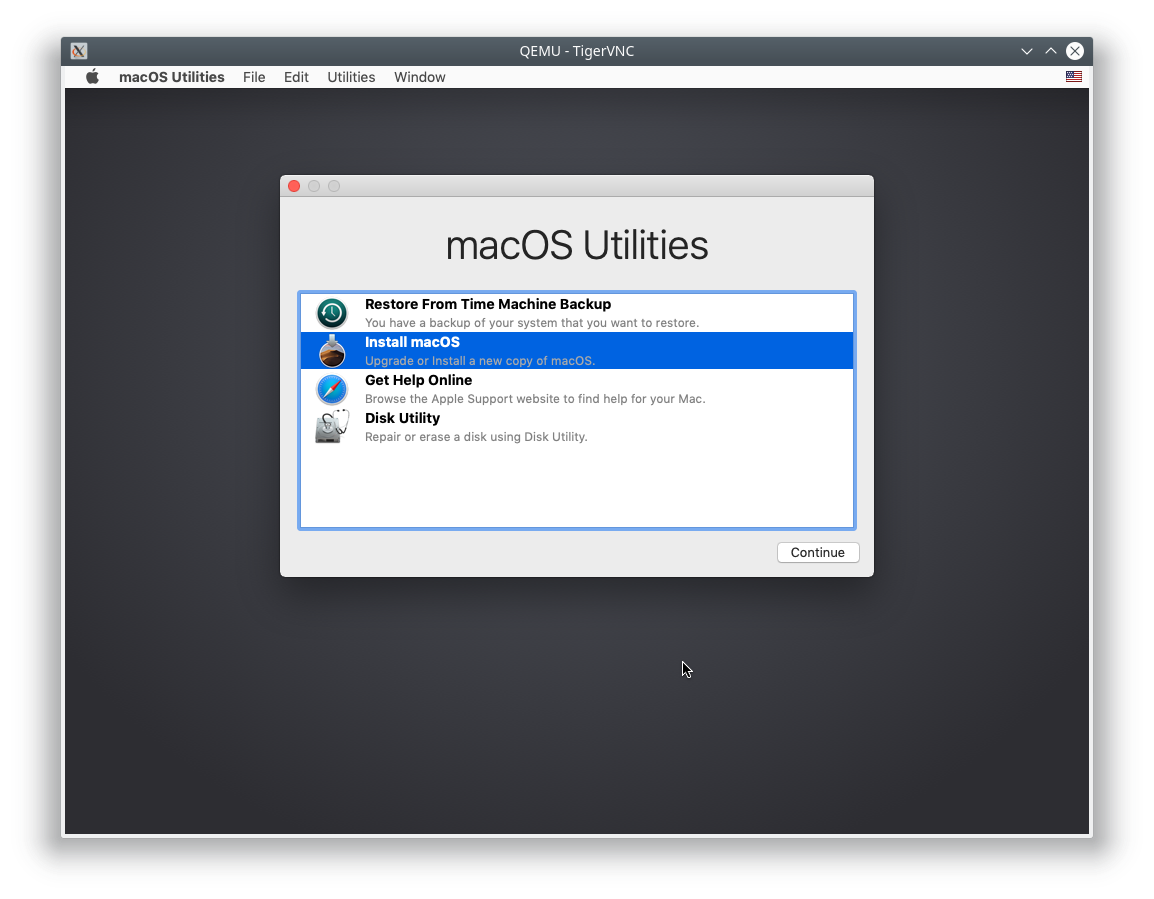
Run the installation
Immediately after selecting the installation language, run "Disk Utility"
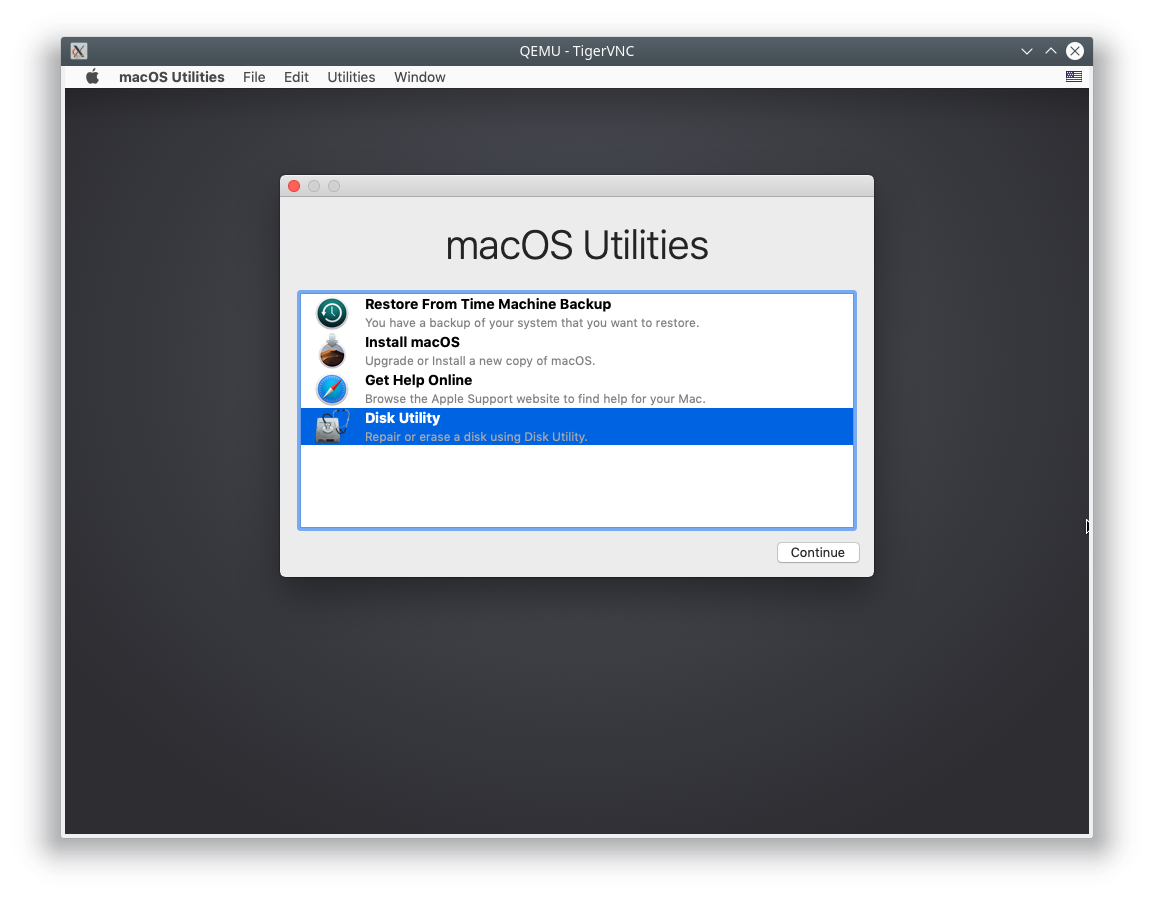
We look at the size of the disks, and we find that we created for the virtual machine.
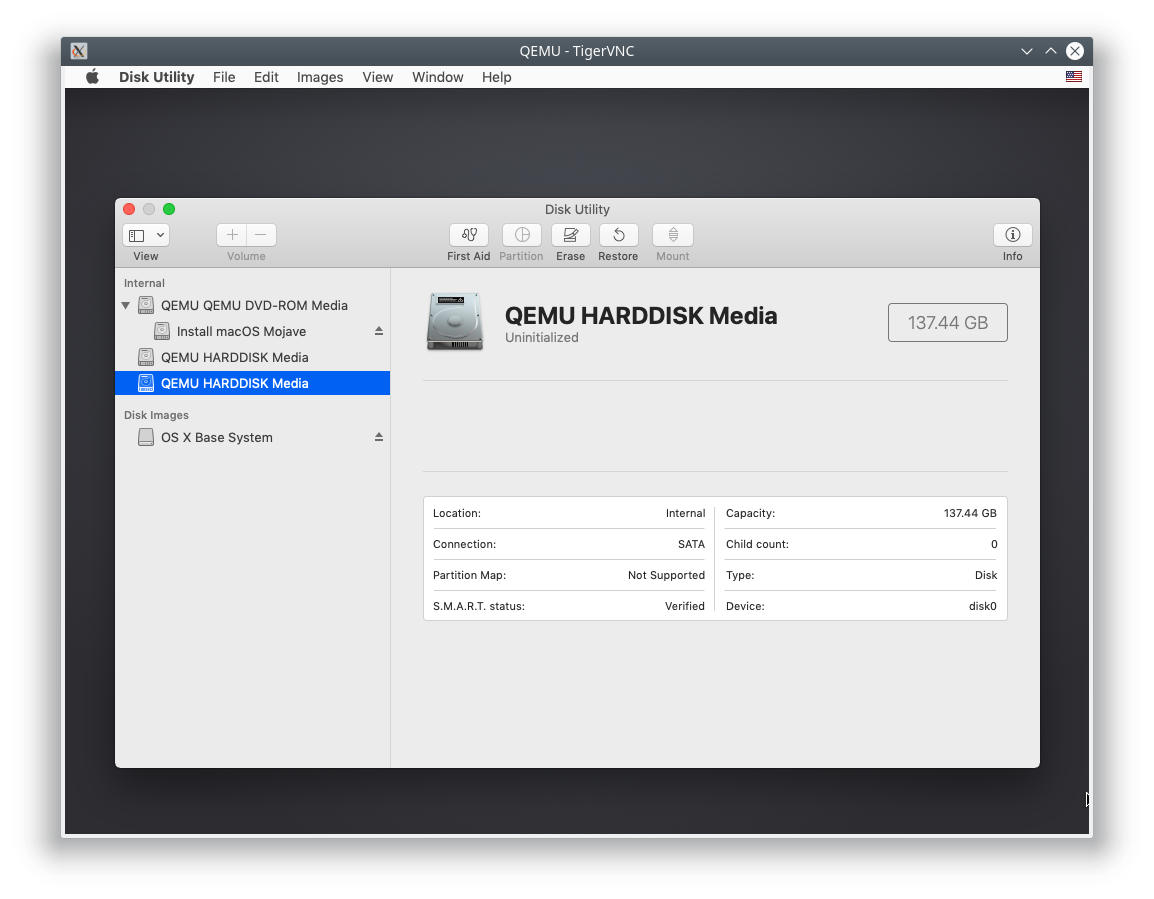
Select "Erase" and set the section name

Close the "Disk Utility" and proceed to install the "Install MacOS"
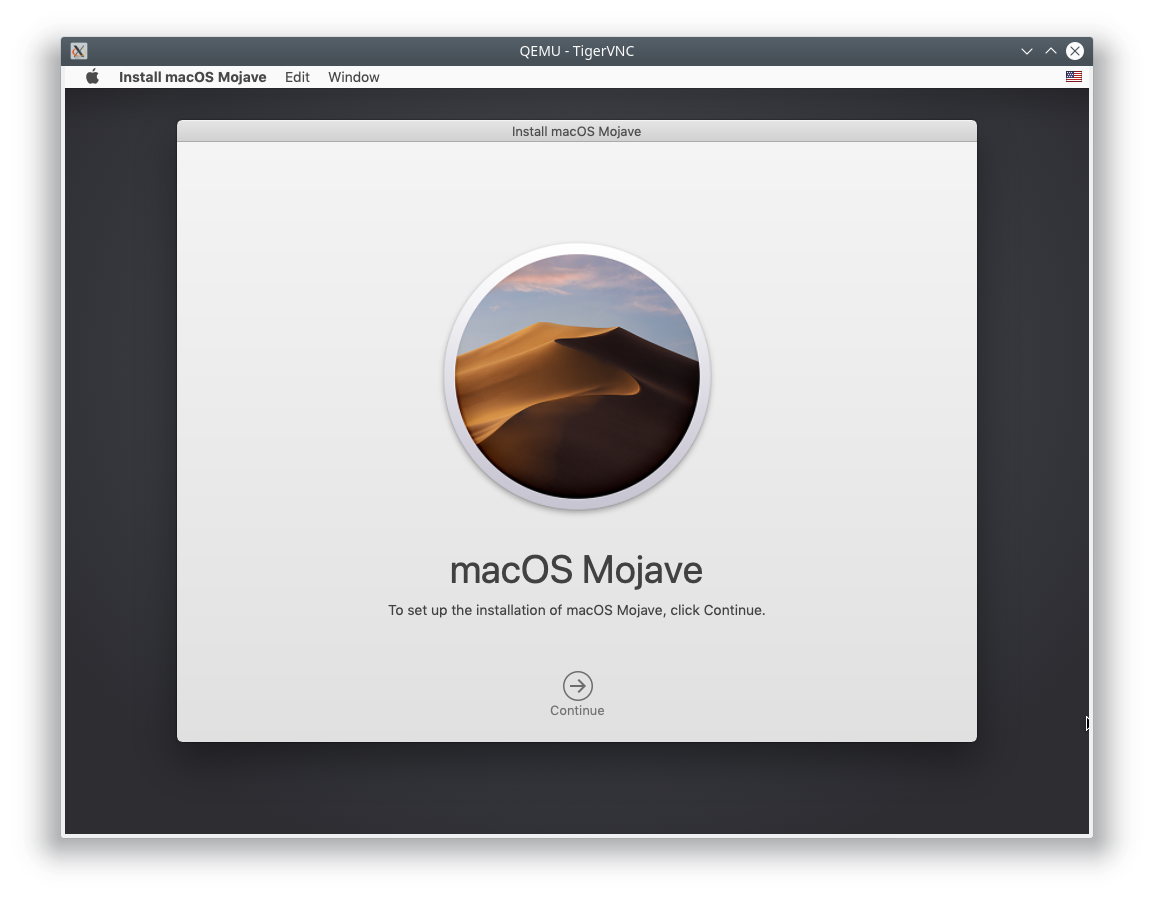
We agree with the license agreement and choose the section for installation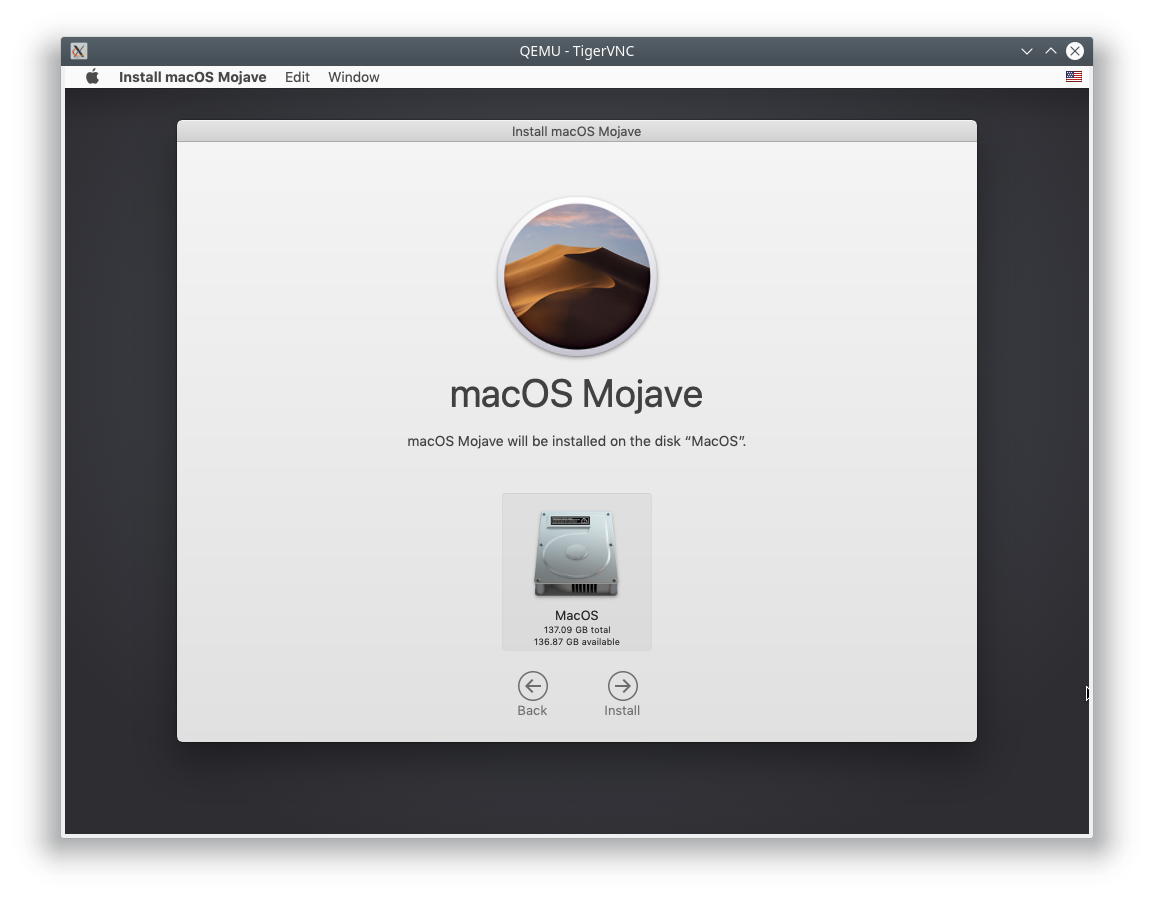
Next, the installation process to paint it makes no sense.
After installing MacOS Mojave, turn off the virtual machine and remove from the script the lines connecting our ISO image as a DVD drive.
These 2 lines are:
          -drive id=MacHDD,if=none,file=./mac_hdd.img,format=qcow2 \
          -device ide-drive,bus=ide.0,drive=MacDVD \
4. Installing Clover on a partition with MacOS
This is necessary not to remove the extra image from the virtual machine, but to set up the system autostart, without the need to select the boot partition.
Start the virtual machine and select the 3rd item "Boot MacOS from MacOS"
MacOS – the name of the section that we asked when preparing the section (Erase)
For this you will need:
1. Clover
2. Clover Configurator
Download Clover and run, we get the following error:
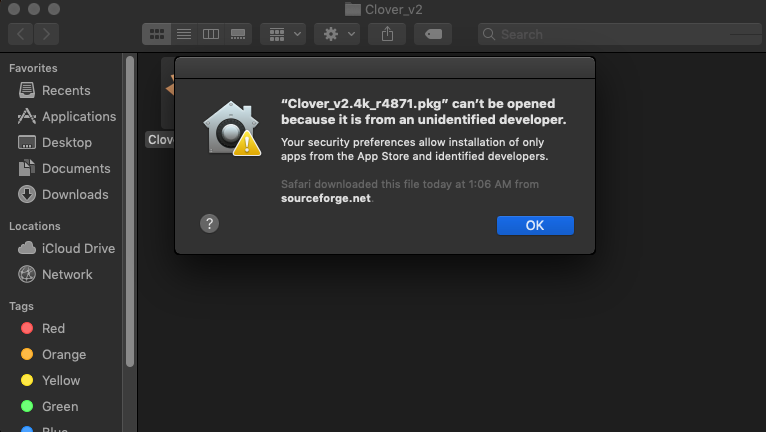
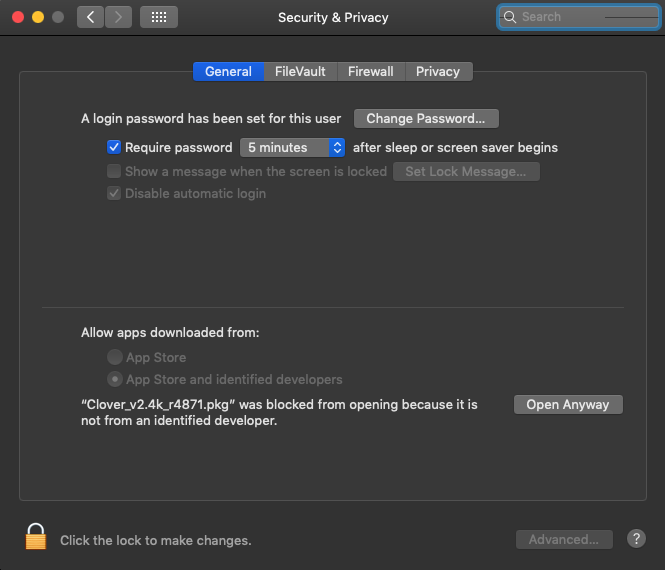
Click "OK" and go to "System Preferences" -> "Security & Privacy" and see our Clover, and the message that for security purposes it was blocked. Click "Open Anyway"
We reach the point "Installation Type" and do not click "Install", but go to "Customize".

Mark the top two points for EFI
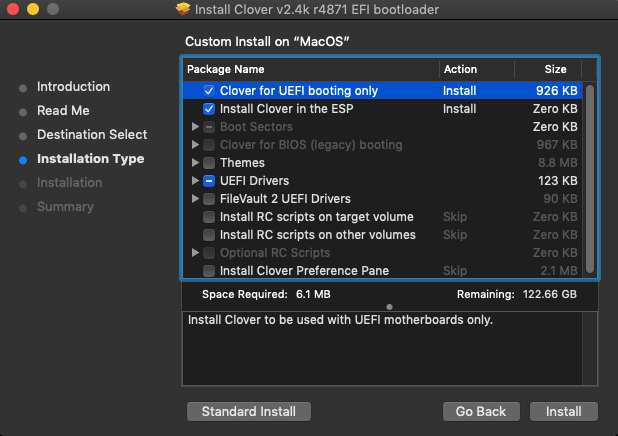
Click "Install" and enter the user password
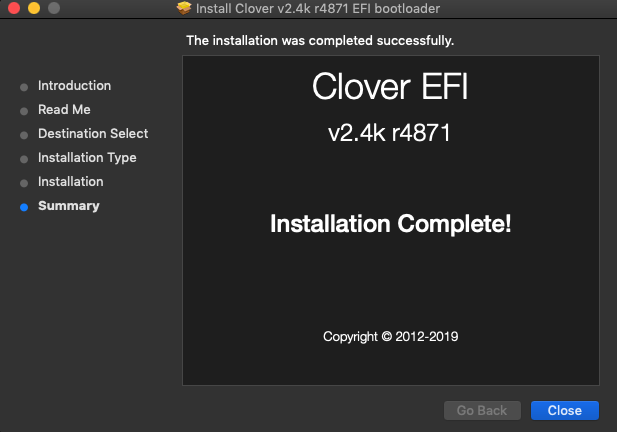
Clover installation is complete.
In essence, the Clover installation was needed in order to create a boot partition, and we’ll clone the contents of the "Clover.qcow2" section into it.
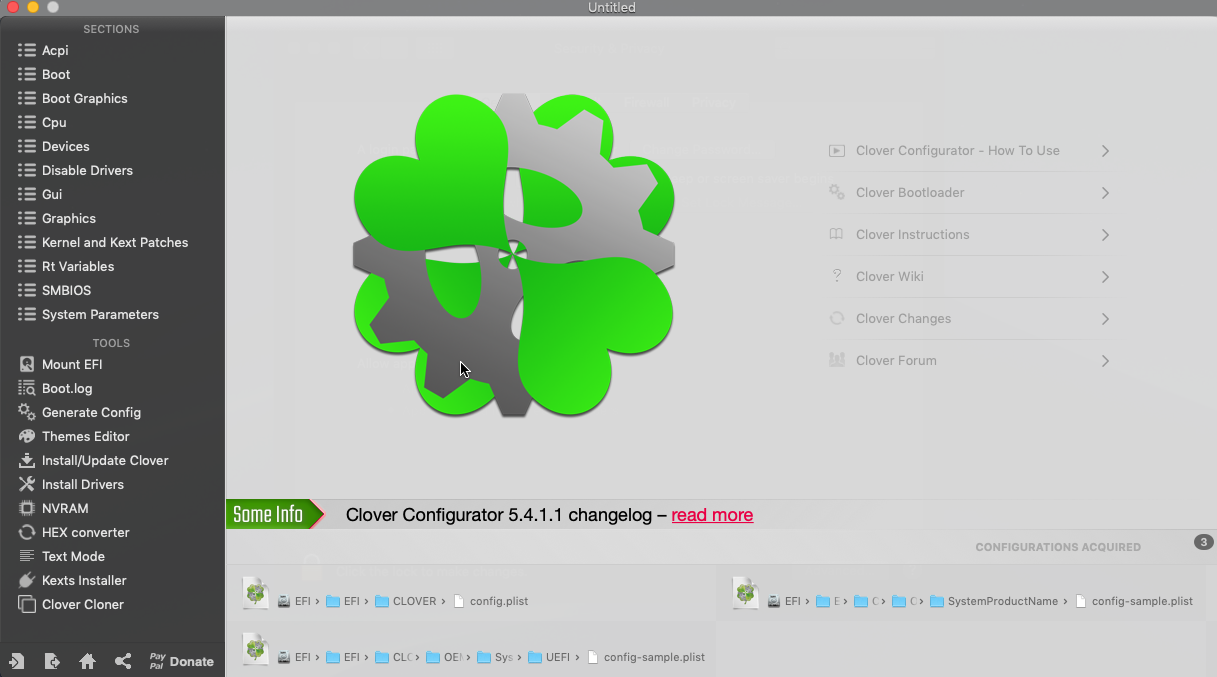
Download Clover Configurator and run. Just go to "System Preferences" -> "Security & Privacy" and allow the launch.
Select the "Mount EFI" section and see two EFI sections there.
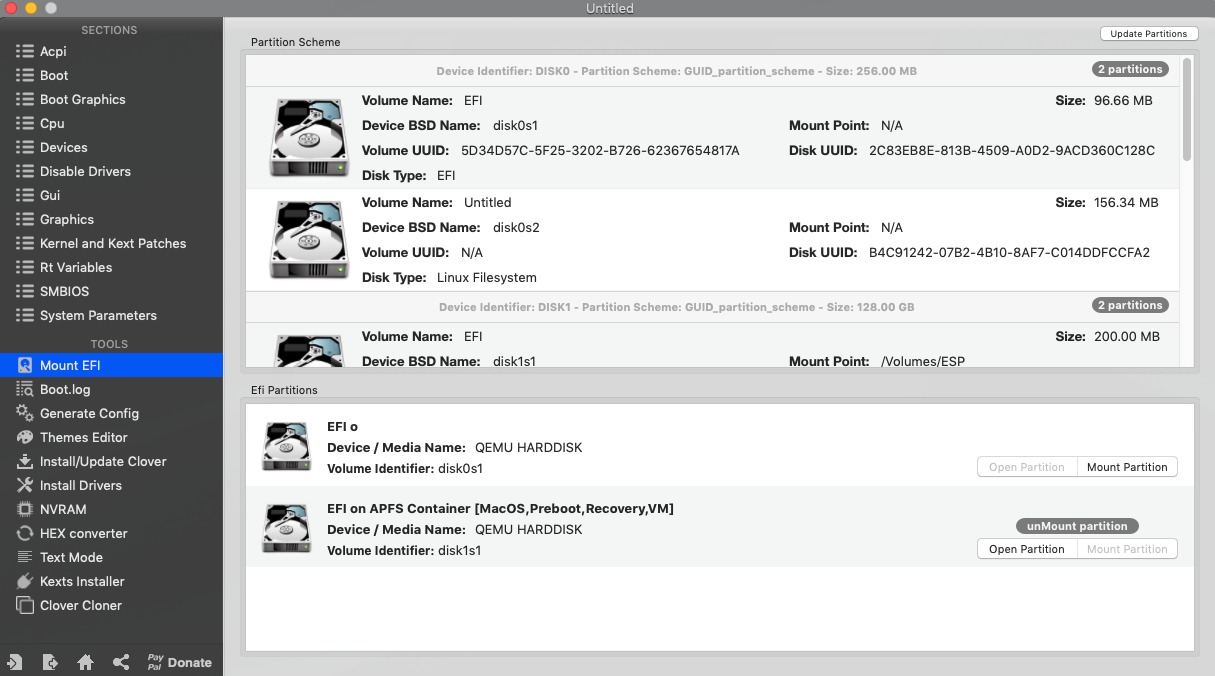
disk1s1 – mounted, MacOS partition, we will clone Clover here
disk0s1 – not mounted, image section "Clover.qcow2", we will clone from here
Mount disk disk0s1 – "Mount Partition"
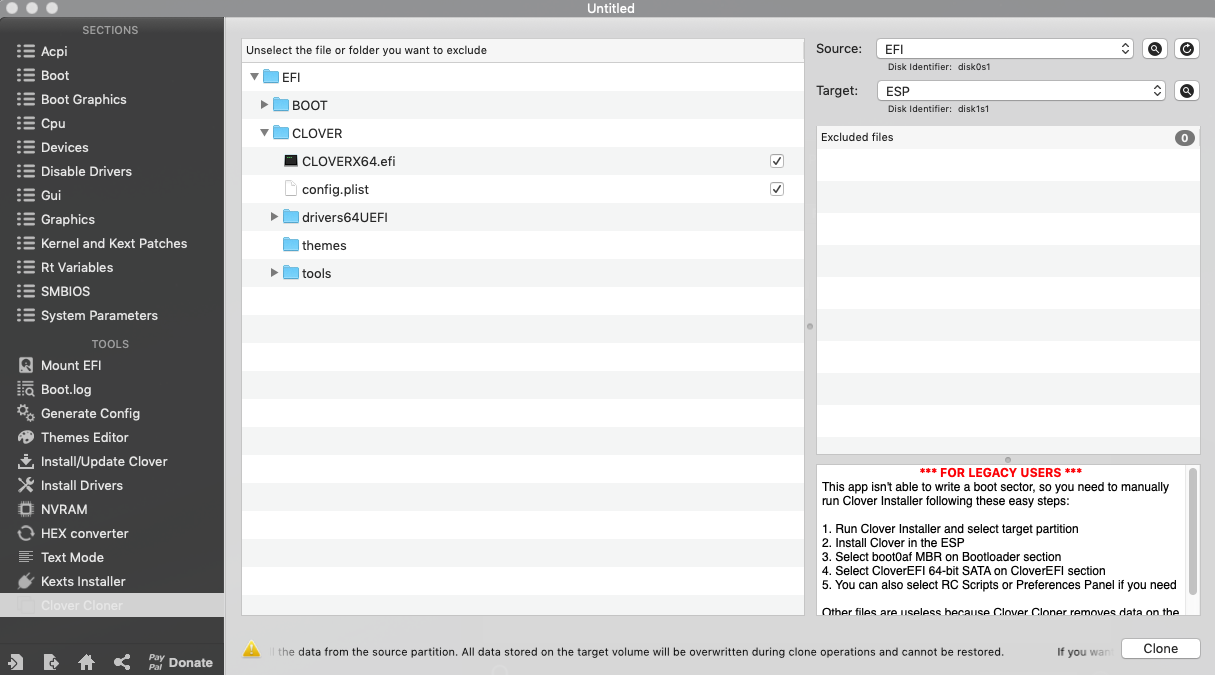
Go to the section "Clover Cloner". Make sure that the "Source" is the partition "disk0s1", and the "Target" – "disk1s1". Click "Clone".
After successful cloning, turn off the virtual machine, find the following lines in the startup script:
          -device ide-drive,bus=ide.2,drive=Clover \
          -drive id=Clover,if=none,snapshot=on,format=qcow2,file=./'Mojave/Clover.qcow2' \
And delete them.
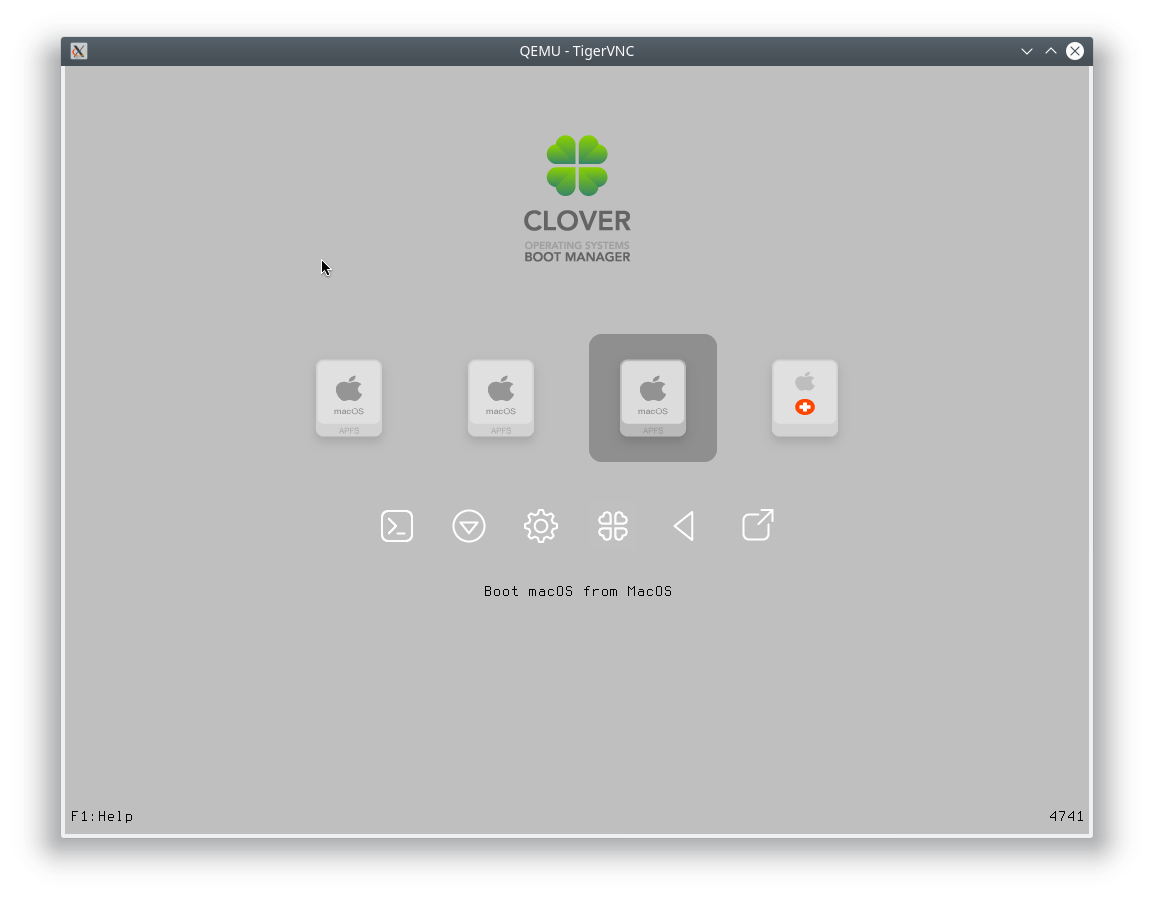
We start again the virtual machine. If everything is done correctly, then we see our Clover
Boot from the section with MacOS. Open Clover Configurator again. Go to the "Mount EFI" section and see that there is now one partition, we will mount it.
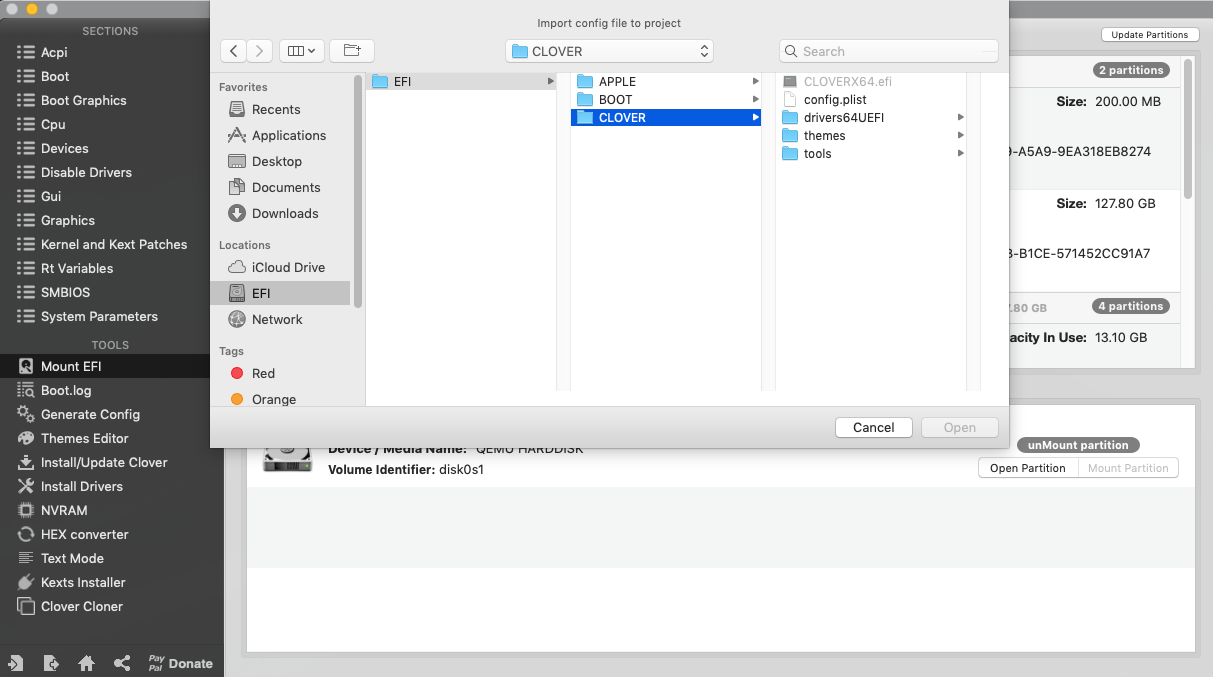
In the lower left corner we find the icon with the name "Import Configuration". In "Locations", select "EFI" -> "CLOVER" -> "config.plist" and click "Open".
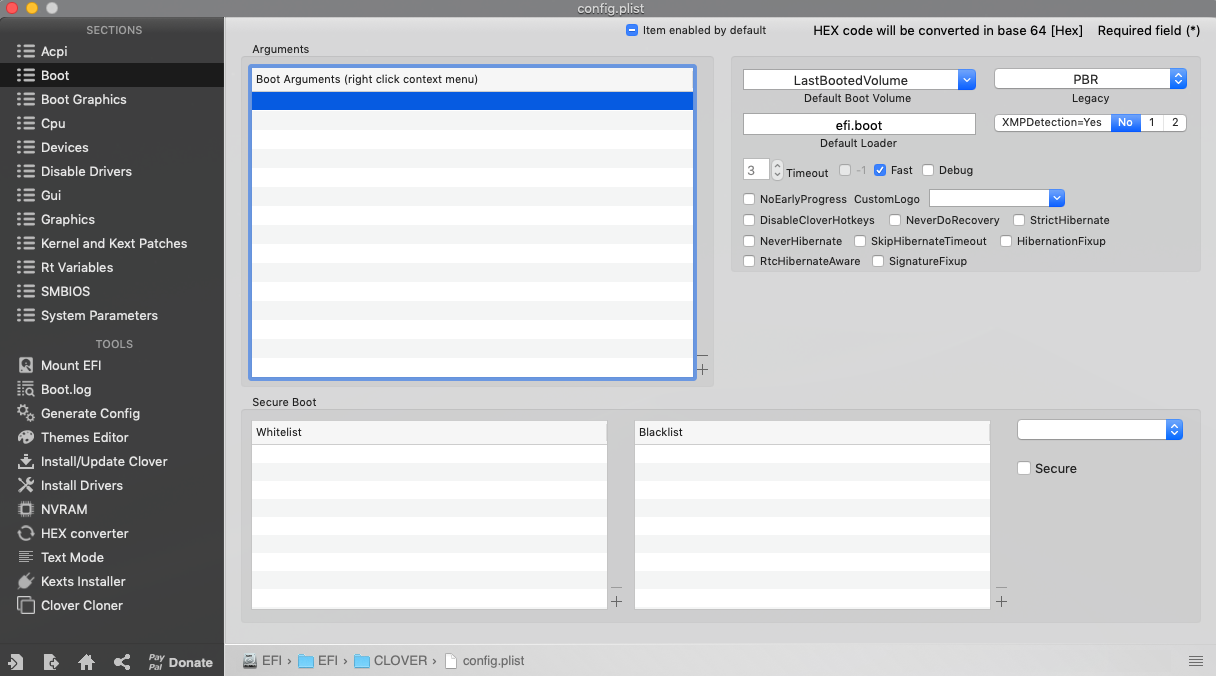
In the section "SECTIONS" select the item "Boot" and bring it to the following form.
In the lower left corner we find the icon with the name "Export Configuration" and click "Save" and reboot, when you turn on Clover will ask the partition from which it is loaded, select our section, all subsequent downloads it will be automatically loaded from it.
After that you can leave only the following files:
- boot-macOS-Mojave.sh
- mac_hdd.img
- OVMF_CODE.fd
- OVMF_VARS-1024×768.fd
I am struggling with the cloning of the EFI section. The Cloning works and says its successful, however when I shutdown, remove those two lines and boot up again, nothing happens. The QEMU bootloader goes to shell and does not proceed any further. Am I missing another step?
It seems on one server I came across a similar one, the cloning wrote that it was successful, but nothing happened at startup. I mounted both sections and noticed that they are not identical. Then I started preparing the partition, then manually with the replacement I copied the contents (via Finder) of one bootloader to another, and then it worked. Maybe the same case, try.
Good luck!
Excellent article! Thank you! I’ve gotten everything running great, but I’ve run into a small issue. I’m trying to ssh into the guest from a remote machine and I’m unable to get this working. I can ping and ssh from the guest to other machines on the network, but cannot ping or ssh from another machine to the guest. I’ve been trying to read up on the issue and as I understand it, I need to setup public bridging? Do you have any tips on getting this woking? QEMU/KVM Host connected via ethernet to 192.168.1.xxx with 255.255.255.0 subnet which is… Read more »
Hi! I am glad that the article was helpful!
I think you will find the answer to your question in the next article, in the "IPTables" part.
https://artem.services/?p=771&lang=en
Does this method have graphics acceleration in it?
Hi!
I can’t check it, because I use server hardware without graphic card. I need only CPU for XCode.
But, you can try looking for there:
https://github.com/kholia/OSX-KVM/blob/master/notes.md
In "Accelerated Graphics" chapter
Good luck!
Hi, this guide is excellent. Great write up, I really appreciate it.
Before step 4 you mention you should turn off the machine and remove the lines. In fact, before you do this, you should download clover configurator and mount the current efi partition and then install clover to the virtual hard drive and move the current efi to the virtual hard drive. That will fix boot issues people may face at step 4.
Hi!
Cool, thanks for the comment, I think it will save people nerves and time)
sudo brctl addif virbr0 tap0
bridge virbr0 does not exist!
Try to execute first:
sudo brctl addbr virbr0
And try again:
sudo brctl addif virbr0 tap0
Correct. Awesome thx.
Hi, thanks a lot for your article, really nice. I’ve an issue regarding boot after clover clone, same issue also if avoid clover clone. After shutdown I can’t reach macos and boot stop at UEFI interfactive shell.
Have you any advice to try to boot again after shutdown?
Thanks,
David.
Hi David!
I was on vacation, I just got to the computer. Make sure you clone to the correct partition. Also, you can use not cloning, but copying through the console, and after making sure that you copied correctly, break will reboot.
Good luck!
I hope you can help me , I didn’t use your tutorial however I’m sure what I did is the same . I used the Ra1nstorm script. Everything went well however when I load the vm I do see the clover but if I select load Mac from whatever it says (Mac isn’t installed yet it’s the 1 button you get when you load the first time) it starts loading I see a bund of lines running and then my screen goes all glitchy the image is all distorted . I have a x1 Lenovo extreme with gtx 1050ti I… Read more »
Hi Patrick!
How did you connect to VM? Because I don’t have video adapter on my server, and use keys: "-nographic" and "-vnc", and connected to VM over VNC