Jenkins – Kubeconfig


To store and switch between Kubernetes configurations, you can use the Kubernetes CLI plugin, to work with it, "kubectl" must be installed in the system

Install the plugin

Go to "Manage Jenkins"


Section "Manage Plugins"


Go to the "Available" tab and in the search indicate "Kubernetes CLI"

Install it.


Add Kubernetes config


Go to the "Credentials" and create the "Secret file"


We load a config and we specify "ID". Save.


Pipeline

An example of using a plugin in Pipeline:

pipeline {
  agent any
  stages {   
    stage("K8s") {
      steps {
        withKubeConfig([credentialsId: 'kubeconfig-artem-services-staging']) {
          script {
            sh "kubectl get pod"
          }
        }
      }
    }
  }
}

FIX ERROR – CentOS 7 kubectl: Invalid choice: 'eks', maybe you meant

When trying to execute any "kubectl" command on an EKS cluster, the following error occurs:

Invalid choice: 'eks', maybe you meant:


A possible reason for this is the old version of "kubectl" available in the repository.


Solution:

Install the latest version of "kubectl" using PIP3

sudo yum install -y python3 python3-pip
sudo pip3 install --upgrade --user awscli


To use "kubectl" installed using PIP, you need the PIP binary files directory to be in the PATH variable, to do this:

export PATH=~/.local/bin:$PATH
source ~/.bash_profile


In order not to do this every time, you need to add the line:

export PATH=~/.local/bin:$PATH


In your profile, depends on the shell:

  • Bash – .bash_profile, .profile, or .bash_login
  • Zsh – .zshrc
  • Tcsh – .tcshrc, .cshrc or .login

Jenkins – Add new path to PATH


To add the path to the Jenkins environment globally, without doing this every time in Pipeline, we’ll go to the Jenkins settings


Next is the tab "Configure System"


Find the "Global properties" block, check the "Environment variables" checkbox. And we add a variable with the name "PATH + EXTRA" and the value – the paths that need to be added, separated by ":" among themselves, if there are several.

Helm – Creating Secret from Variable


In order to save the value of the variable as Secret, the variable must be encoded in base64, for this we use "_helpers.tpl"

For example, we need to save the value of the variable "applicationSecret"

values.yaml:

# Default values for artem-services.
# This is a YAML-formatted file.
# Declare variables to be passed into your templates.

replicaCount: 1
namespace: default

image:
  repository: XXXXXXXXXXXX.dkr.ecr.eu-east-1.amazonaws.com/artem-services
  tag: 1.0.1
  pullPolicy: IfNotPresent

nameOverride: ""
fullnameOverride: "artem-services"

applicationSecret: |
  var1=value1
  var2=value2
  var3=value3
  var4=value4


Add the following to "_helpers.tpl":

_helpers.tpl:

{{- define "applicationSecret" }}
{{- printf .Values.applicationSecret | b64enc }}
{{- end }}


Now in the "templates" directory, create the file "secret.yaml"

secret.yaml:

apiVersion: v1
kind: Secret
type: Opaque
metadata:
  name: "{{ .Chart.Name }}-application"
data:
  application.conf: {{ template "applicationSecret" . }}

Ansible – Launch Playbook with a specific version of Python

For example, there is an instance on which Python of the 2nd and 3rd versions is installed, but the default is 2nd, and in order not to change the default version and start the Playbook using Python3, you can use the following command:

python3 $(which ansible-playbook) -i localhost my-playbook.yaml


You can also specify the interpreter in the inventory file:

[localhost]
localhost ansible_connection=local ansible_python_interpreter=python3


Make sure Ansible module is installed for the correct version of Python

sudo pip3 install --user ansible

Ansible – Template: to_nice_json

In order to create a file from the template and immediately save it as "Pretty JSON", you can use the "copy" module with the "content" key.

For example, save the template "config.j2" as the file "/app/config.json"

Playbook:

- name: Template a file to configuration files
  copy:
    content: "{{ lookup('template', 'templates/config.j2') | to_nice_json }}"
    dest: "/app/config.json"
    owner: artem
    group: artem
    mode: '0644'

Jenkins – Active Choice: CheckBox – Default values


When working with the Active Choice CheckBox parameter, you can select the default values by adding the ": selected" parameter

Pipeline:

properties([
  parameters([
    [$class: 'CascadeChoiceParameter', 
      choiceType: 'PT_CHECKBOX', 
      description: 'Select environment',
      filterLength: 1,
      filterable: false,
      name: 'Environment', 
      script: [
        $class: 'GroovyScript', 
        script: [
          classpath: [], 
          sandbox: false, 
          script: 
            'return[\'Development:selected\',\'Production:selected\']'
        ]
      ]
    ]
  ])
])


When assembling with parameters, two environments at once, "Development" and "Production" will be selected by default

Jenkins – Active Choice: CheckBox – Working with an Array

When working with the Active Choice CheckBox parameter, the parameter values are written to the variable, separated by commas. To work with them as separate elements, you need to save them in an array. For example, there is the following Active Choice, which displays a list of environments in the form of a CheckBox.

Pipeline:

properties([
  parameters([
    [$class: 'CascadeChoiceParameter', 
      choiceType: 'PT_CHECKBOX', 
      description: 'Select Environment',
      filterLength: 1,
      filterable: false,
      name: 'Environment', 
      script: [
        $class: 'GroovyScript', 
        script: [
          classpath: [], 
          sandbox: false, 
          script: 
            'return[\'Development\',\'QA\',\'Staging\',\'Production\']'
        ]
      ]
    ]
  ])
])


It looks like this:


Choose two environments, "Development" and "QA"


The value of the variable "Environment" will be the following: "Development, QA". We will save these values to an array for further work with it.

String[] Env_Array = "${params.Environment}".split(',');


Completely Pipeline will have the following form

Pipeline:

properties([
  parameters([
    [$class: 'CascadeChoiceParameter', 
      choiceType: 'PT_CHECKBOX', 
      description: 'Select Environment',
      filterLength: 1,
      filterable: false,
      name: 'Environment', 
      script: [
        $class: 'GroovyScript', 
        script: [
          classpath: [], 
          sandbox: false, 
          script: 
            'return[\'Development\',\'QA\',\'Staging\',\'Production\']'
        ]
      ]
    ]
  ])
])

pipeline {
  agent any
  stages {
    stage('Check env') {
      steps {
        script {
          if ( env.Environment.isEmpty() ) {
            echo "Environment not specified."
            autoCancelled = true
            error('Aborting the build.')
          }
          else {
            echo "Environment total: ${env.Environment}"
            String[] Env_Array = "${params.Environment}".split(',');
            for (x in Env_Array) {
              echo "ENV: ${x}"
            }
          }
        }
      }
    }
  }
}


The result of the Jenkins job:

Jenkins – Active Choice: Pipeline examples


A few examples of how Active Choices parameters in Pipeline as a code

Example 1

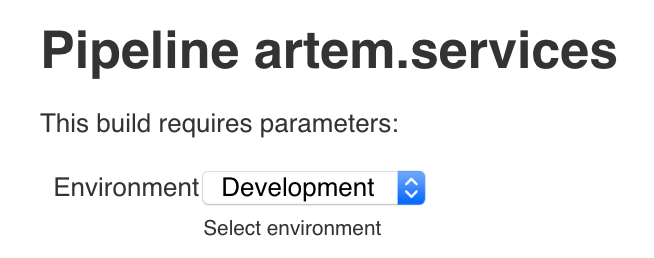
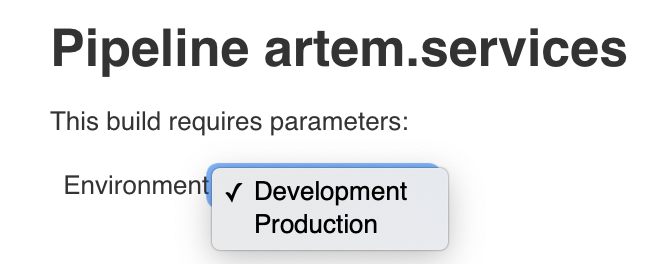
Single selection from the list provided. A drop-down list of environments, by default, the first item in the list is selected.

Pipeline:

properties([
  parameters([
    [$class: 'CascadeChoiceParameter', 
      choiceType: 'PT_SINGLE_SELECT', 
      description: 'Select environment',
      filterLength: 1,
      filterable: false,
      name: 'Environment', 
      script: [
        $class: 'GroovyScript', 
        script: [
          classpath: [], 
          sandbox: false, 
          script: 
            'return[\'Development\',\'Production\']'
        ]
      ]
    ]
  ])
])


Continue reading "Jenkins – Active Choice: Pipeline examples"

Jenkins – Username

In order to find out Jenkins username, you need a plugin user build vars

Go to Jenkins settings


Section "Manage Plugins"


Go to the "Available" tab and specify "user build vars" in the search.

Install it.


An example of using a plugin from Pipeline:

pipeline {
  agent any
  stages {
    stage('Output') {
      steps {
        script {
          wrap([$class: 'BuildUser']) {
            echo "Build was started by user: ${BUILD_USER}"
          }
        }
      }
    }
  }
}


The module also has the following variables:

  • BUILD_USER – Full name (first name + last name)
  • BUILD_USER_FIRST_NAME – First name
  • BUILD_USER_LAST_NAME – Last name
  • BUILD_USER_ID – Jenkins user ID
  • BUILD_USER_EMAIL – Email address