![]()
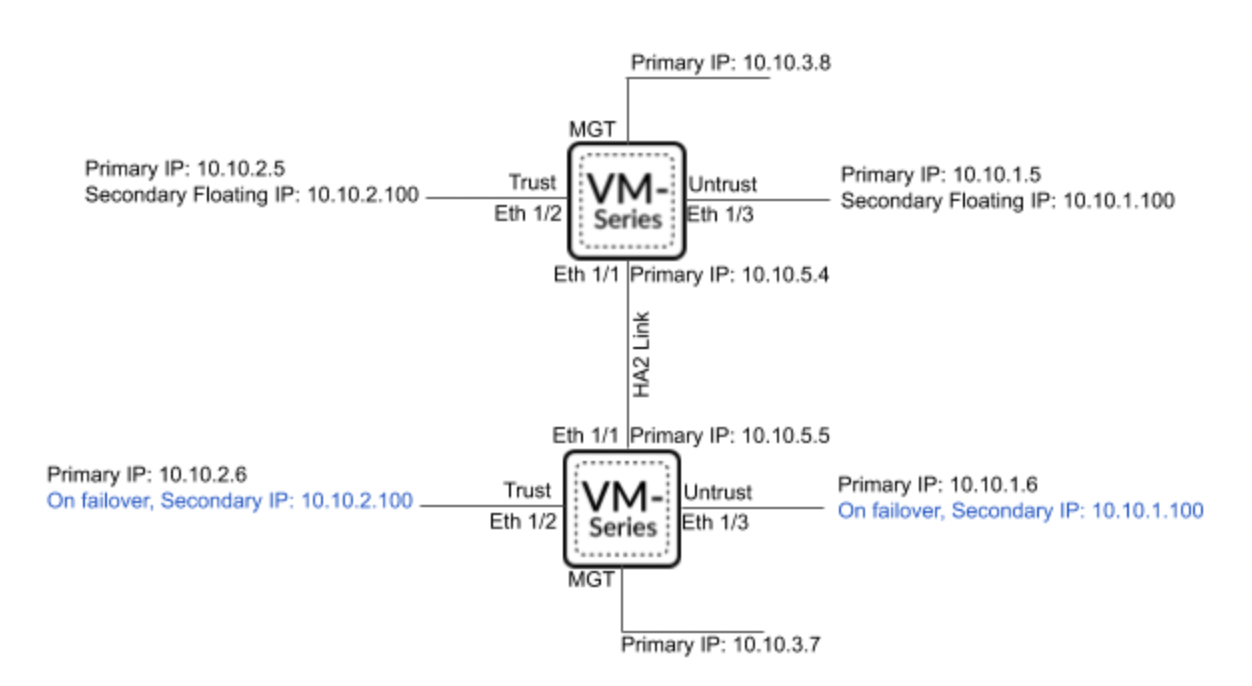
The Palo Alto VM-Series Firewall uses an active/passive configuration for high availability. In which the active firewall constantly synchronizes its configuration and information about active sessions with a similarly configured passive firewall. There are two options for achieving HA on AWS: "Secondary IP Move" and "Dataplane Interface Move".
Secondary IP Move
If the active firewall is unavailable, the passive one becomes active. It also makes API requests to transfer secondary IP addresses from an inaccessible host to itself and updates the routing tables so that traffic is sent to the new active firewall. Switching firewall roles in this method is faster than in "Dataplane Interface Move".
Dataplane Interface Move
As in the case of "Secondary IP Move", if the passive firewall detects that the active one is no longer available, then it becomes active, but instead of transferring IP addresses, it transfers ENI from the inaccessible firewall to itself.
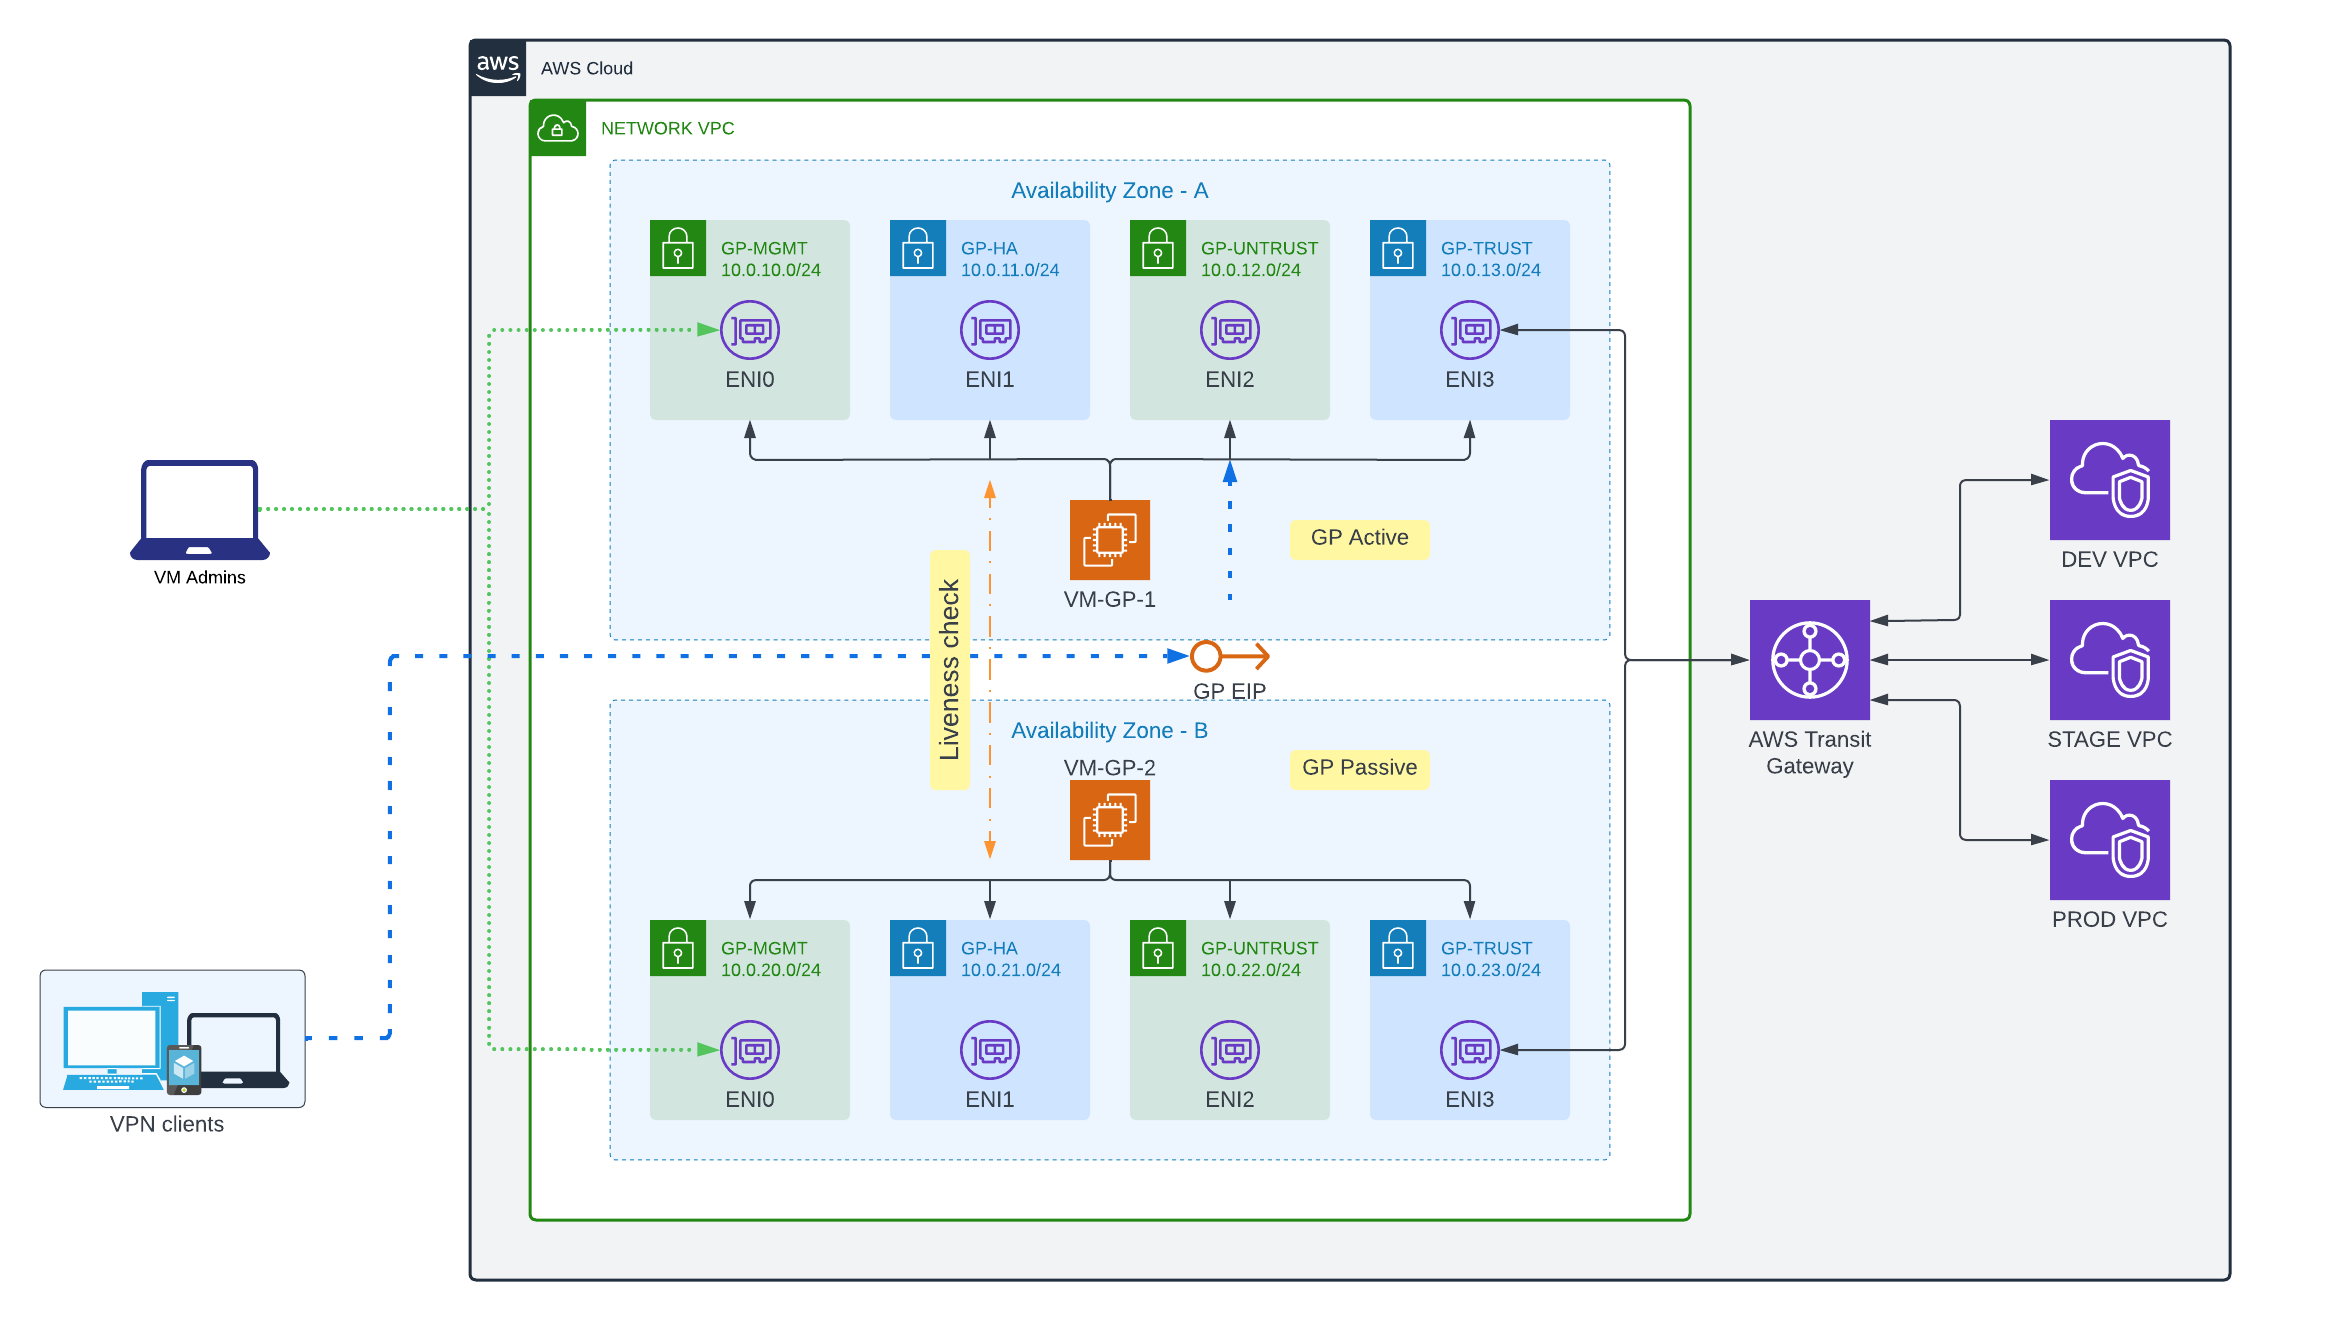
Since it is planned to use VM Firewall as GlobalProtect to access local resources from outside, and firewalls must be in different AZs, only the "Secondary IP Move" option is suitable, but in this case, it will be the EIP that is associated with the main private IP address.
HA requires at least 4 interfaces on each firewall:
- ENI0: MGMT – for management and configuration via console or web interface. Also, this interface will be used as HA1 link
- ENI1: HA2 – to check firewall status
- ENI2: Untrust – interface for connecting to GlobalProtect. On an active firewall, EIP will be associated with this interface
- ENI3: Trust – interface through which local resources will be available
Keep in mind that there is a limit on the maximum number of ENIs attached to an instance, depending on its type and size. Limits can be found here. In this case, instances will be used – m5.xlarge
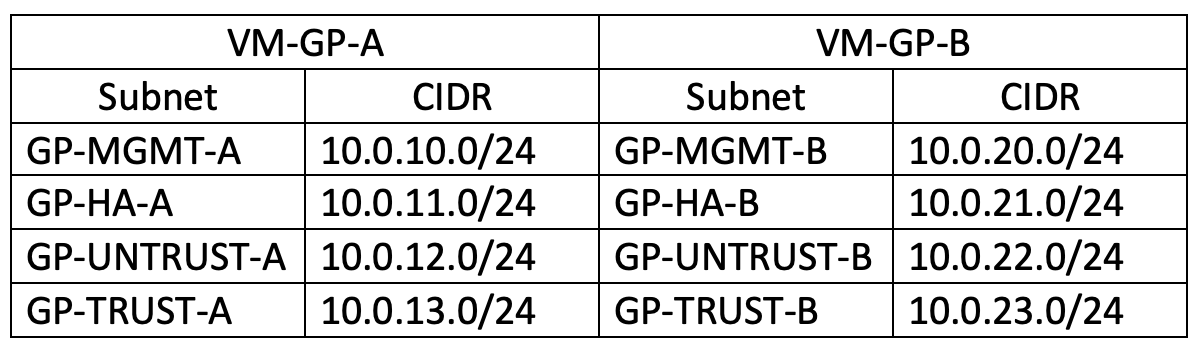
For clarity, the ranges of networks will be formed as follows:
10.0."firewall_number"+"interface_number".0/24
Total we have:
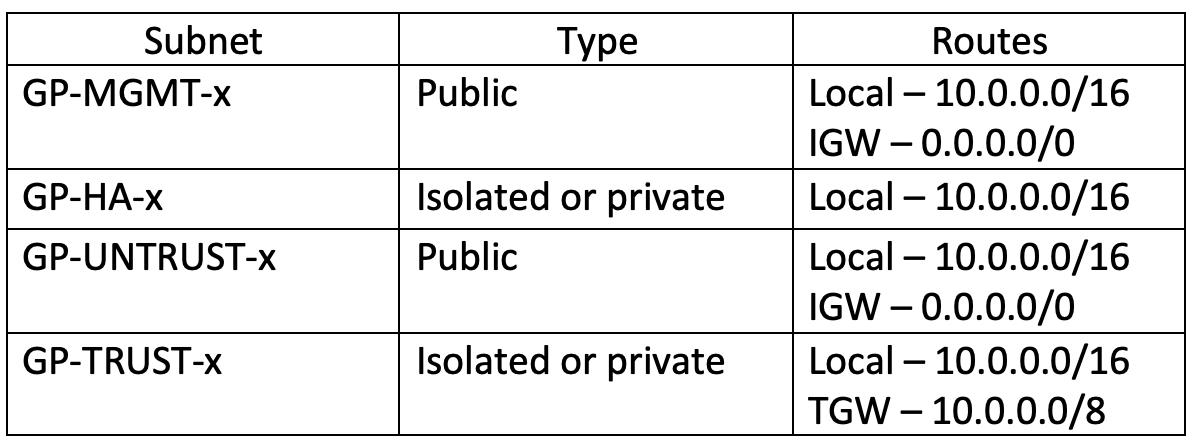
By type, these will be public subnets and isolated/private (for GlobalProtect they do not need Internet access)
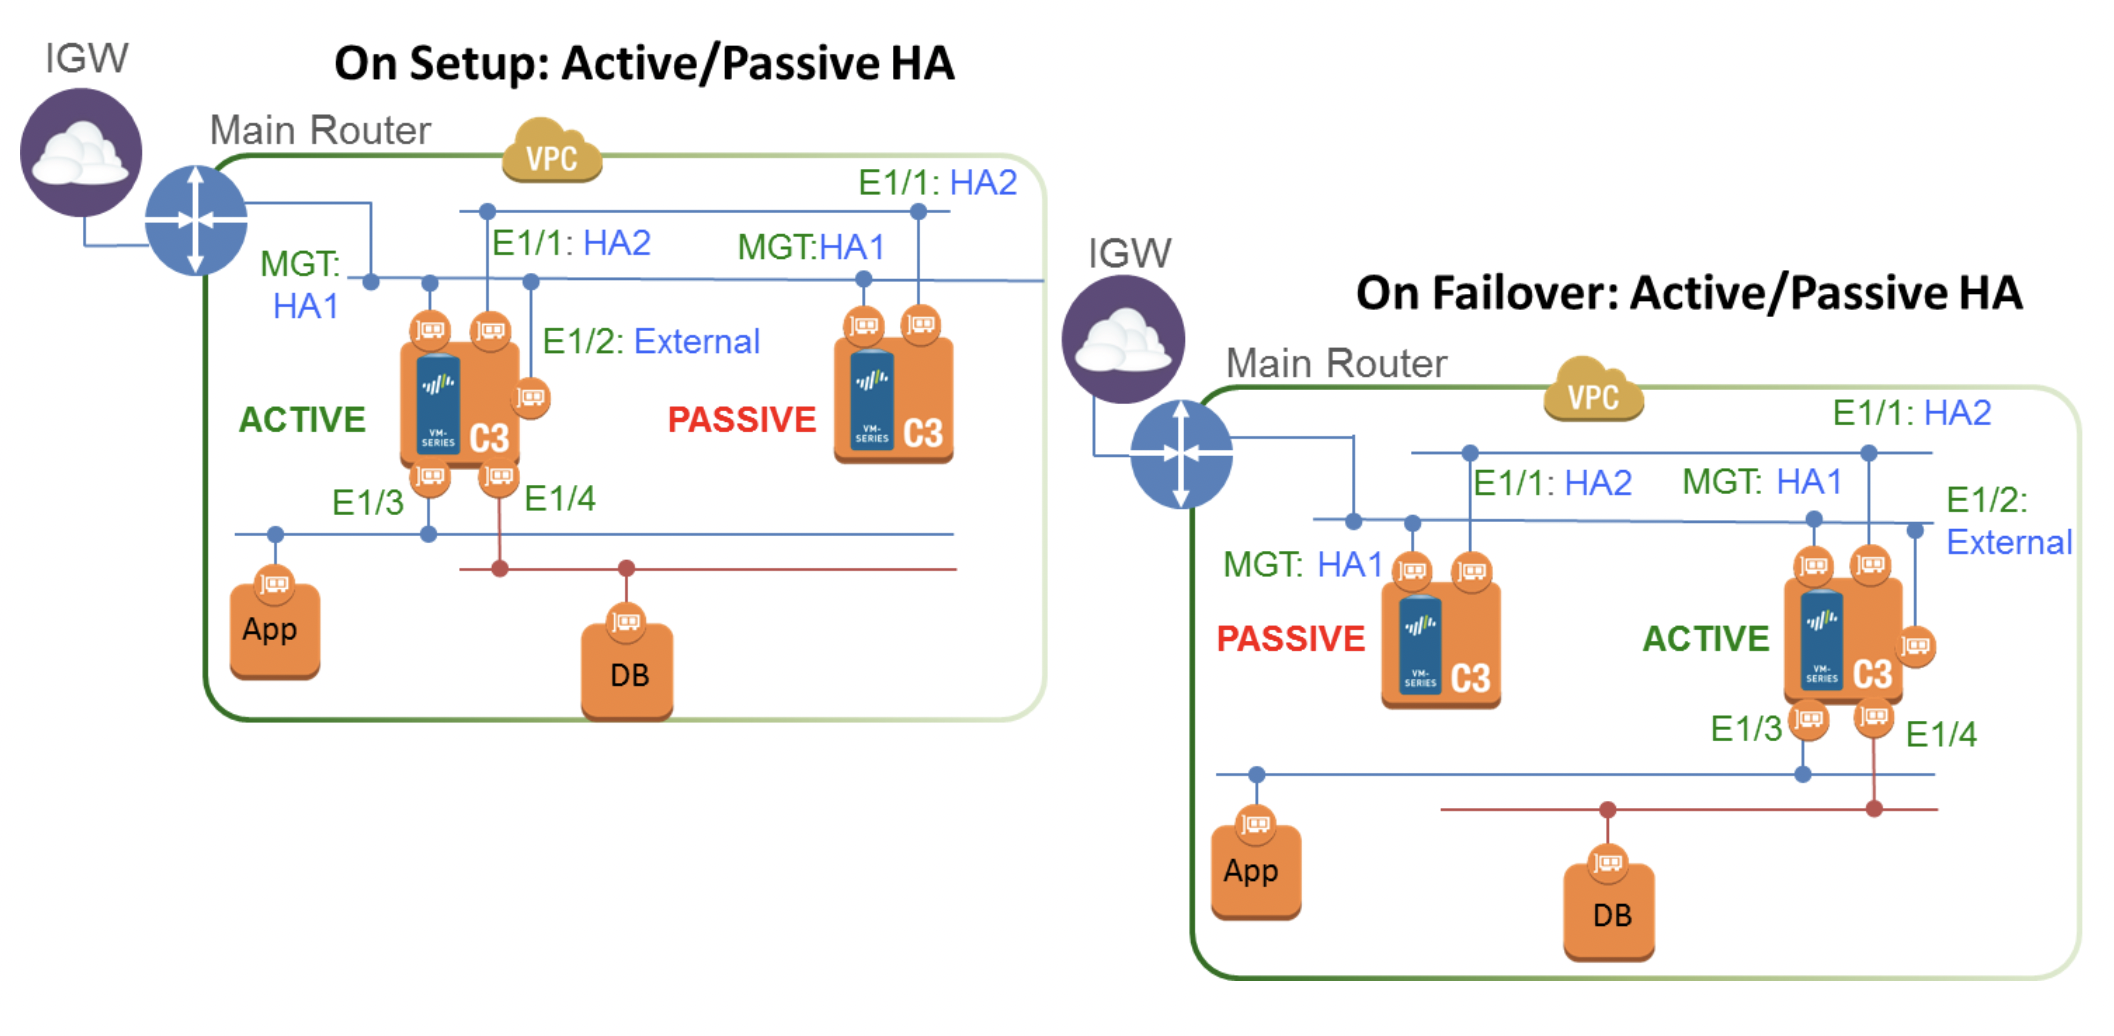
As a result, we have the following scheme:
AWS Infrastructure
VPC
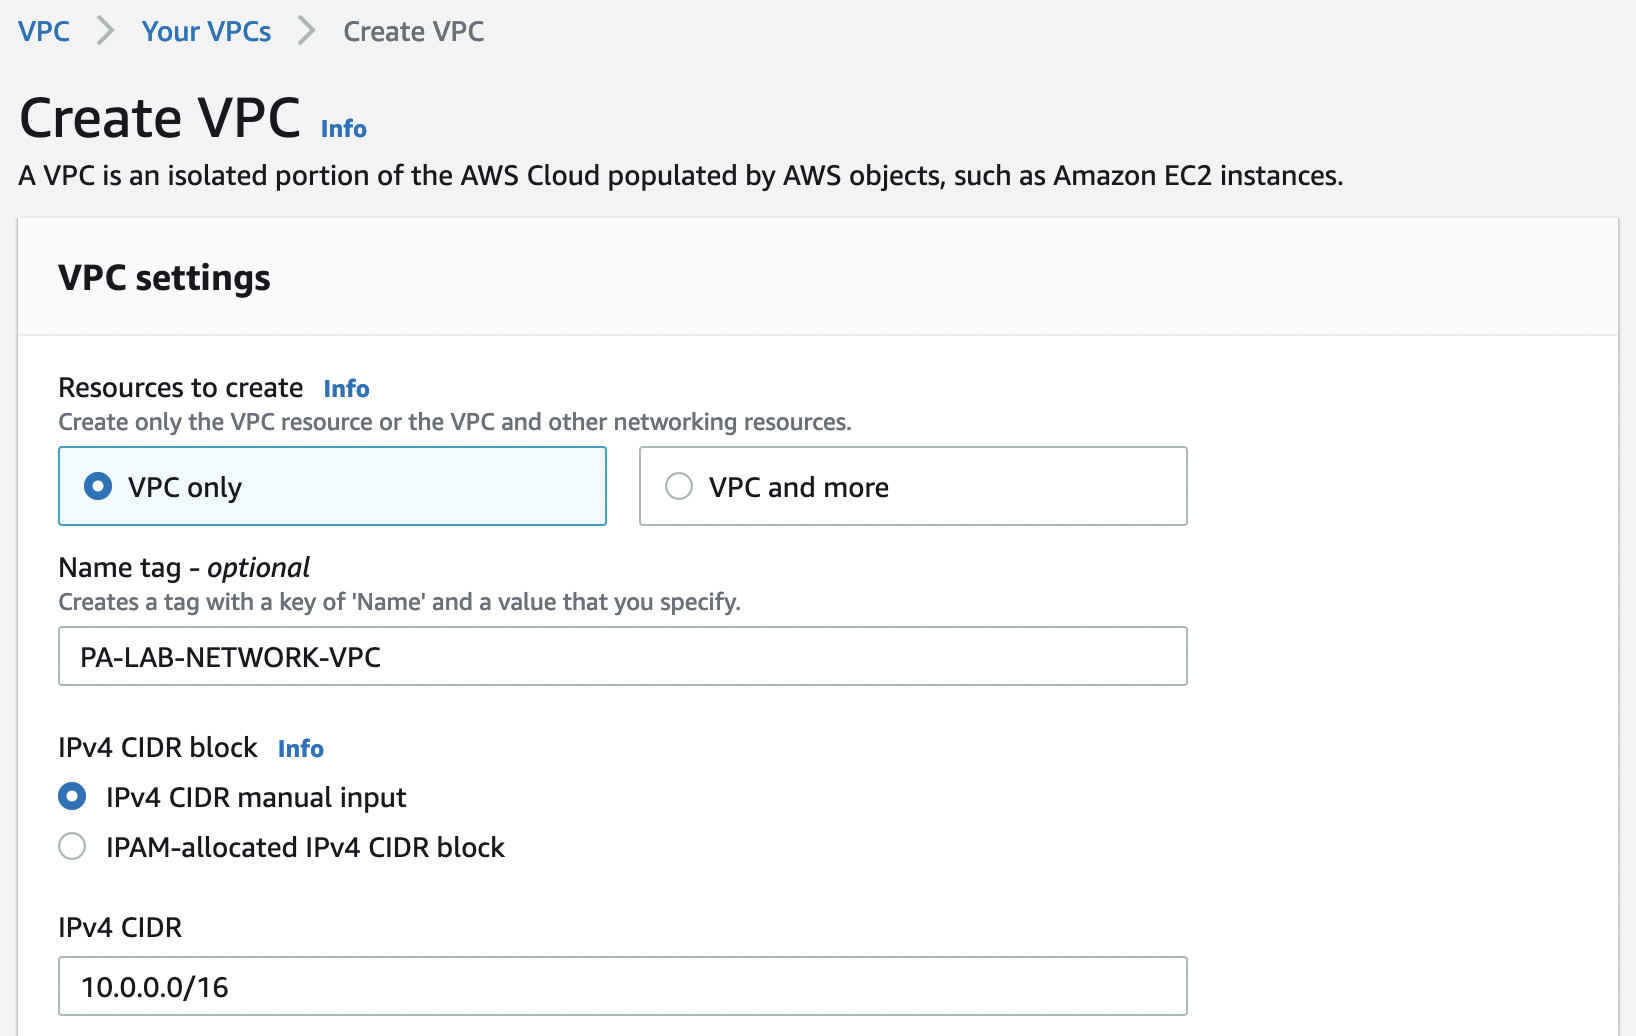
Let’s go to the "VPC" section and select "Create VPC". We will not use the wizard, we will create the necessary resources ourselves. Specify the name and CIDR, the rest will be left by default.
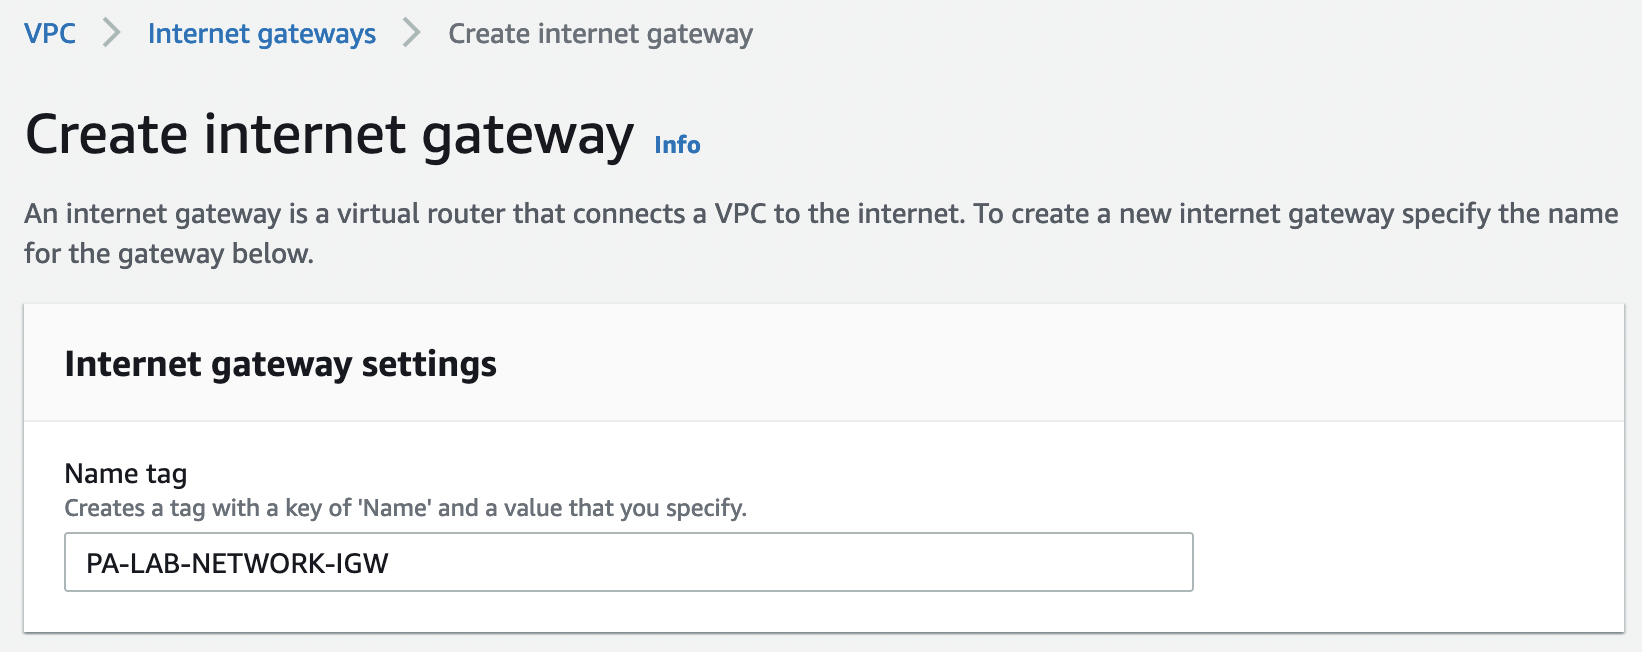
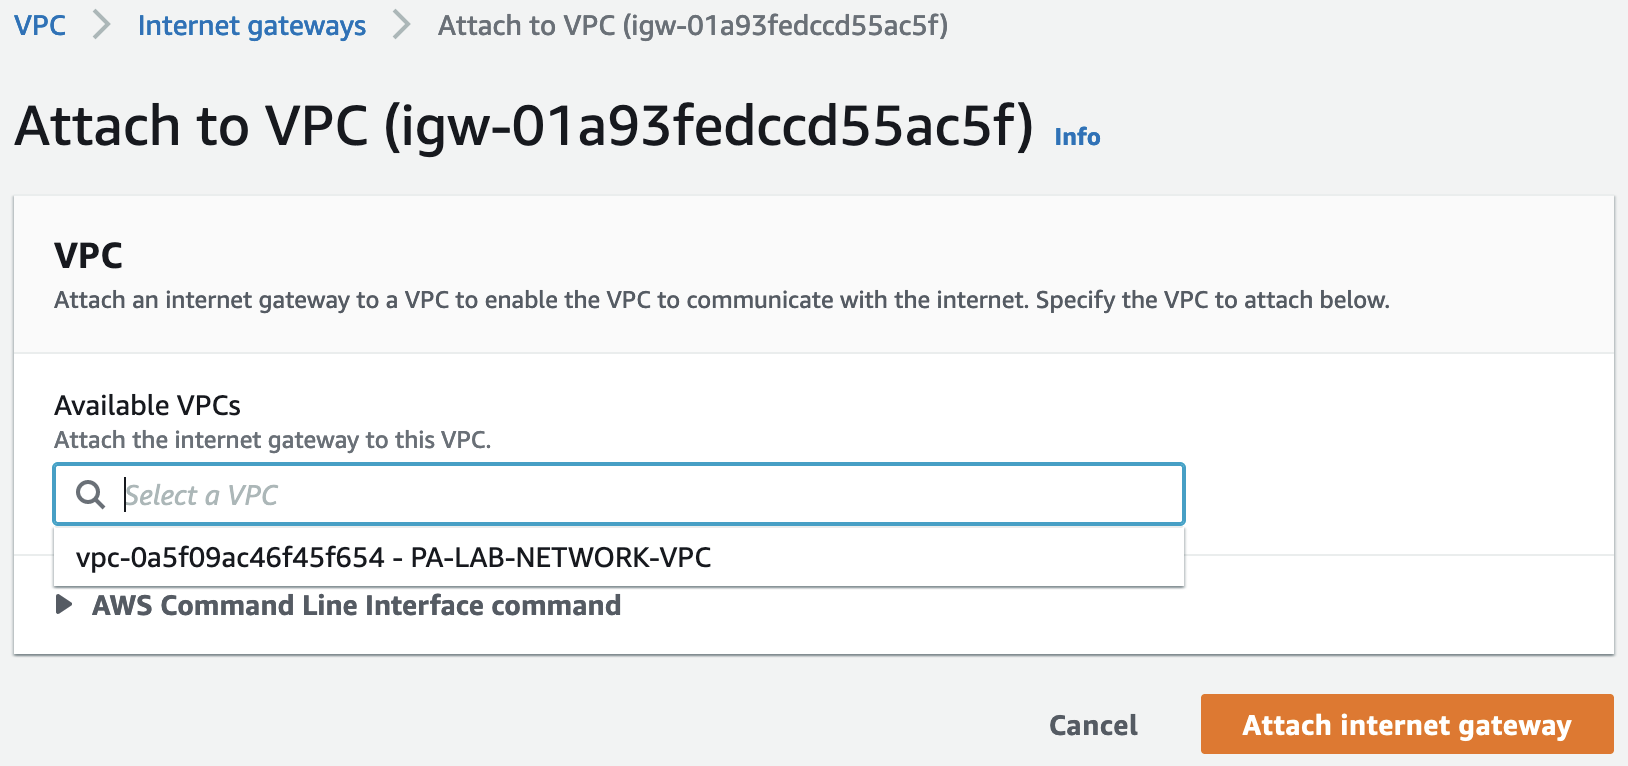
In the "VPC" tab, find "Internet gateways" and select "Create internet gateway"
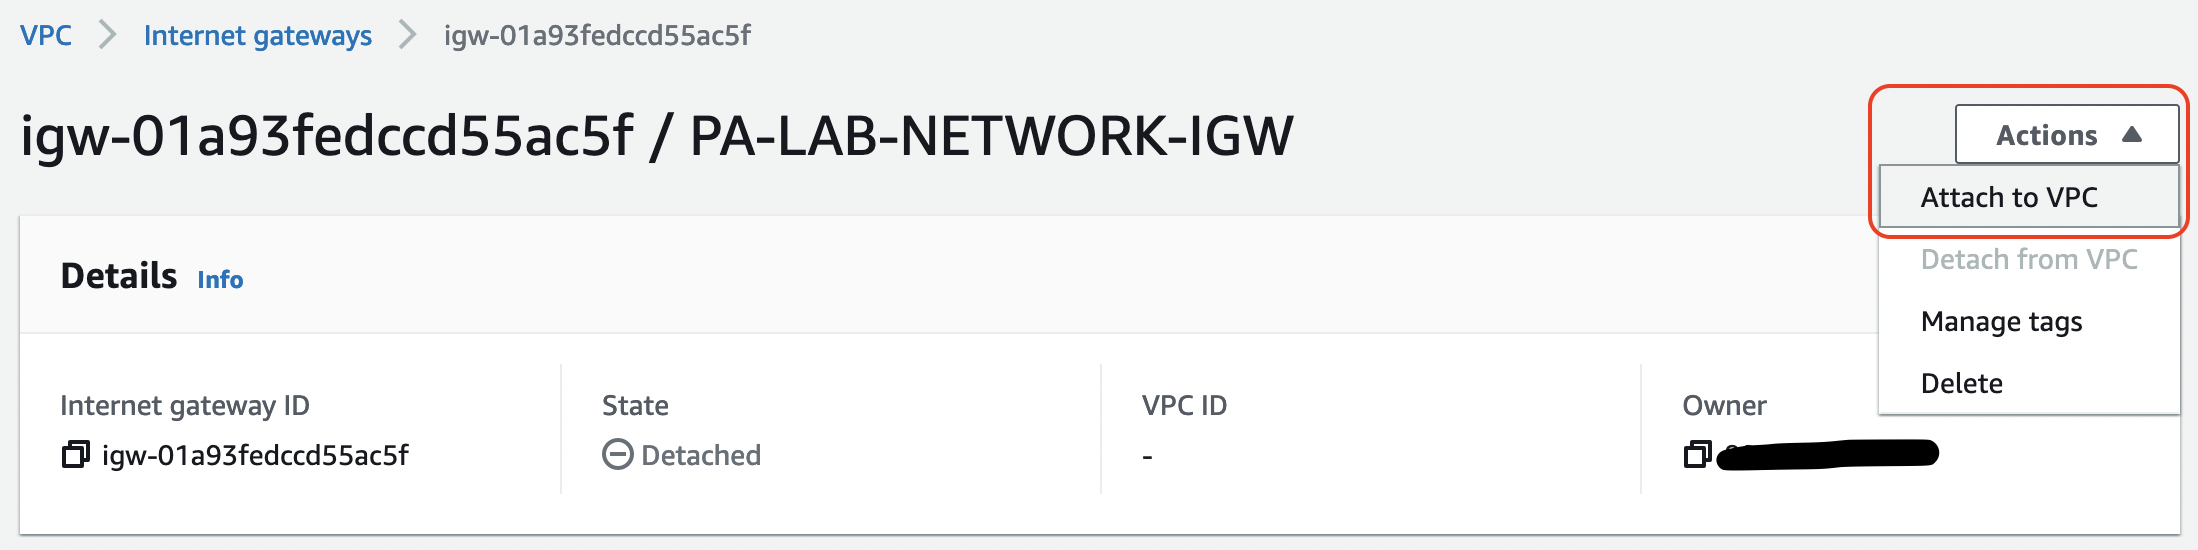
Let’s attach the created IGW to our VPC
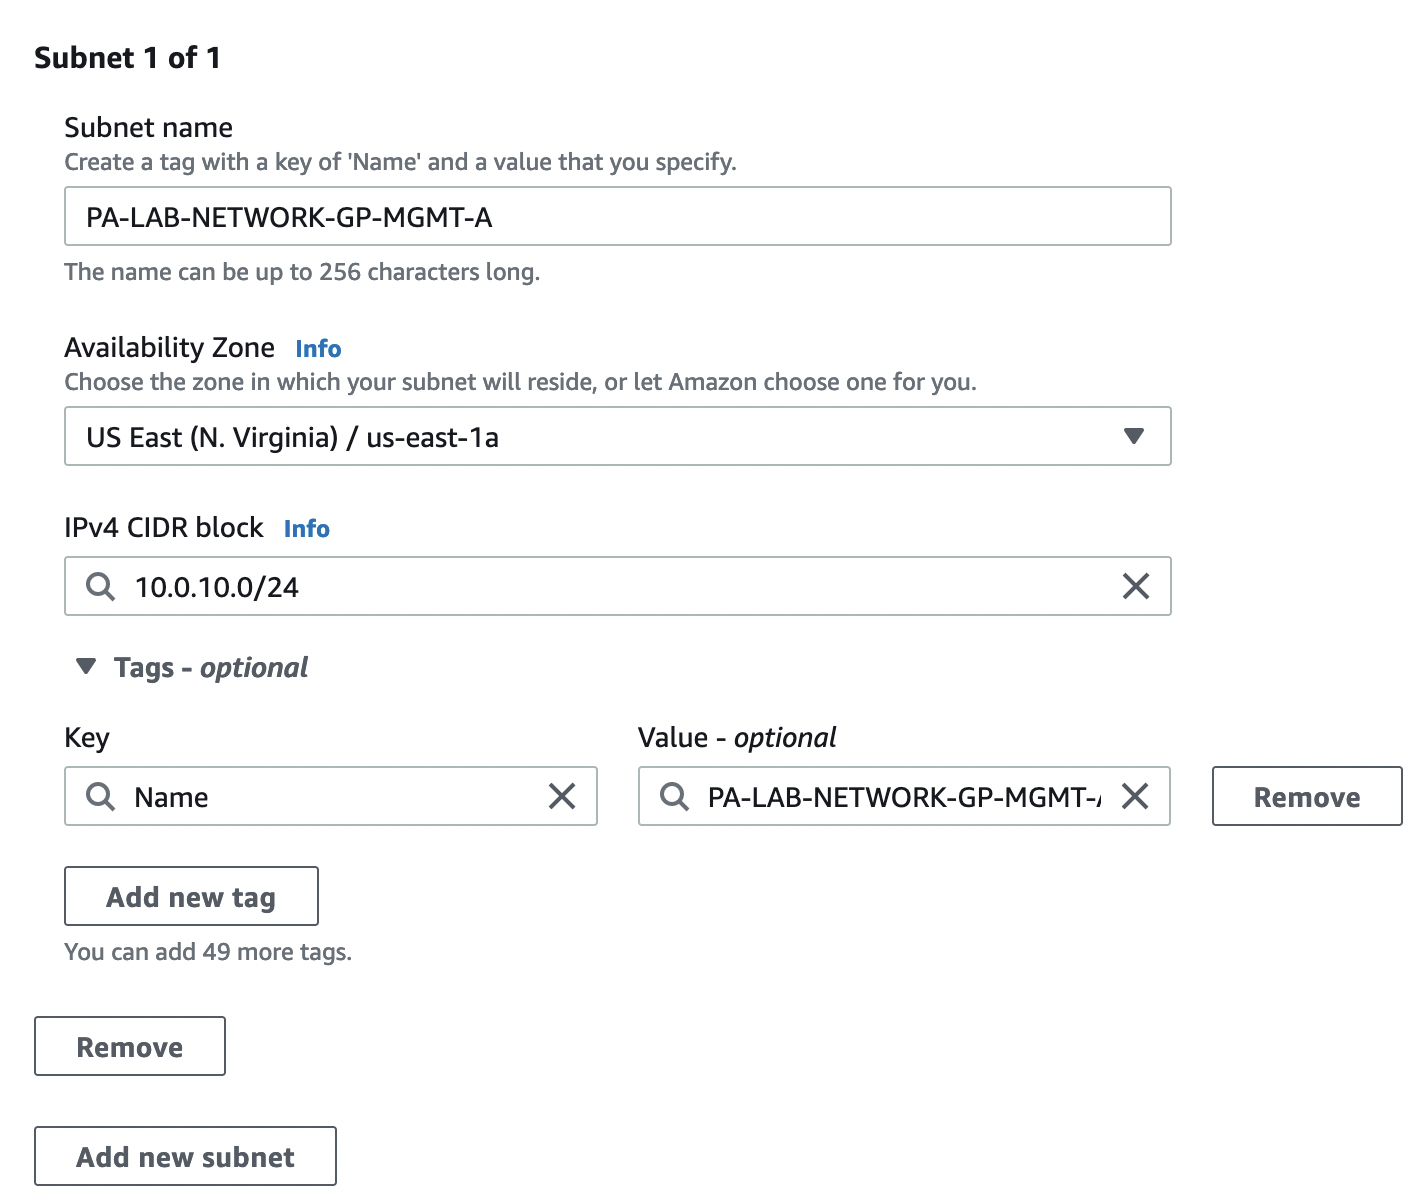
Subnets
Let’s create the necessary subnets, for this we go to "VPC" -> "Subnets" and select "Create subnet". It is necessary to create 4 subnets in 2 AZs according to the table above
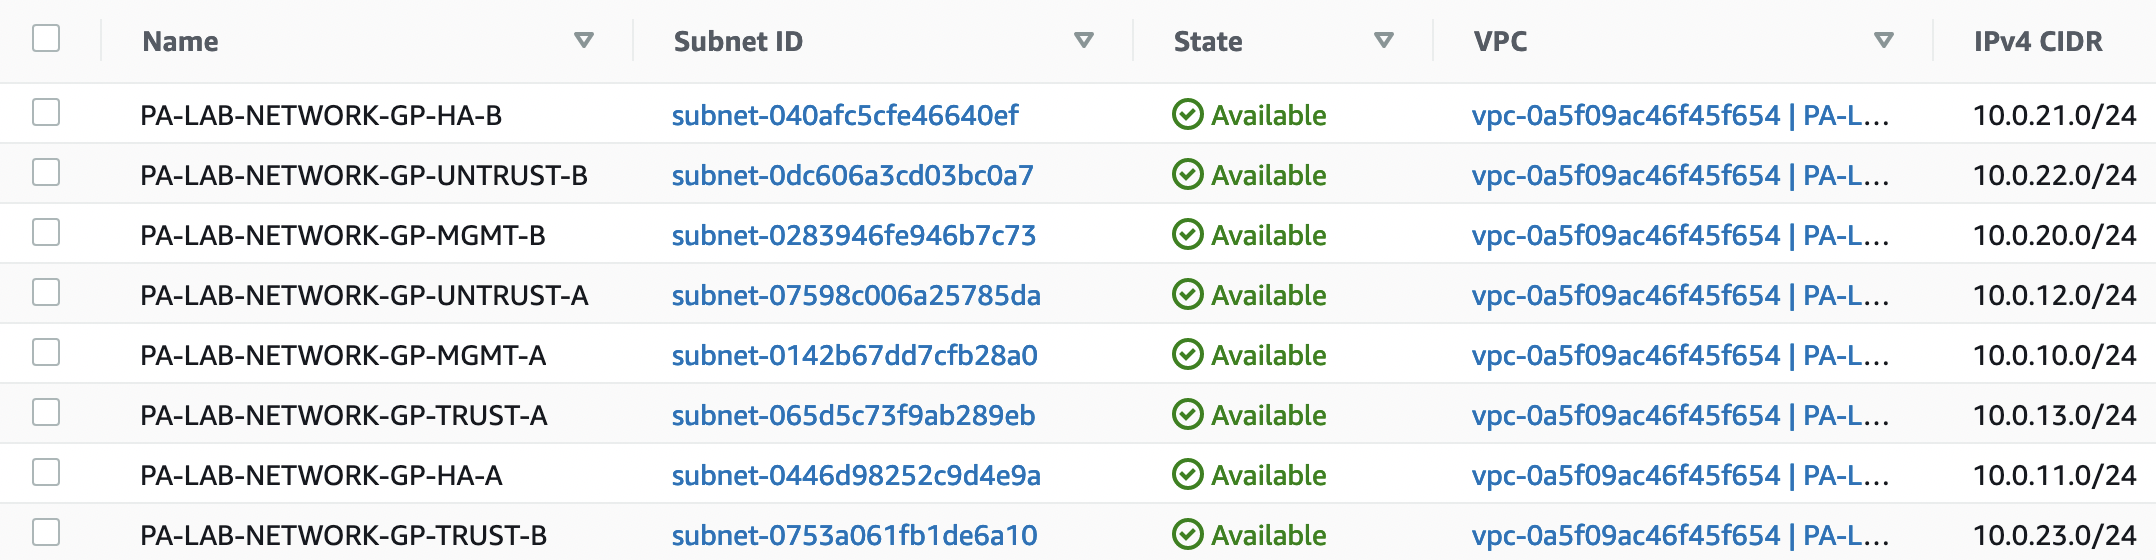
Check the created subnets, their CIDR, and Availability zones
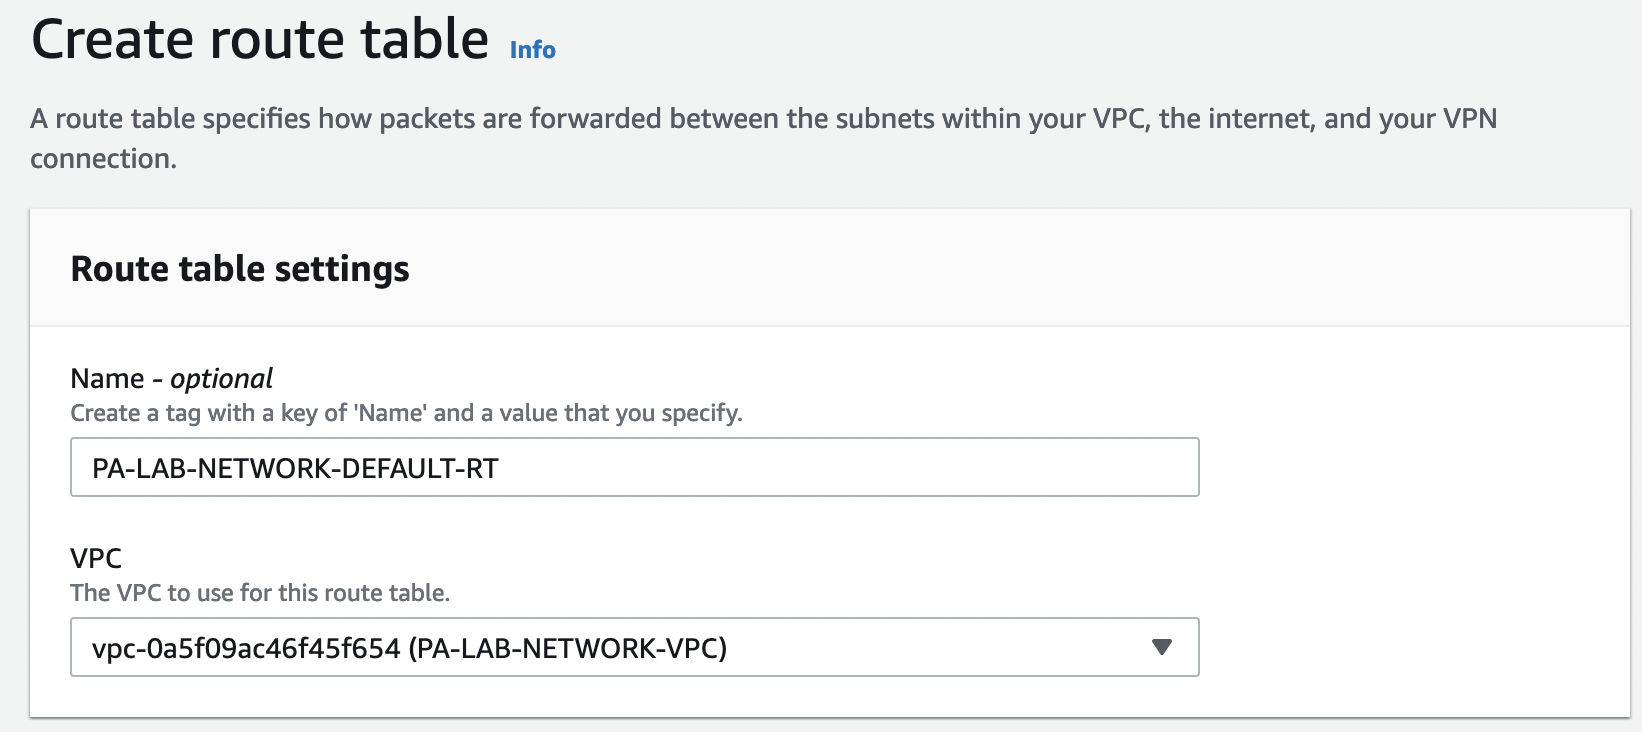
Route tables
Let’s create 3 routing tables:
- PA-LAB-NETWORK-DEFAULT-RT
- PA-LAB-NETWORK-PUBLIC-RT
- PA-LAB-NETWORK-GP-TRUST-RT
To do this, go to "VPC" -> "Route tables" and select "Create route table"
For the "TRUST" zone, we create a separate table, since we will add routes to it on the Transit Gateway.
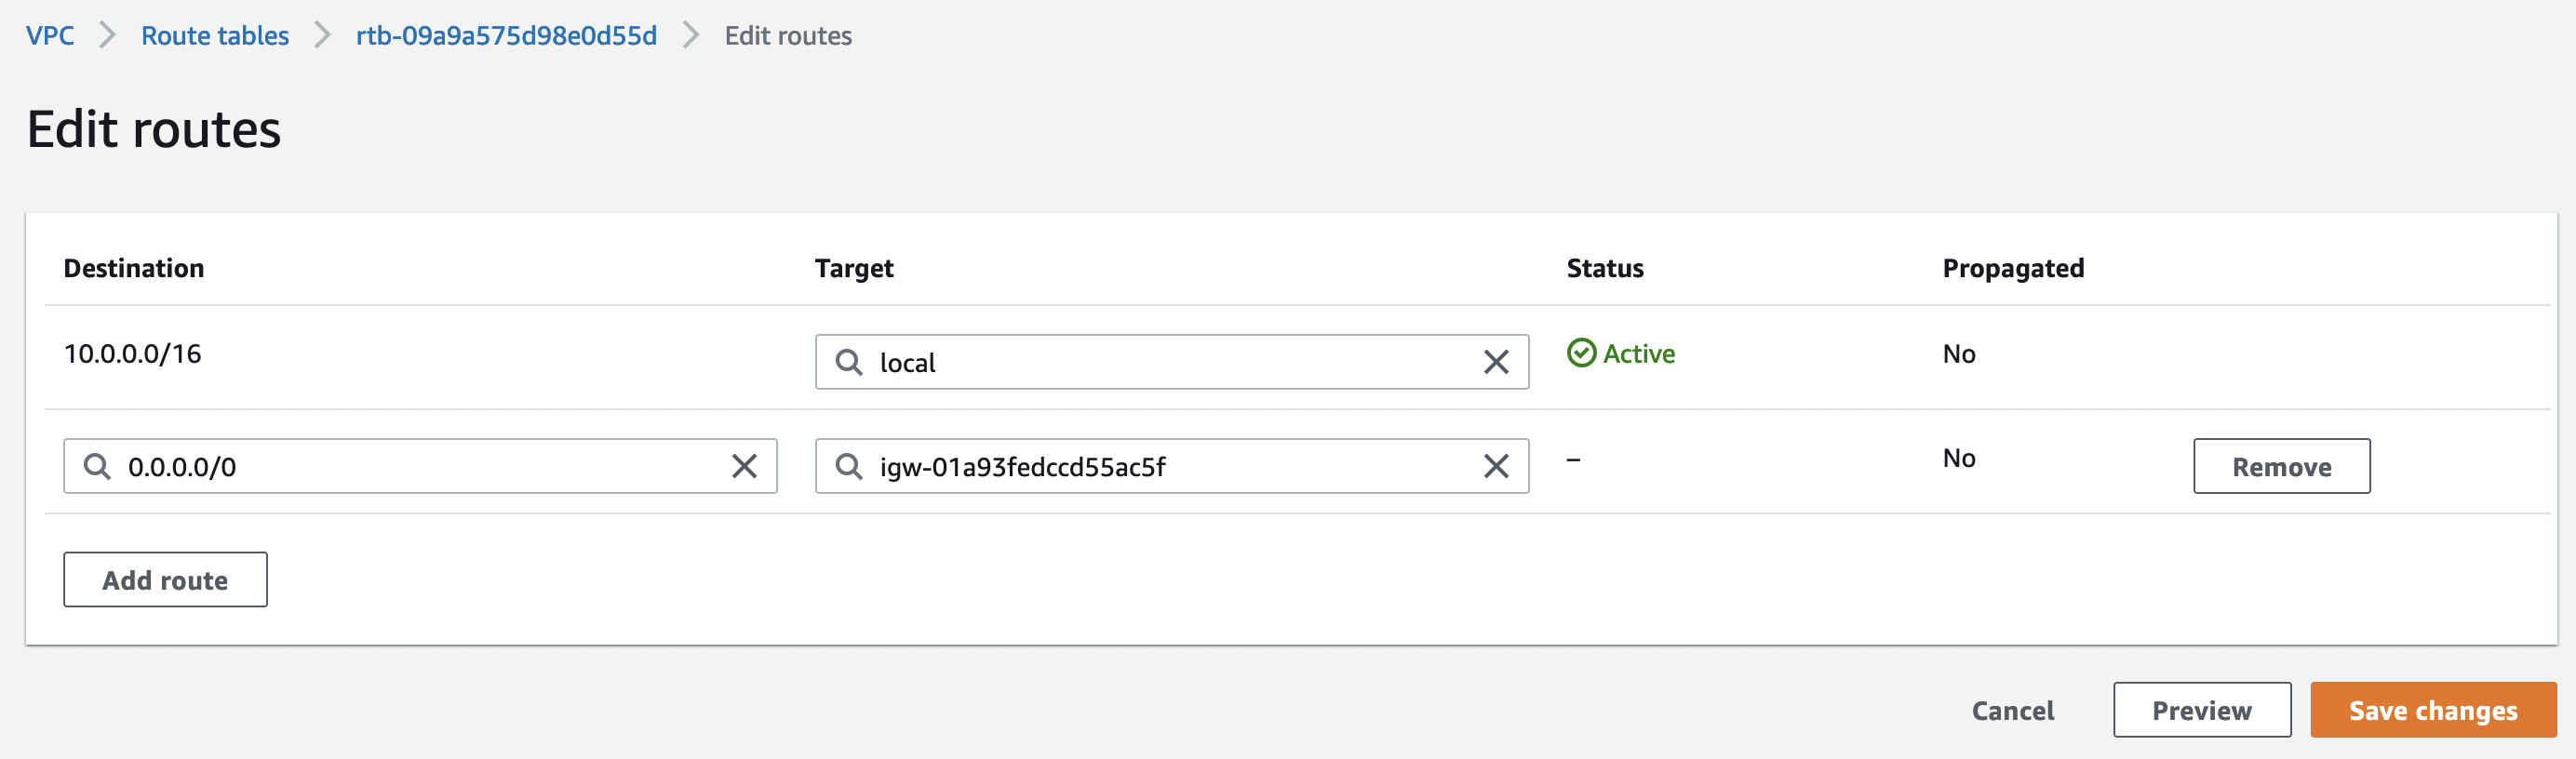
Select the routing table "PA-LAB-NETWORK-PUBLIC-RT" go to the "Routes" tab and select "Edit routes" and add a default route on IGW
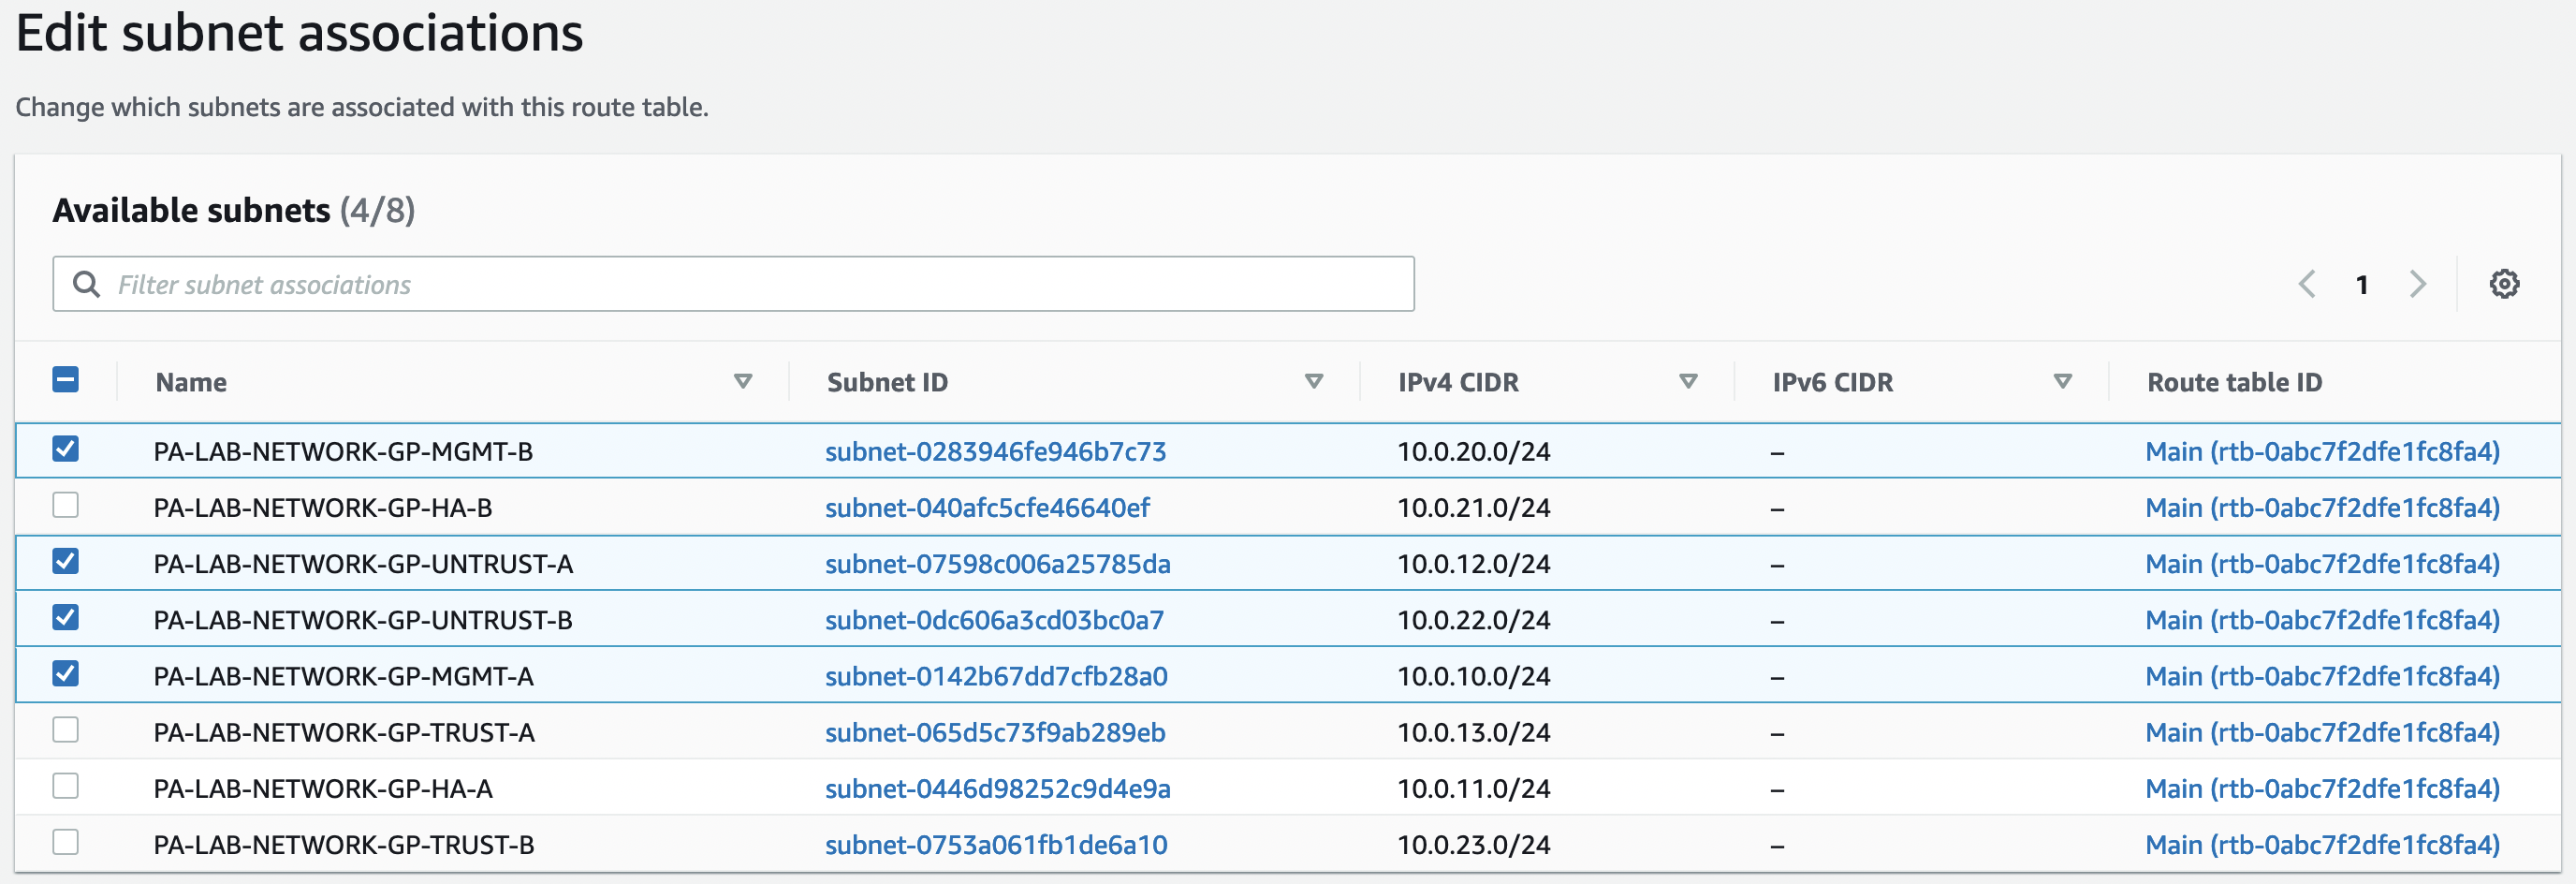
We also associate the routing table with public subnets:
- MGMT-A
- MGMT-B
- UNTRUST-A
- UNTRUST-B
Go to the "Subnet associations" tab and select "Edit subnet associations"
We also associate the table "TRUST-RT" with the networks "TRUST-A" and "TRUST-B"
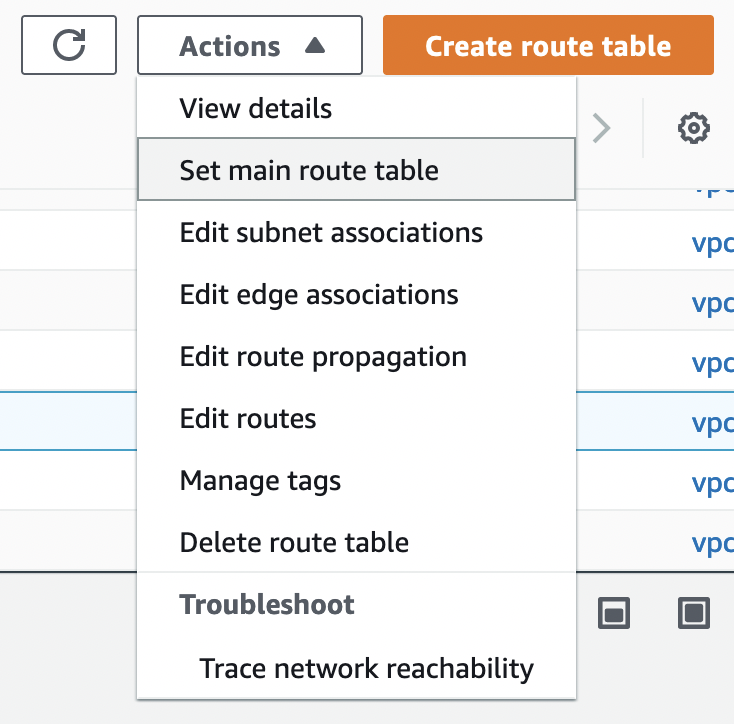
Now select the "DEFAULT-RT" table and set it as the main table.
Security Group
Next, we need to create 4 security groups:
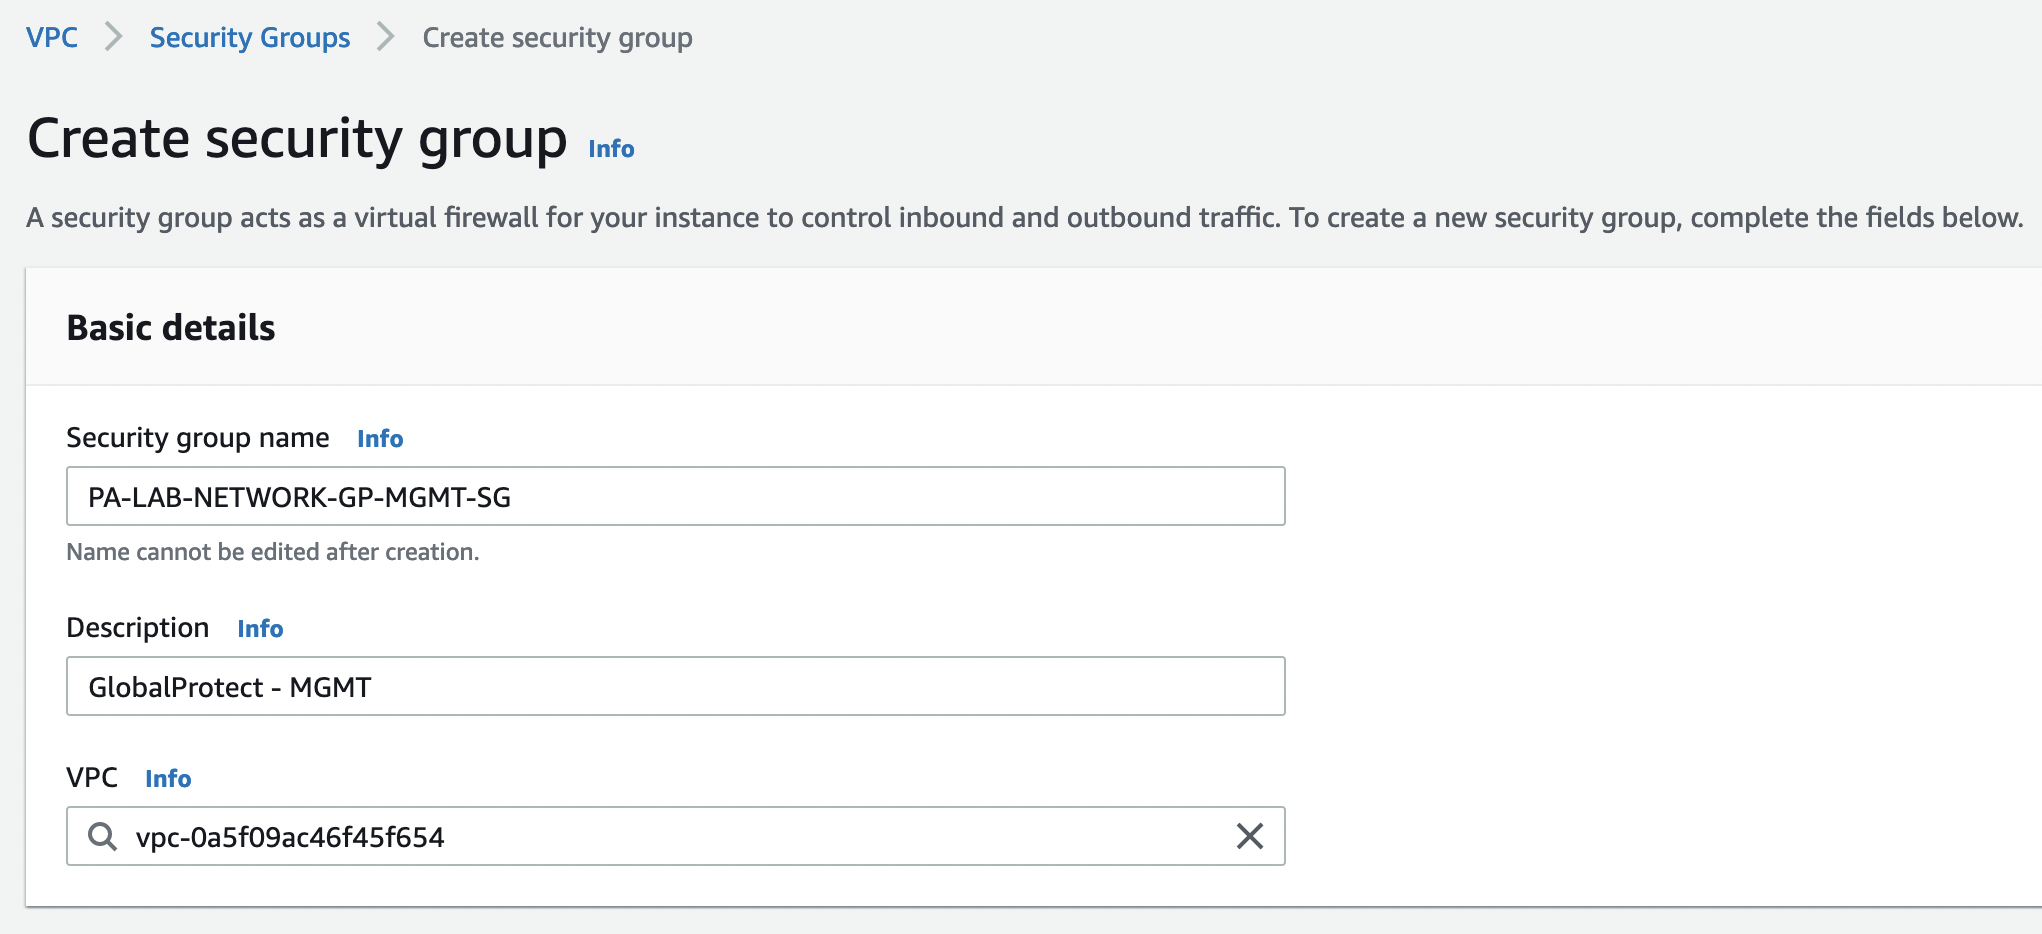
- PA-LAB-NETWORK-GP-MGMT-SG
- PA-LAB-NETWORK-GP-HA-SG
- PA-LAB-NETWORK-GP-UNTRUST-SG
- PA-LAB-NETWORK-GP-TRUST-SG
For HA, you can leave only the necessary ports, but we will simply allow traffic within the security group.
To do this, go to "VPC" -> "Security" and select "Create security group". Let’s create 4 security groups with the following rules:
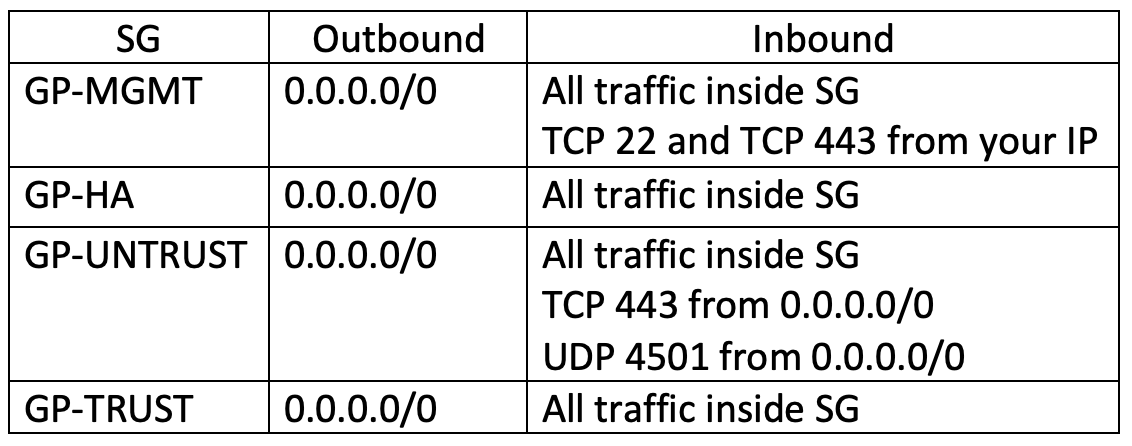
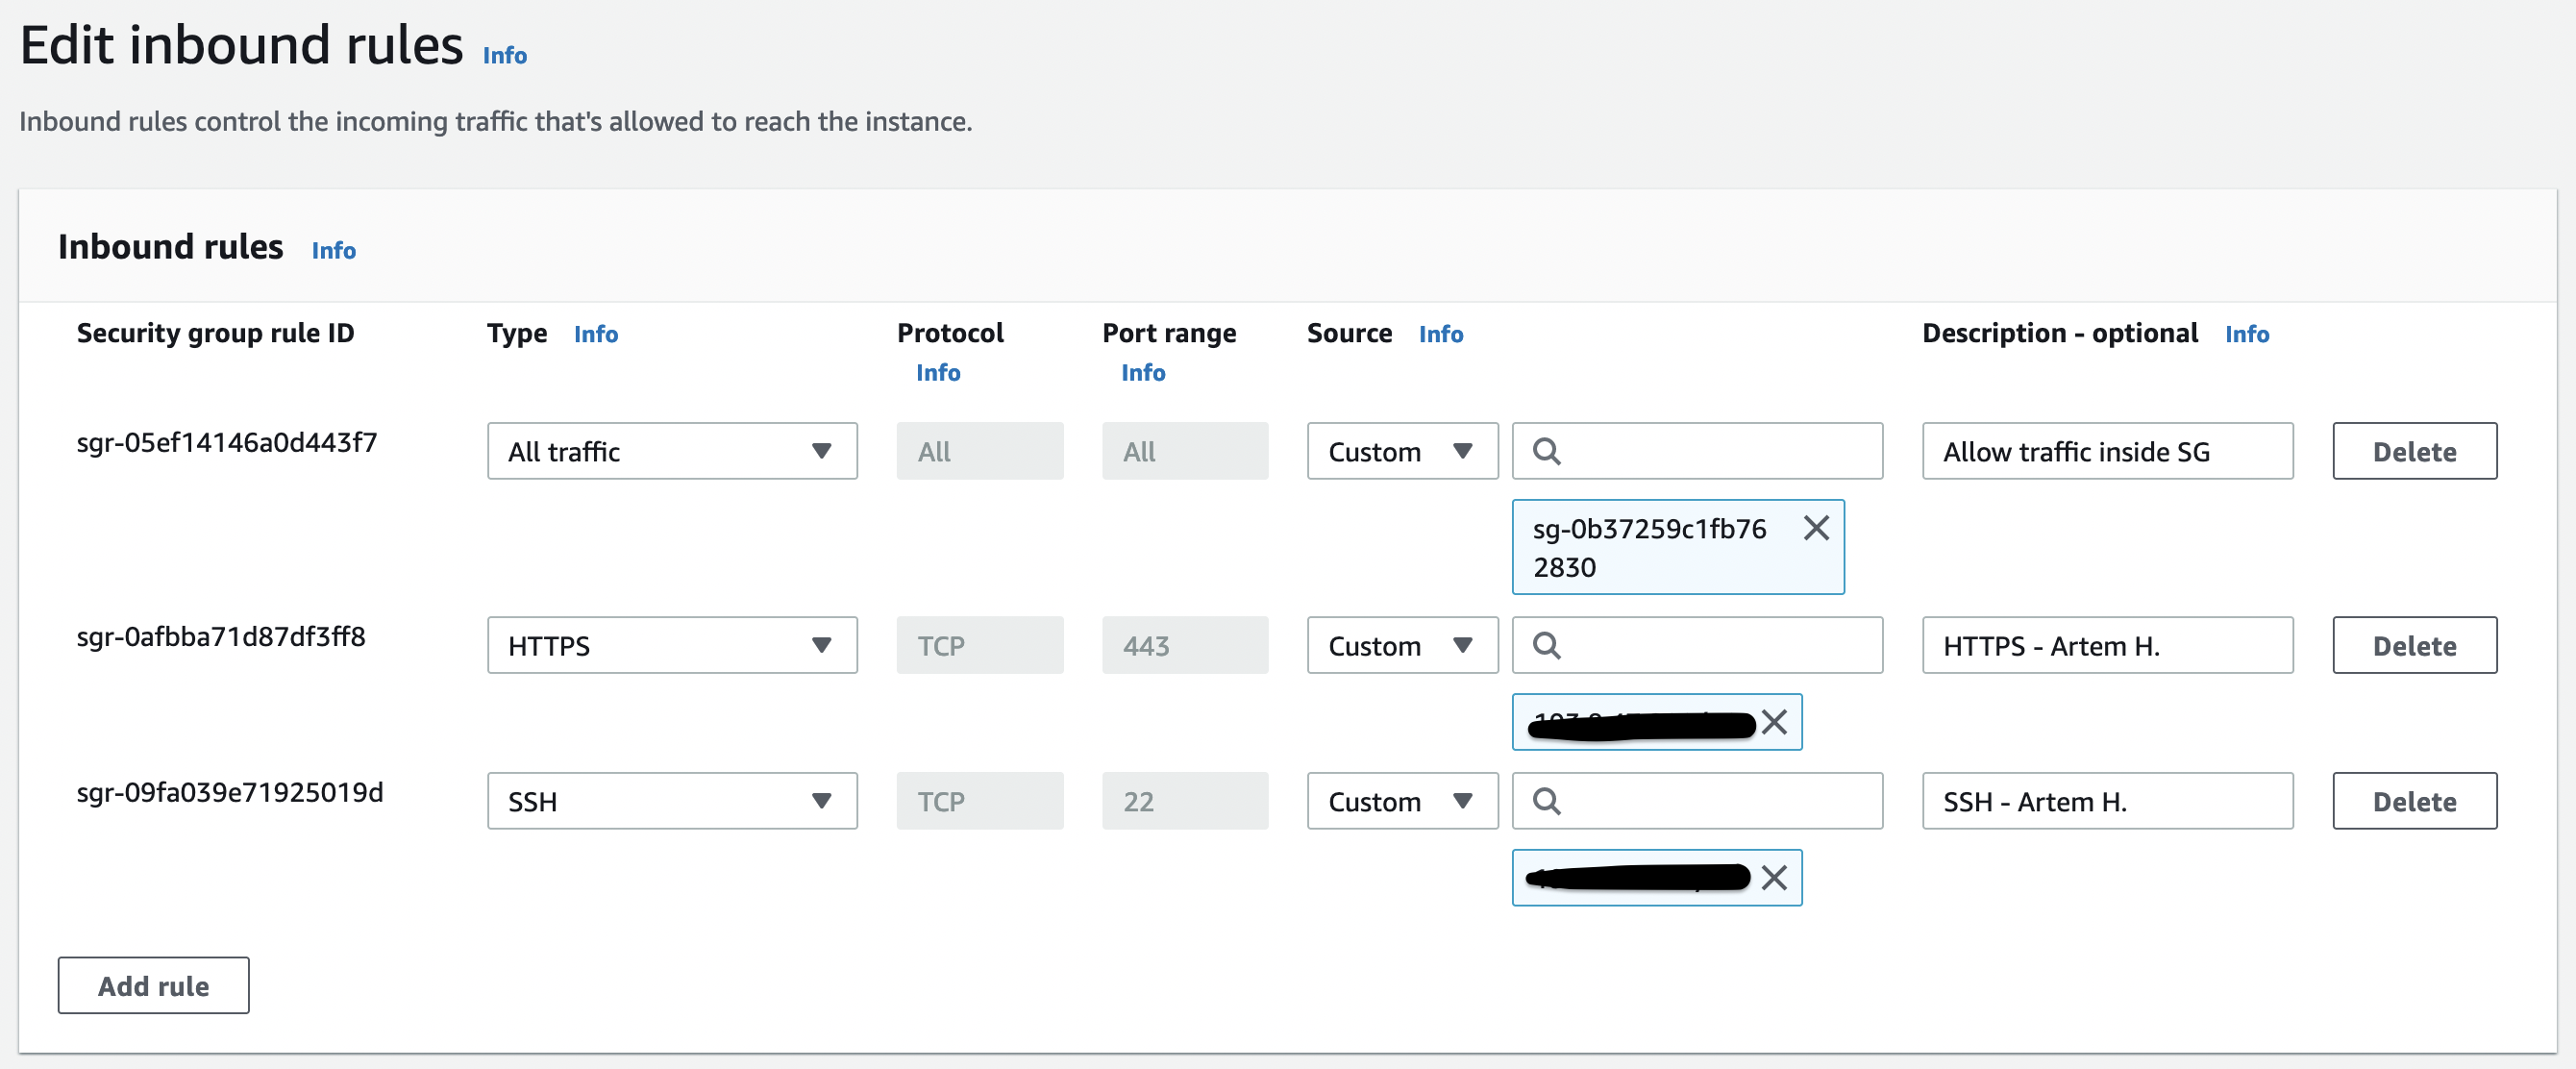
Check the security groups that they belong to the correct VPC and their rules

ENI
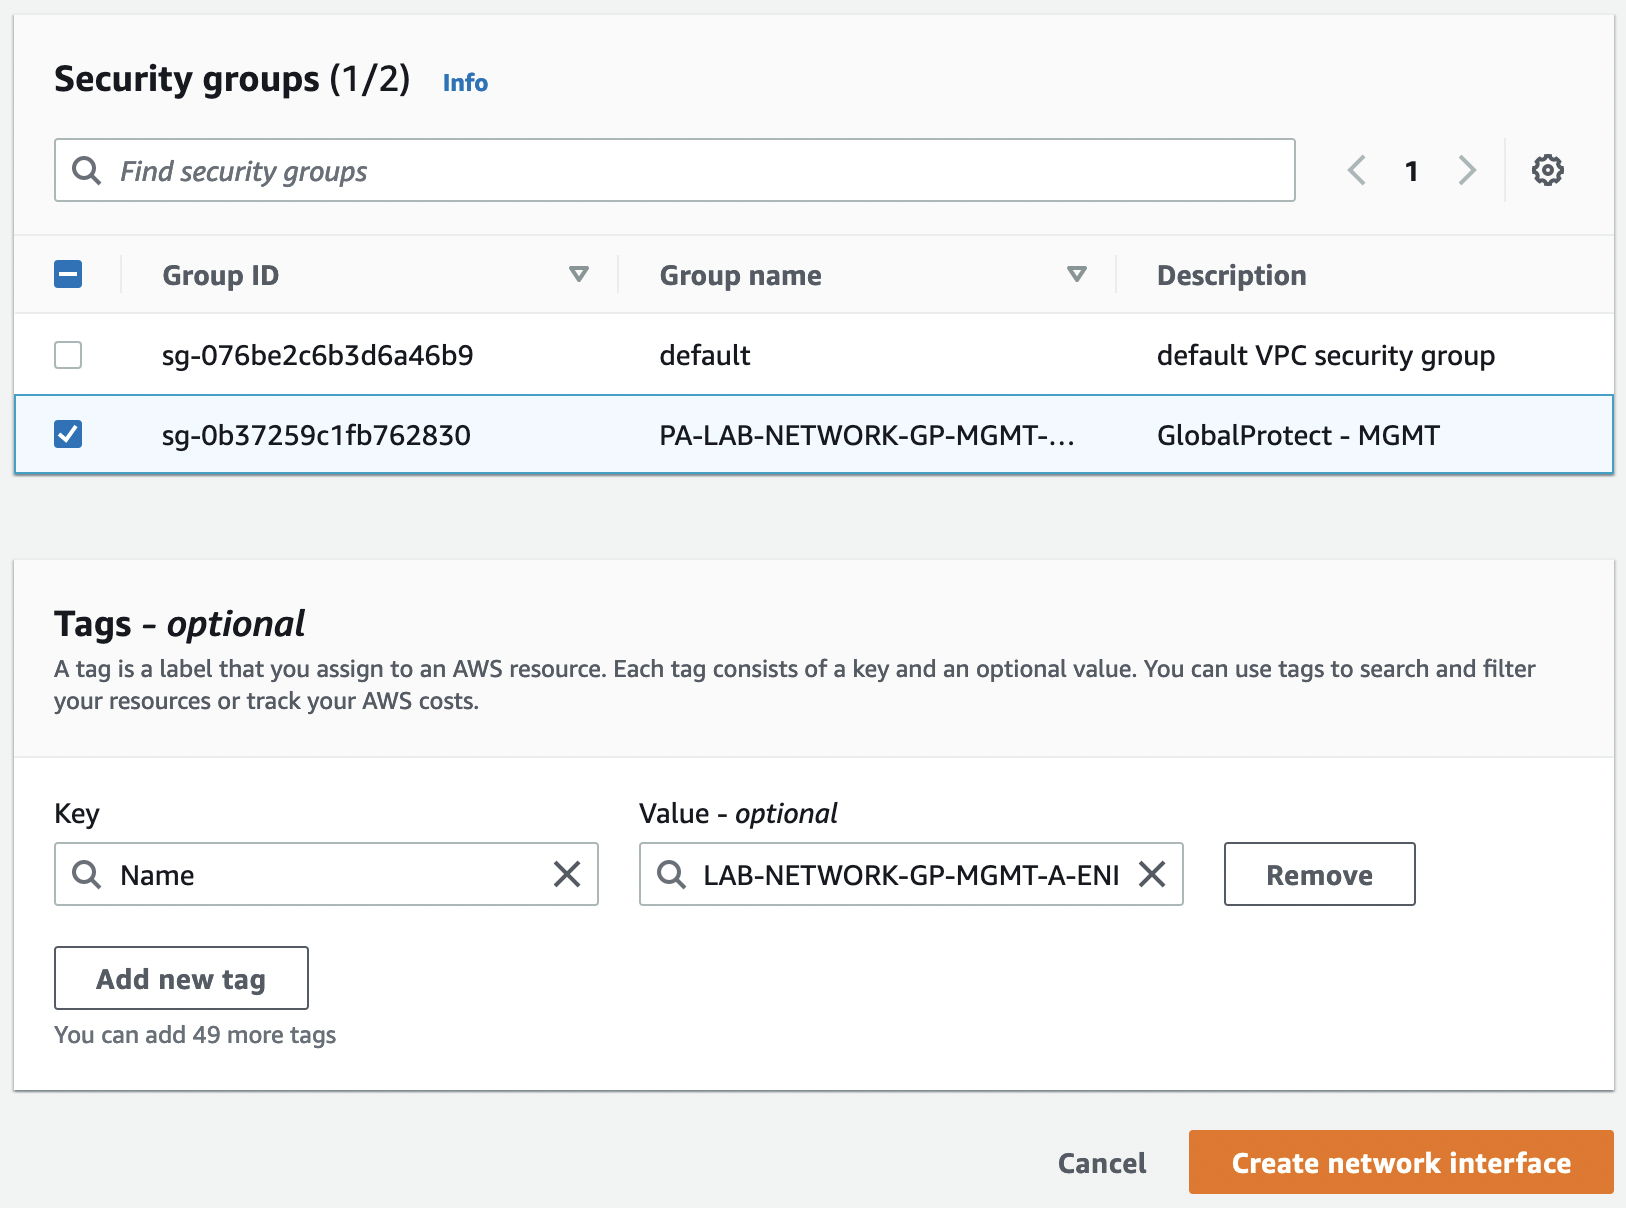
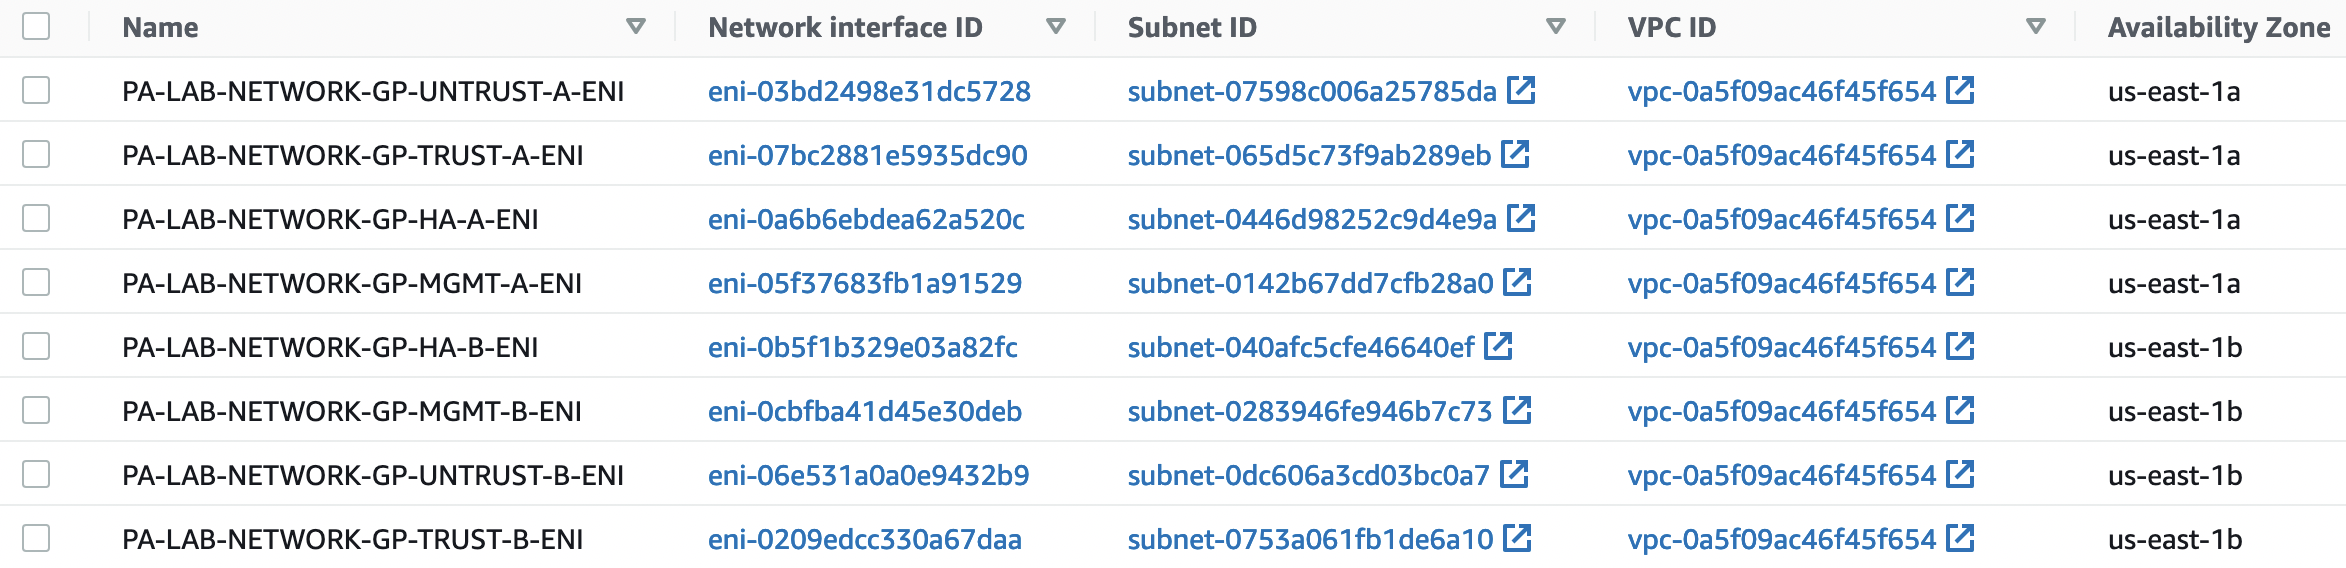
Let’s create 8 ENIs according to the names of our SGs, associate them with the appropriate security groups, and add a description and a "Name" tag.
Go to "EC2" -> "Network & Security" -> "Network Interfaces" and select "Create network interface"
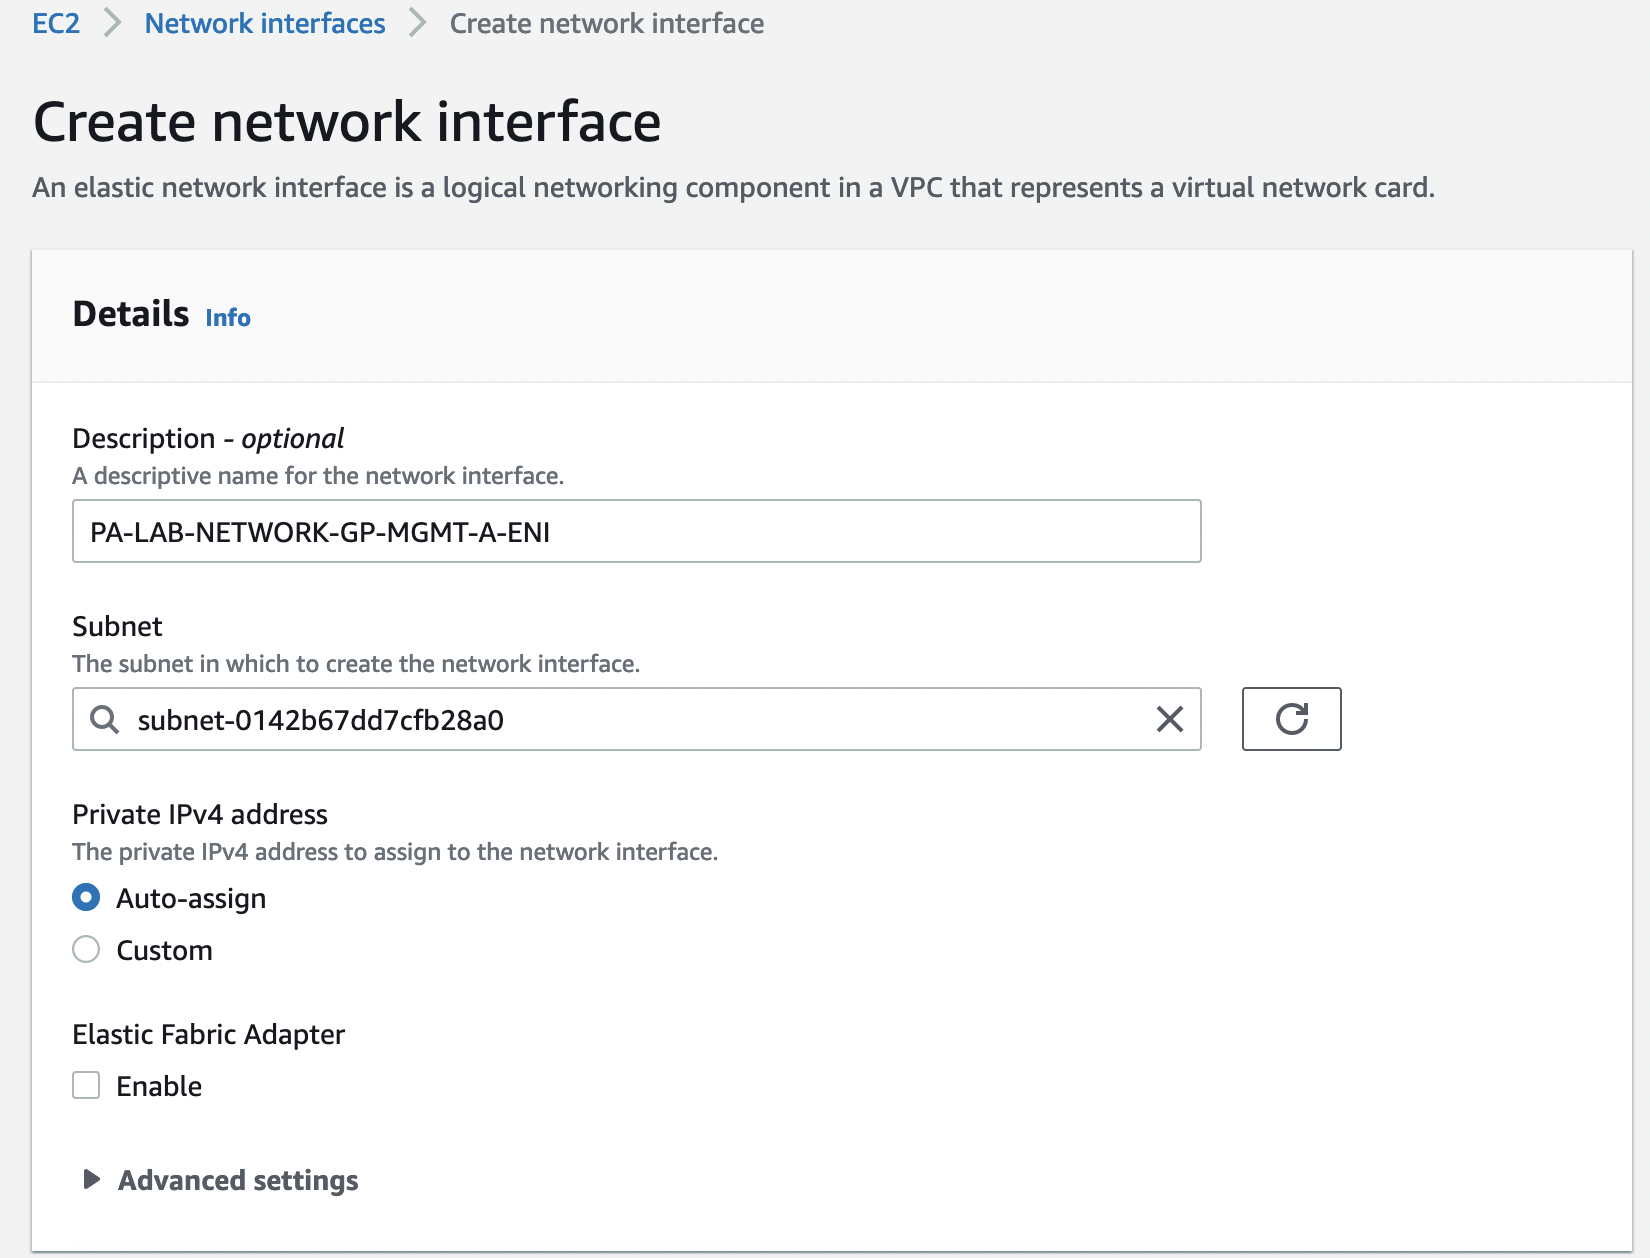
Check the created interfaces that they belong to the correct VPC, AZ, and subnets
EIP
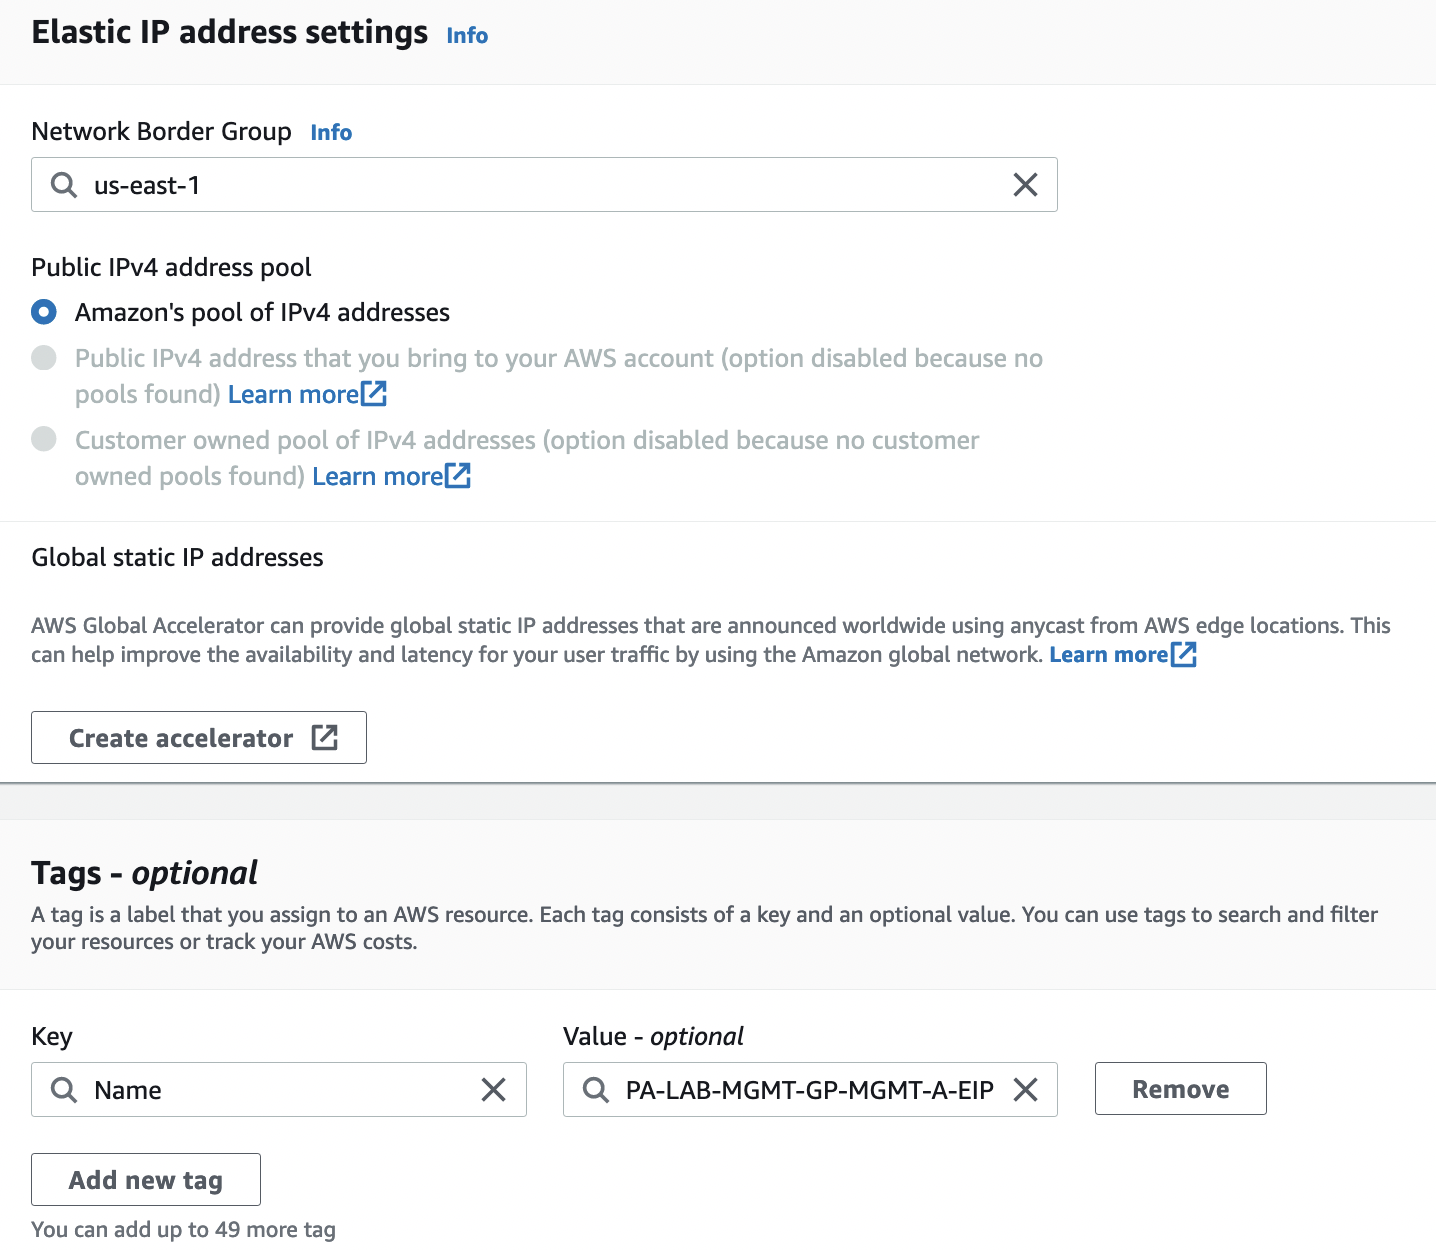
Now we need to create 3 EIPs:
- GP-MGMT-A
- GP-MGMT-B
- GP-PORTAL
To do this, go to "VPC" -> "Virtual private cloud" -> "Elastic IPs" and select "Allocate Elastic IP address". And add the "Name" tag
Check the generated EIPs

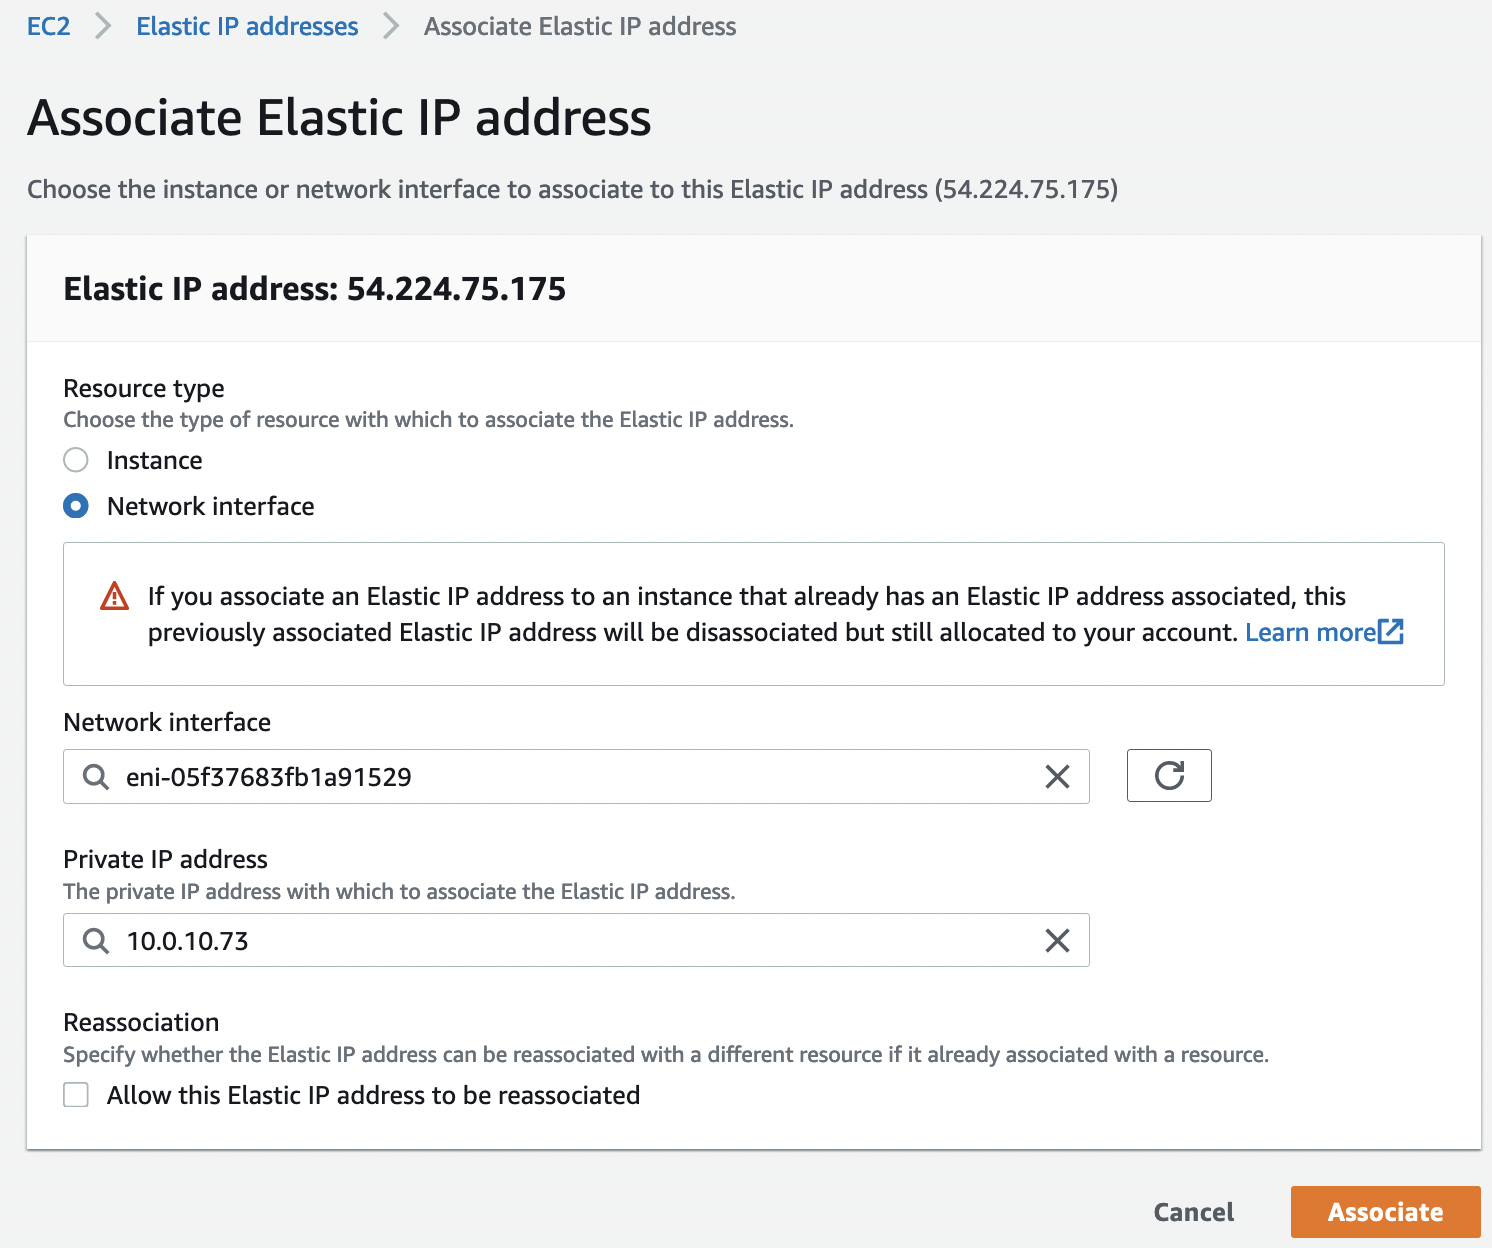
IP addresses "MGMT-A-EIP" and "MGMT-B-EIP" we need to associate with the corresponding interfaces, "GP-PORTAL-IP" – with the interface "GP-UNTRUST-A", it is the instance in AZ A that will be initially active.
IAM
For HA mode, you need to create an IAM Policy with the following content:
{
    "Version": "2012-10-17",
    "Statement": [
        {
            "Action": [
                "ec2:AttachNetworkInterface",
                "ec2:DetachNetworkInterface",
                "ec2:DescribeInstances",
                "ec2:DescribeNetworkInterfaces",
                "ec2:AssignPrivateIpAddresses",
                "ec2:AssociateAddress",
                "ec2:DescribeRouteTables"
            ],
            "Resource": [
                "*"
            ],
            "Effect": "Allow"
        },
        {
            "Action": [
                "ec2:ReplaceRoute"
            ],
            "Resource": [
                "arn:aws:ec2:*:*:route-table/*"
            ],
            "Effect": "Allow"
        }
    ]
}
More information about the required rights can be found here.
To do this, go to the "IAM" -> "Access management" -> "Policies" section and select "Create policy", switch from the visual editor to the "JSON" tab, and paste our policy.
We will also create an IAM Role, go to the "IAM" -> "Access management" -> "Roles" section and select "Create role"
- Trusted entity type: "AWS service"
- Use case: "EC2"
And associate the previously created policy.
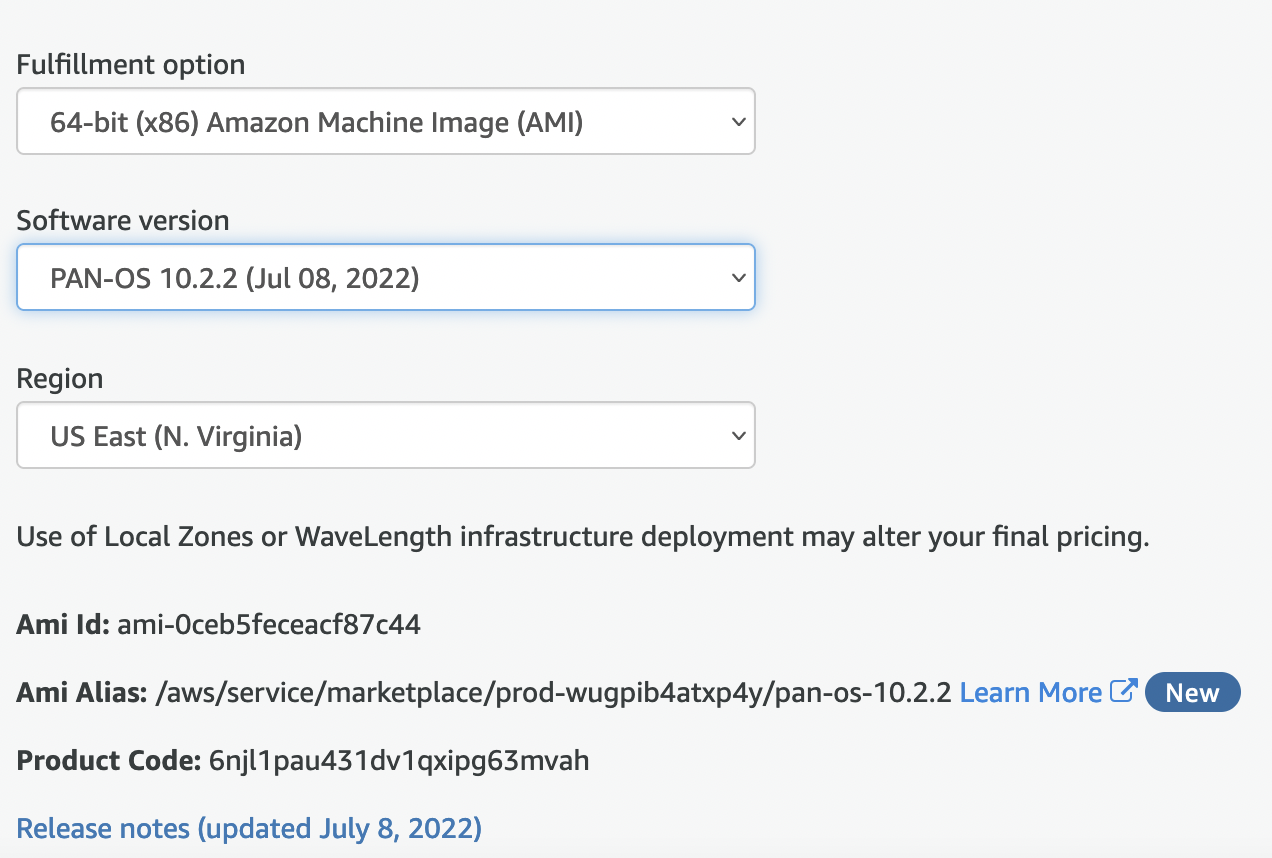
MarketPlace
We will be using the "VM-Series Next-Generation Firewall (BYOL and ELA)" AMI, but before that, you need to subscribe to it in AWS MarketPlace

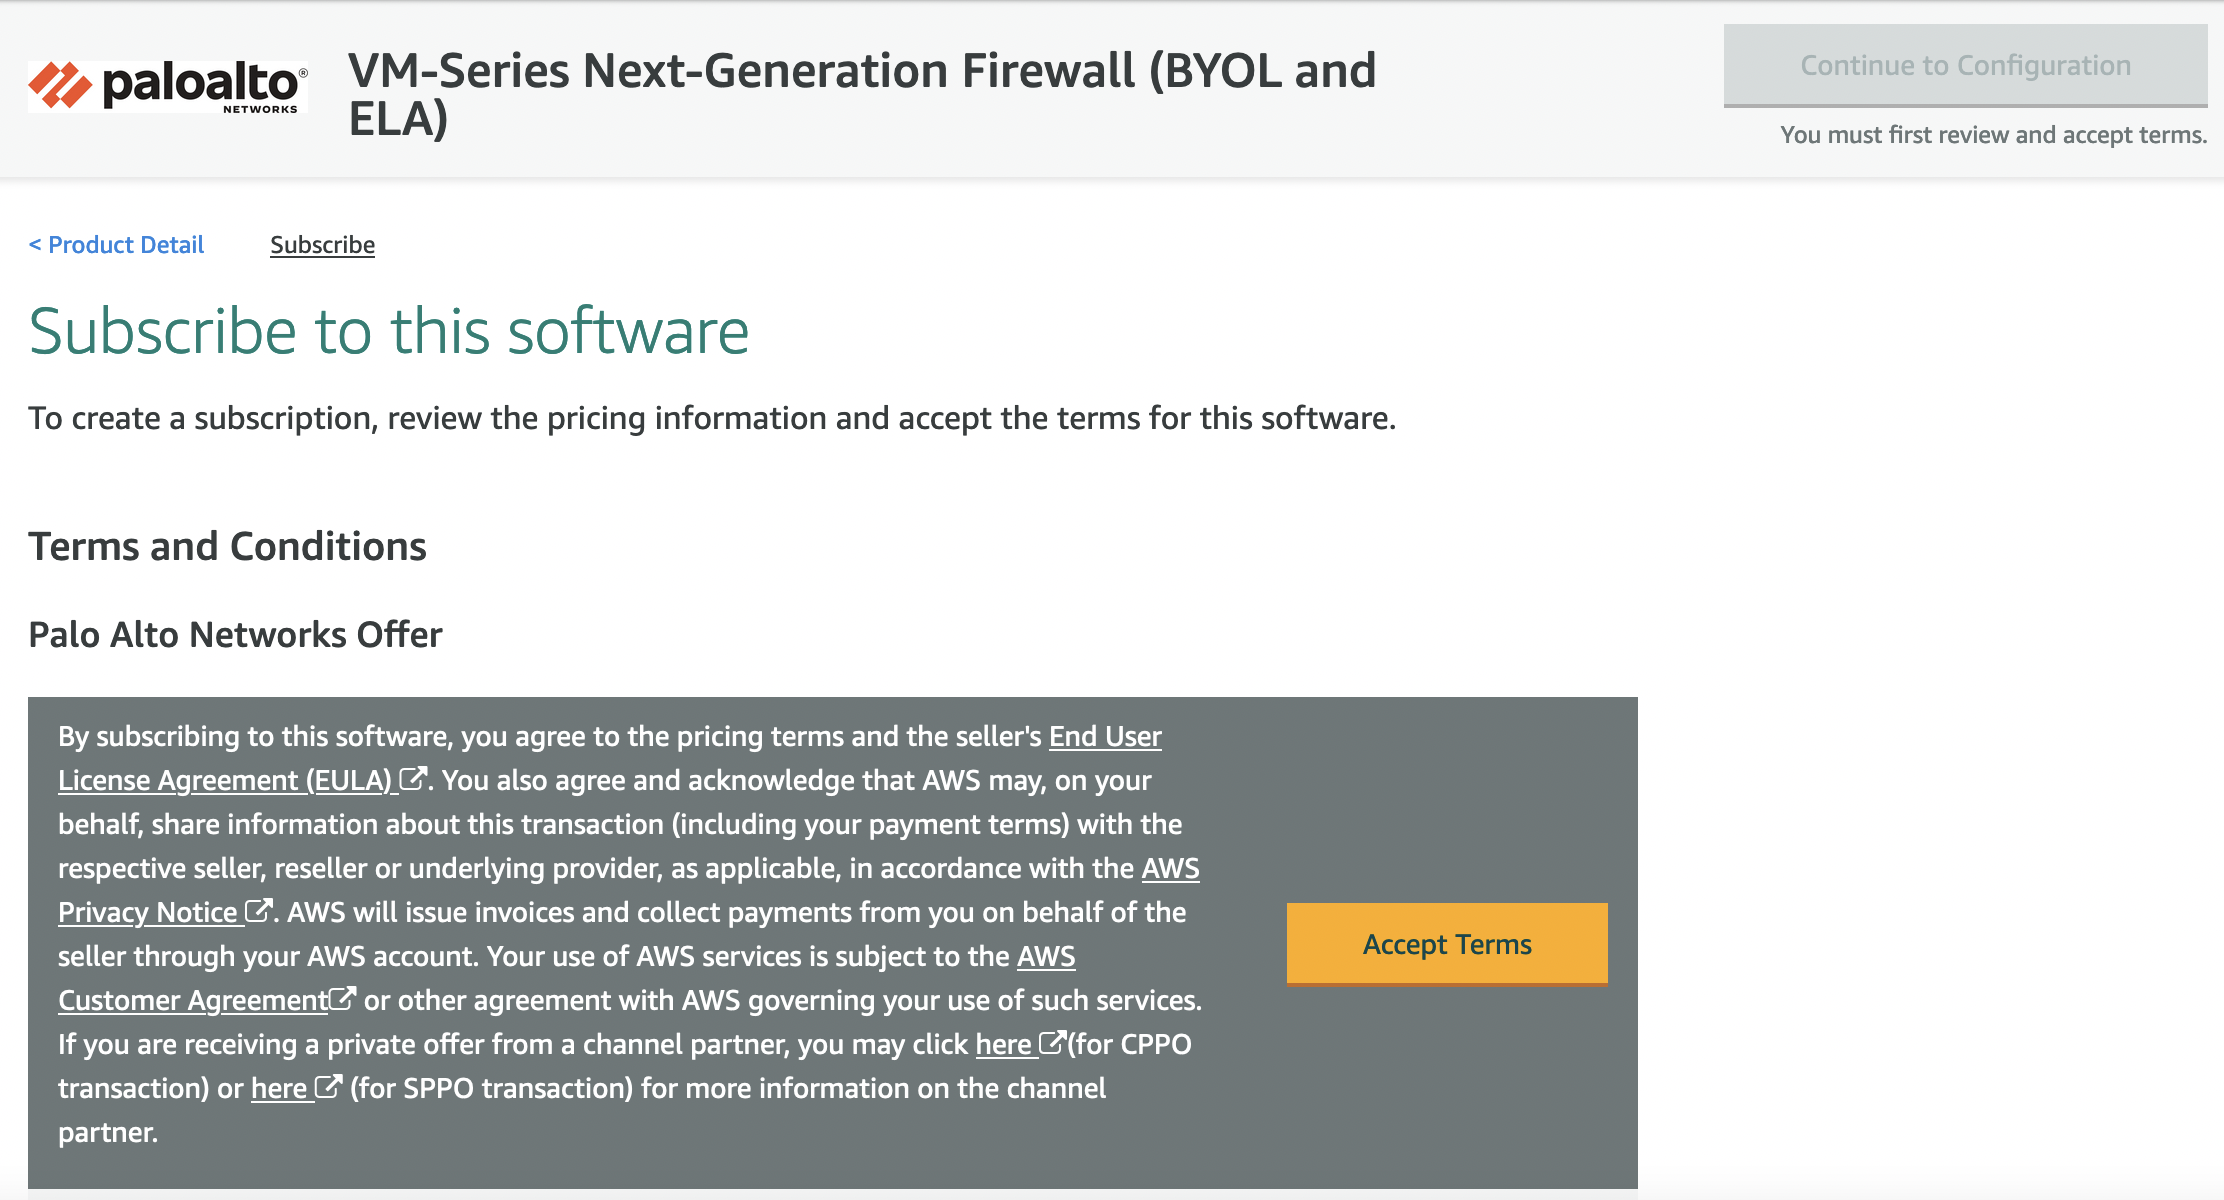

After you have subscribed to AMI, if you go to the configuration you can find the AMI ID for your region
EC2 Instance
Let’s create the first instance for AZ A, specify the AMI ID from the previous step, instance type: m5.xlarge. Be sure to specify the SSH key, if you don’t have one, first create or export it.
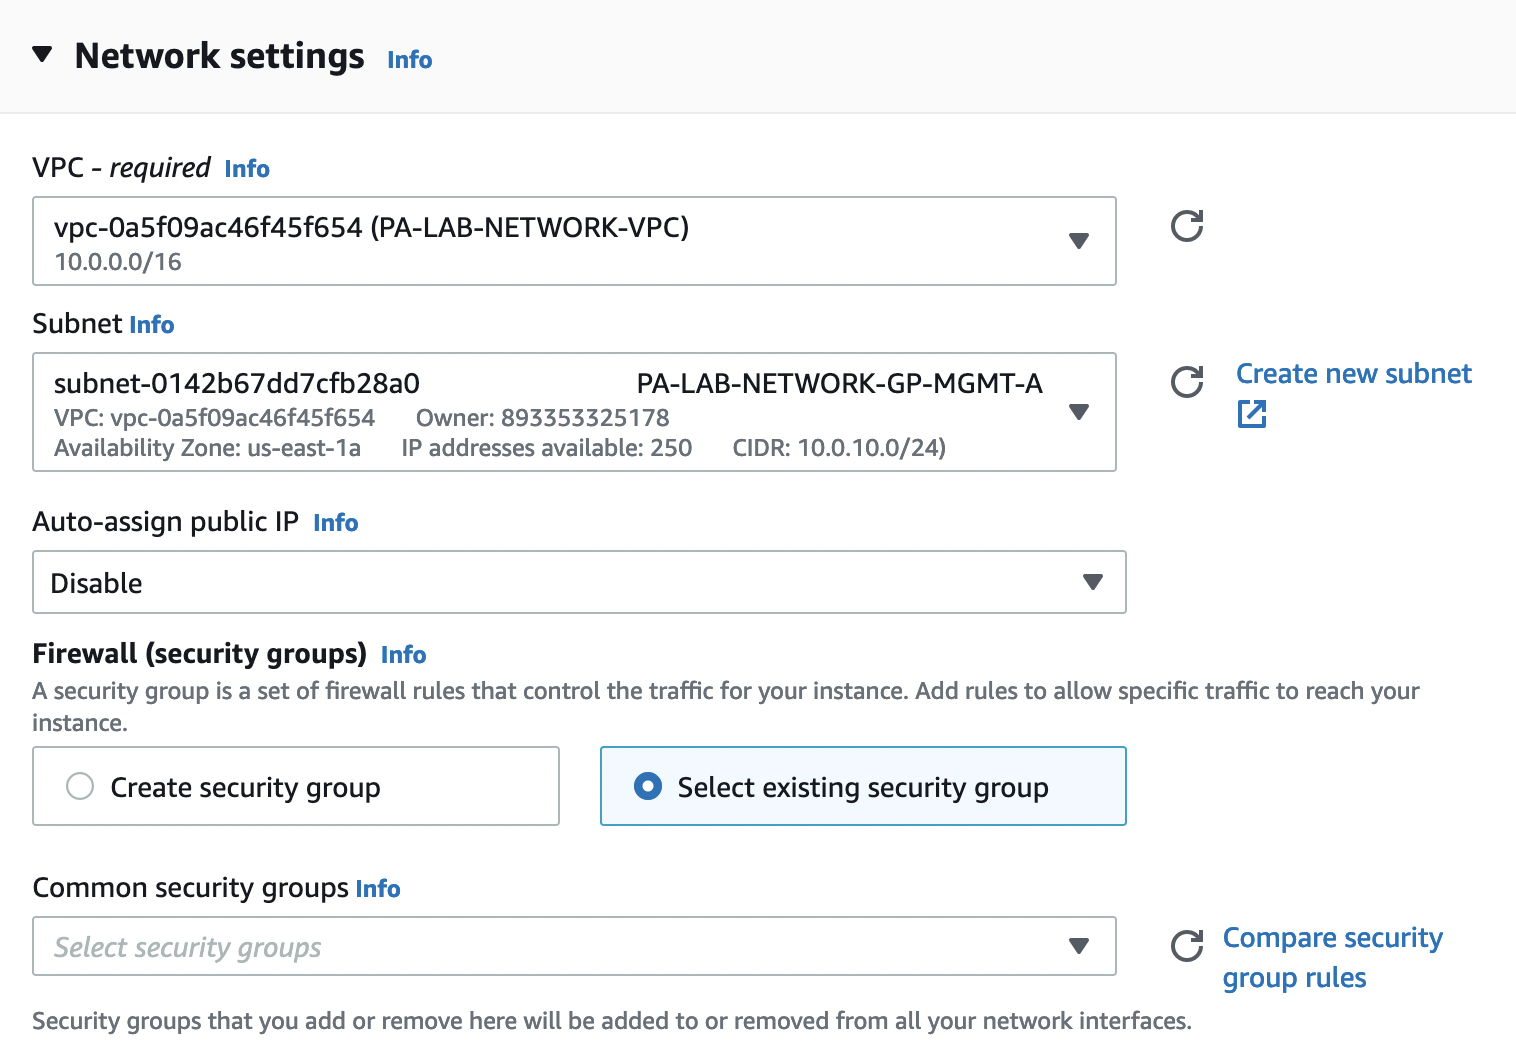
Network settings
Let’s select our VPC, select any subnet from AZ A, as we will connect network interfaces manually (WebUI bug, you will be shown for manual adding only interfaces that are created in the same zone as the subnet, even though we will not use it directly) and be sure to indicate that we will use the existing security group and leave this field empty.
Next, in the tab "Advanced network configuration" as "Network interface 1" select the "MGMT" interface, do not touch all other settings.
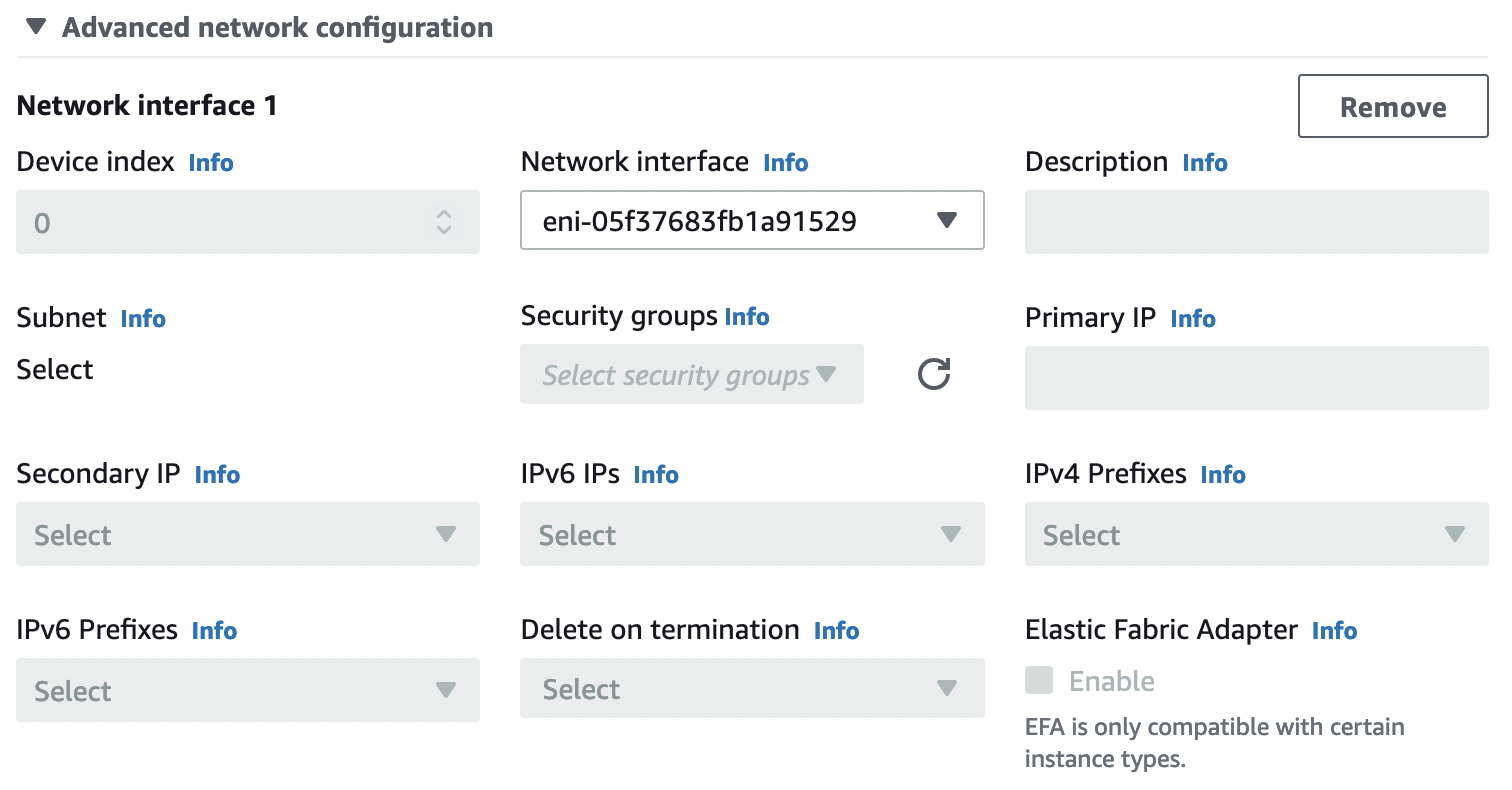
We add 3 more additional interfaces in the following order:
- HA
- UNTRUSTED
- TRUSTED
In the tab "Advanced details" we find the item "IAM instance profile" and select the created IAM Role.
In the same way, we create an instance for AZ B.