![]()
PAN-OS only allows you to generate self-signed certificates or already import existing ones. To use a Let’s Encrypt certificate, you need to request it on another device, and therefore we can only use DNS as validation.
AWS Route53 is used as a DNS provider, we will use Certbot to obtain a certificate, we also need an installed and configured awscli
Certificate request
Installing the necessary software (in this example, the macOS system was used):
brew install certbot awscli
pip3 install certbot-dns-route53
Configure awscli:
awscli configure
Minimum permissions for DNS validation
AWS IAM Policy:
{
  "Version": "2012-10-17",
  "Id": "certbot-dns-route53",
  "Statement": [
    {
      "Effect": "Allow",
      "Action": [
        "route53:ListHostedZones",
        "route53:GetChange"
      ],
      "Resource": [
        "*"
      ]
    },
    {
      "Effect": "Allow",
      "Action": [
        "route53:ChangeResourceRecordSets",
        "route53:ListResourceRecordSets"
      ],
      "Resource": [
        "arn:aws:route53:::hostedzone/YOURDOMAINZONEID"
      ]
    }
  ]
}
Where "YOURDOMAINZONEID" – ID your hosted zone
Requesting a certificate
Certbot on macOS requires root privileges
sudo certbot certonly \
  --register-unsafely-without-email \
  --dns-route53 \
  -d gp1.aws.artem.services
Where "gp1.aws.artem.services" is the domain name for the requested certificate
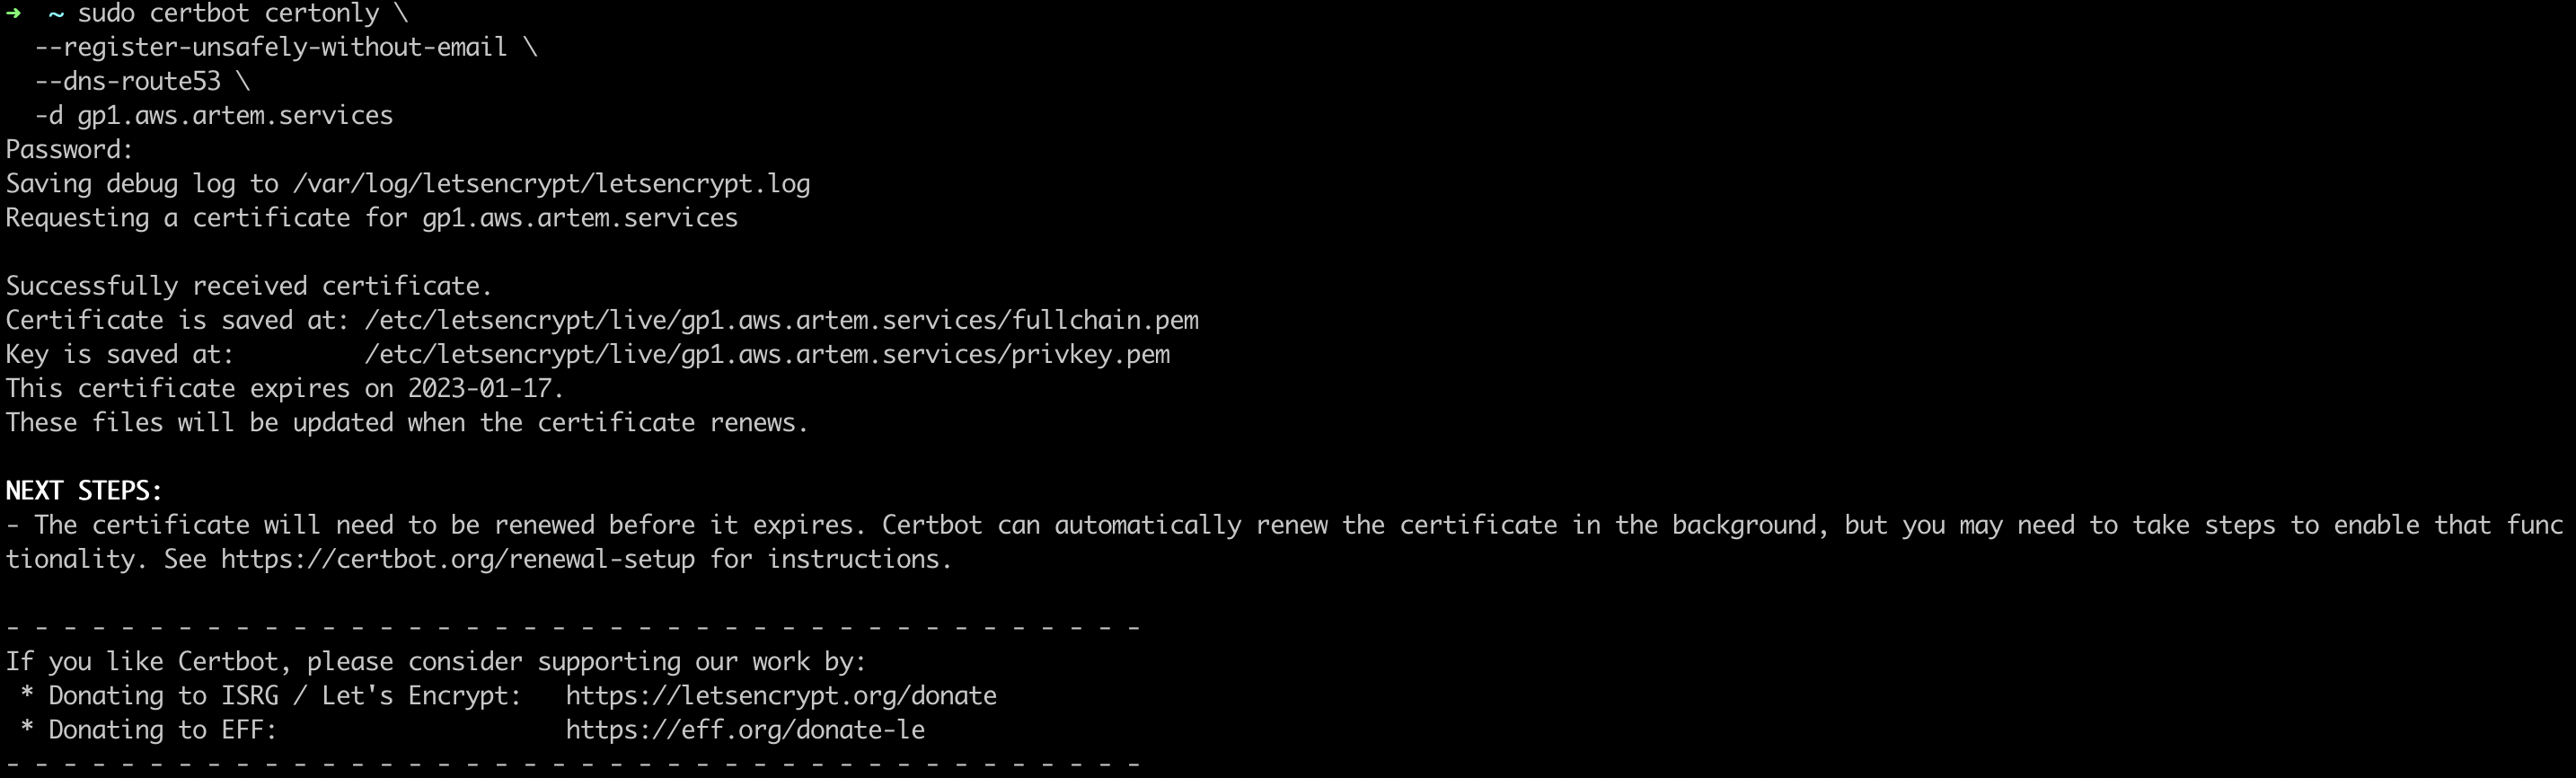
Since we executed Certbot as root, we will copy the necessary files to the home directory and change the owner
sudo cp /etc/letsencrypt/live/gp1.aws.artem.services/{fullchain,privkey}.pem ~/
sudo chown artem:staff ~/{fullchain,privkey}.pem
Now you can proceed to import the certificate
Firewall
Management
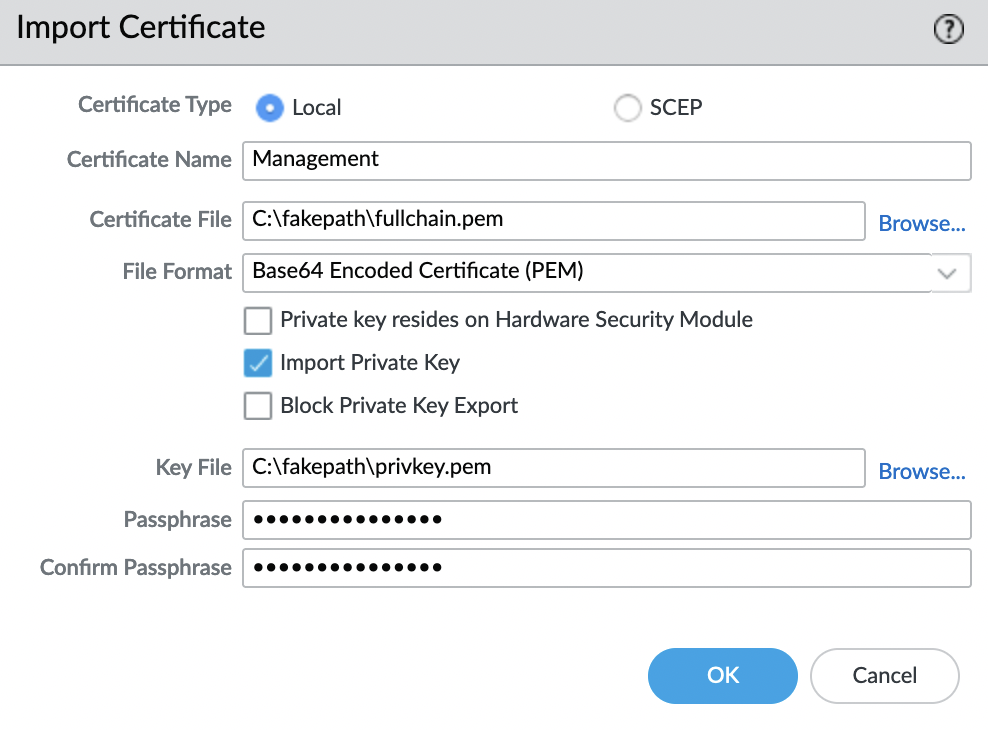
To import a certificate, go to "Device" -> "Certificate Management" -> "Certificates" -> "Device Certificates" and click "Import"
- Certificate File: fullchain.pem
- Import Private Key: check the box
- Key File: privkey.pem
- Passphrase: random password (will not be used anywhere else)
We check the status of the certificate and make sure that the "Key" field is checked.

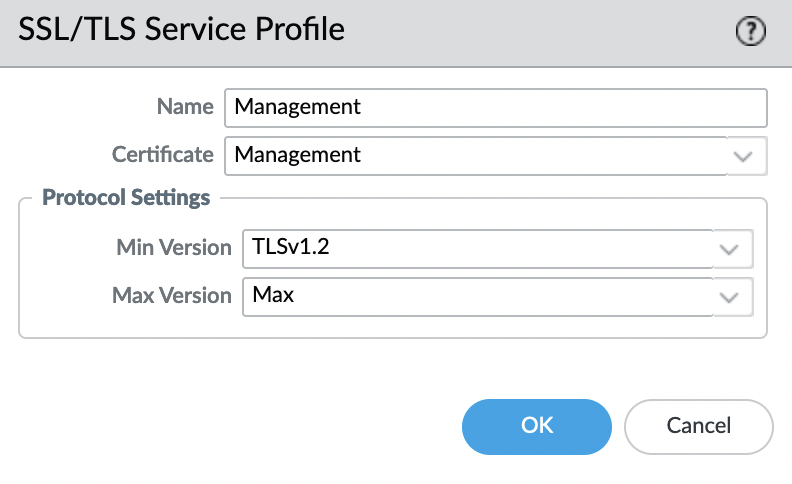
Next, we need to create a profile, for this we go to "Device" -> "Certificate Management" -> "SSL/TLS Service Profile" and click "Add". We select our imported certificate and specify the name and requirements for TLS versions.
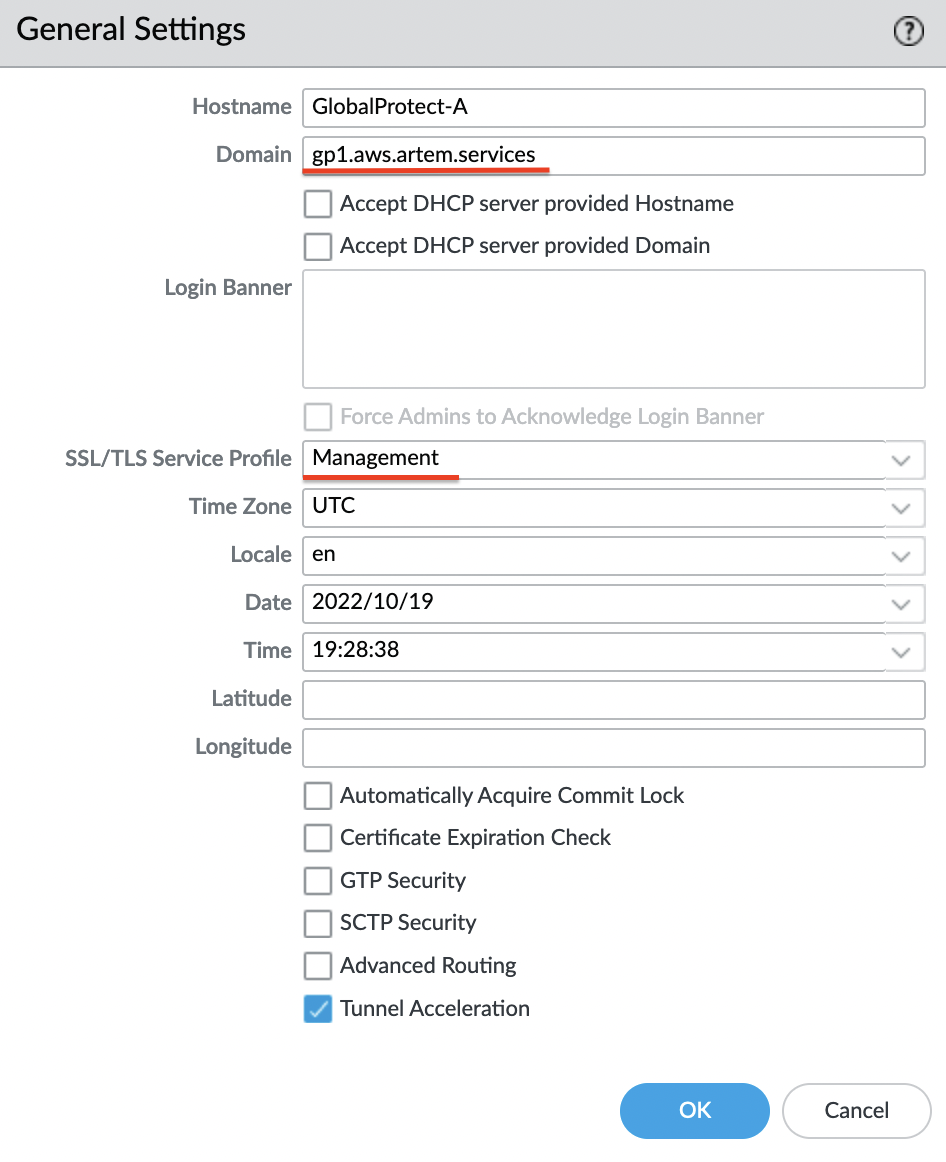
It remains to specify the profile for the management connection. Go to "Device" -> "Setup" -> "Management Settings" and click on the "gear". Set a domain name and select an SSL/TLS profile.
And finally only left to apply and save the changes, for this, in the upper right corner, click on the "Commit" button
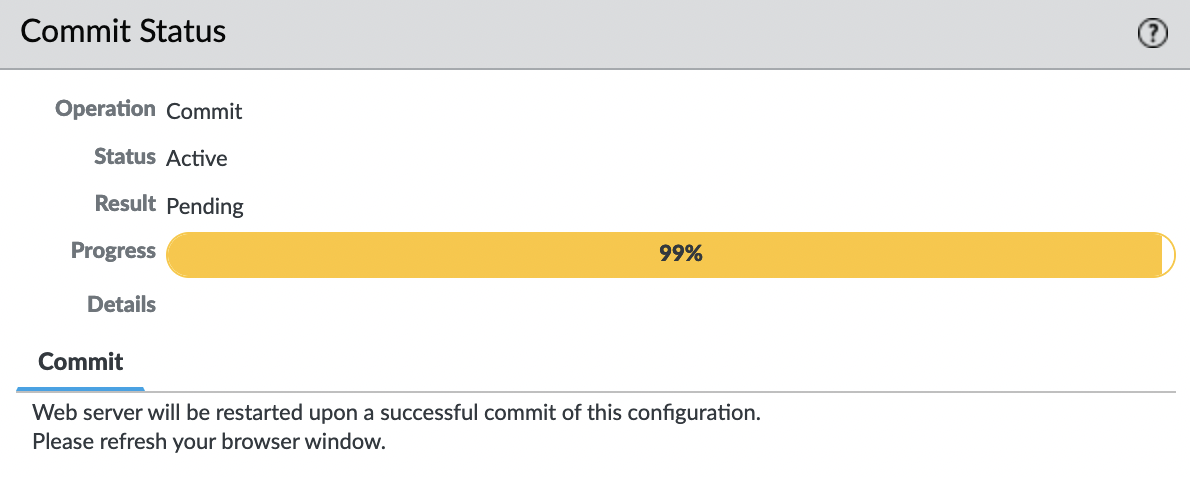
After a few minutes, you can connect to the WebUI by domain name using the HTTPS protocol
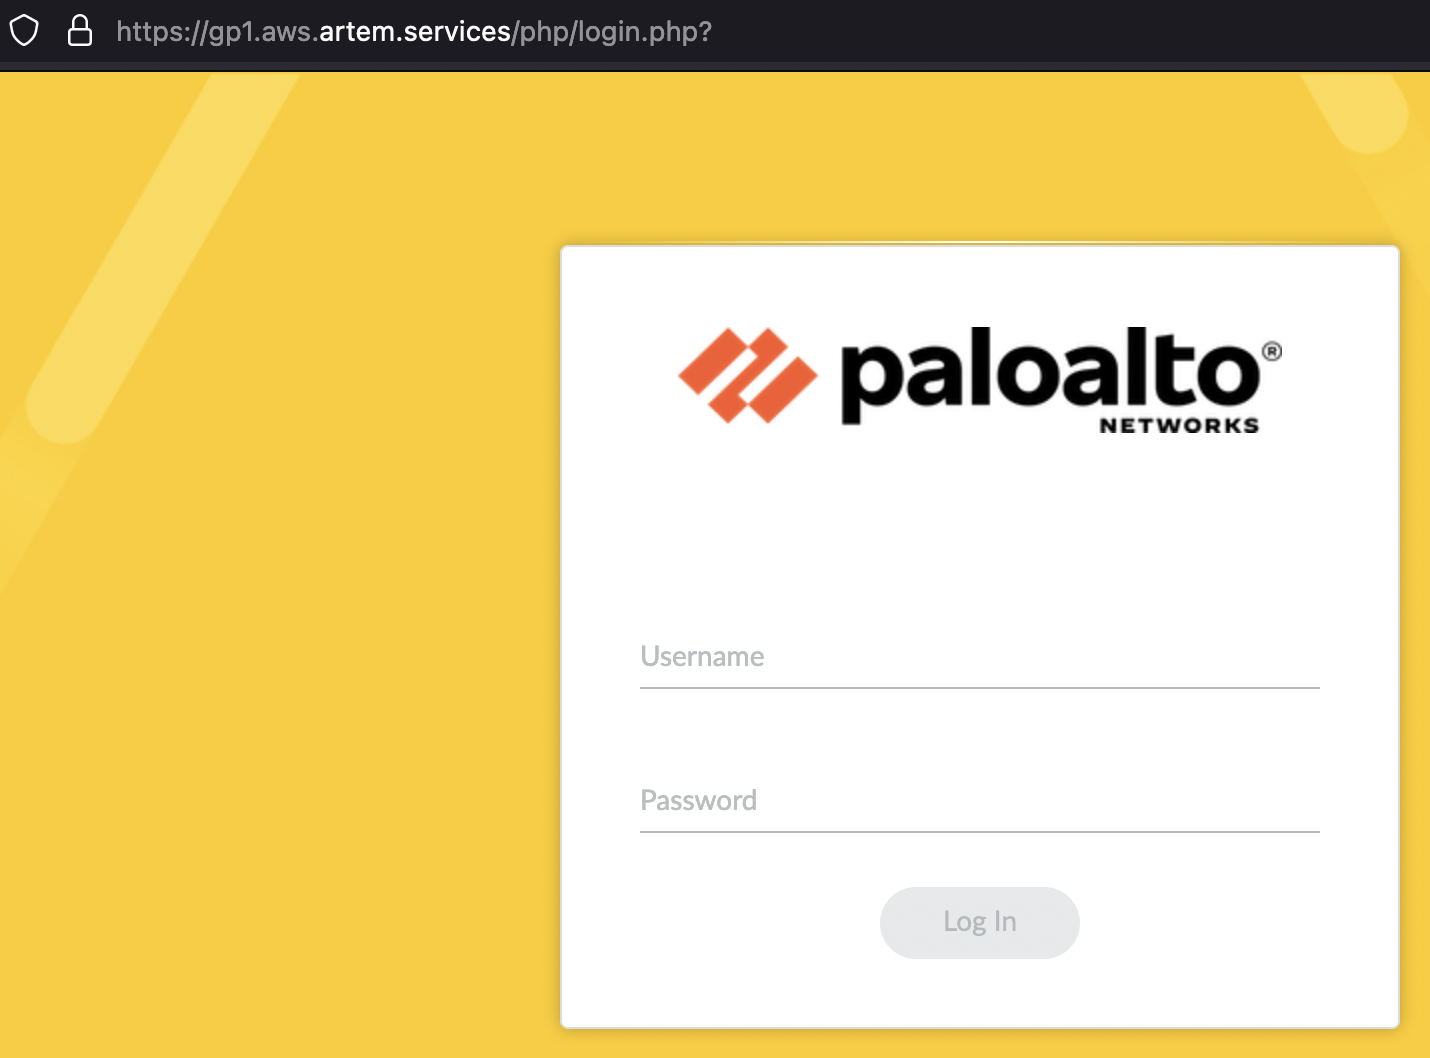
Don’t forget to create a DNS record pointing to your firewall
GlobalProtect
To import a certificate for GlobalProtect, you need to follow all the same steps and specify the required profile when configuring the portal and gateway.