![]()
Before start configuring GlobalProtect, needs to generate/import an SSL certificate and create an SSL/TLS Service Profile. And also needs an Authentication Profile, you can either create a local user base or use an external one. An example of using OneLogin and AWS SSO.
Security zone
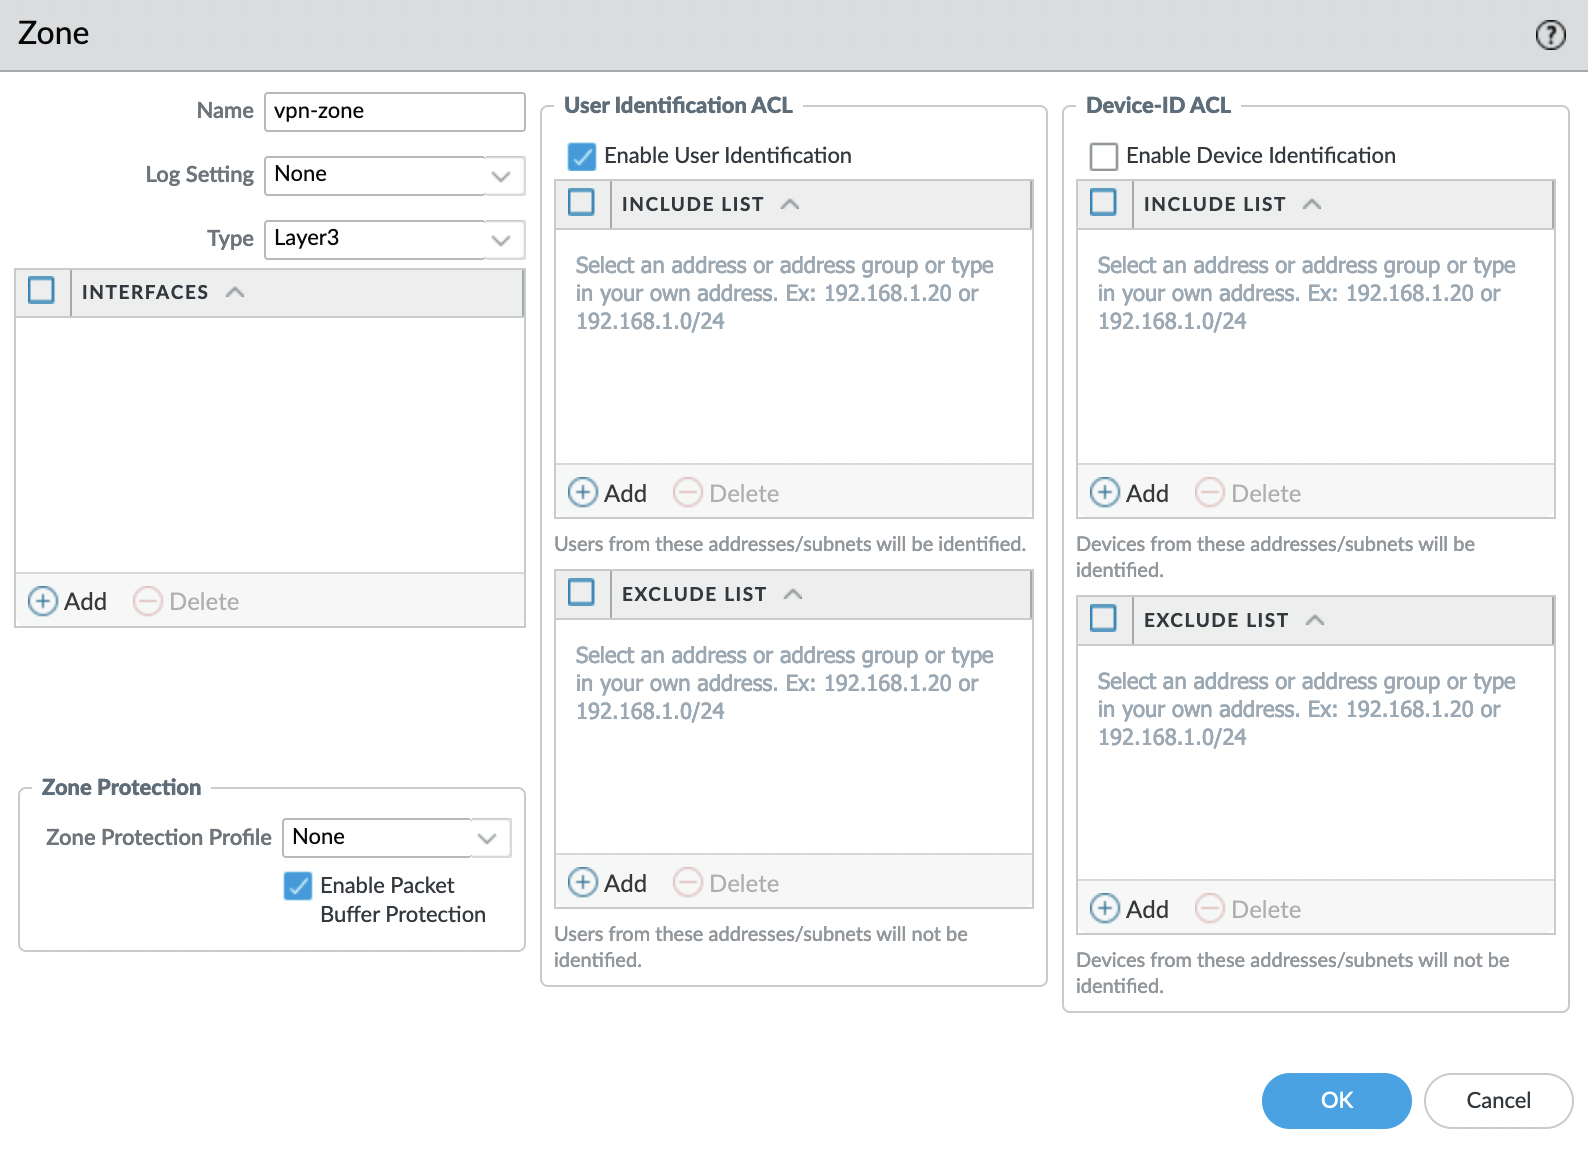
First of all, needs to create a security zone for the VPN interface. To do this, go to the "Network" -> "Zones" tab and click "Add".
Set the name, select "Layer3" as the "Type" and enable the "Enable User Identification" option. Leaves everything else by default.
Tunnel interface
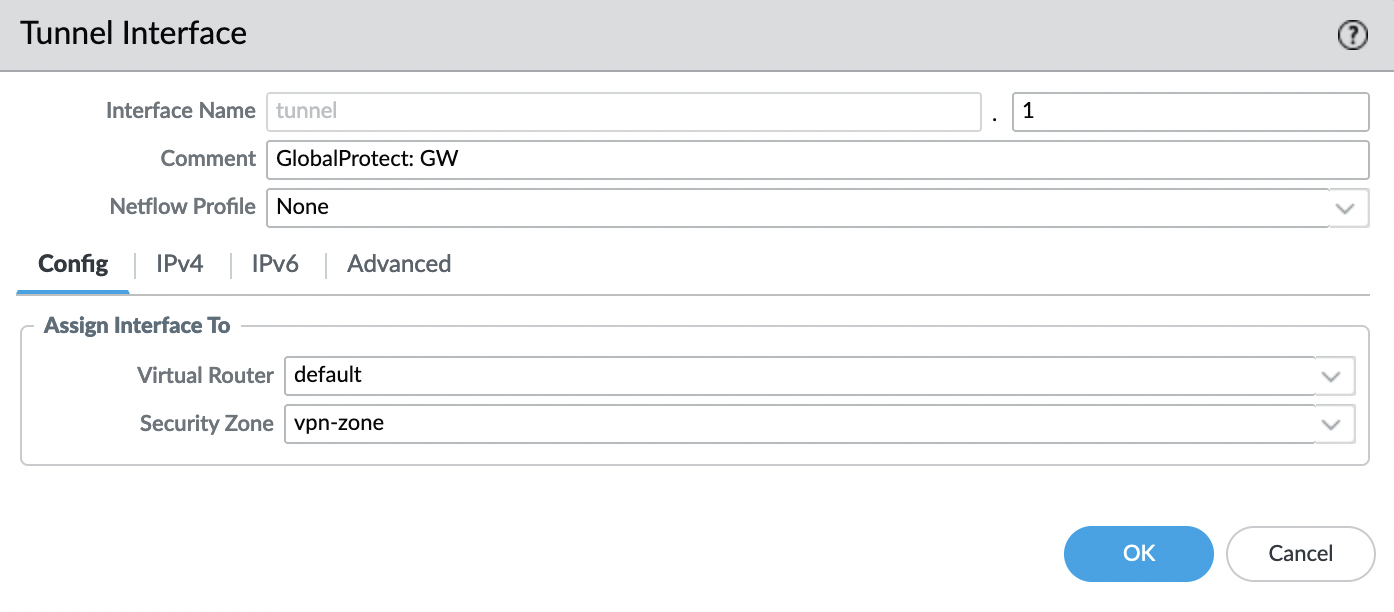
Now let’s create a tunnel, for this we go to the "Network" -> "Interfaces" -> "Tunnel" tab and add a new one.
- Number: any number from 1 to 9999
- Comment: optional, for faster identification
- Virtual Router: default
- Security Zone: vpn-zone
Leaves everything else by default.
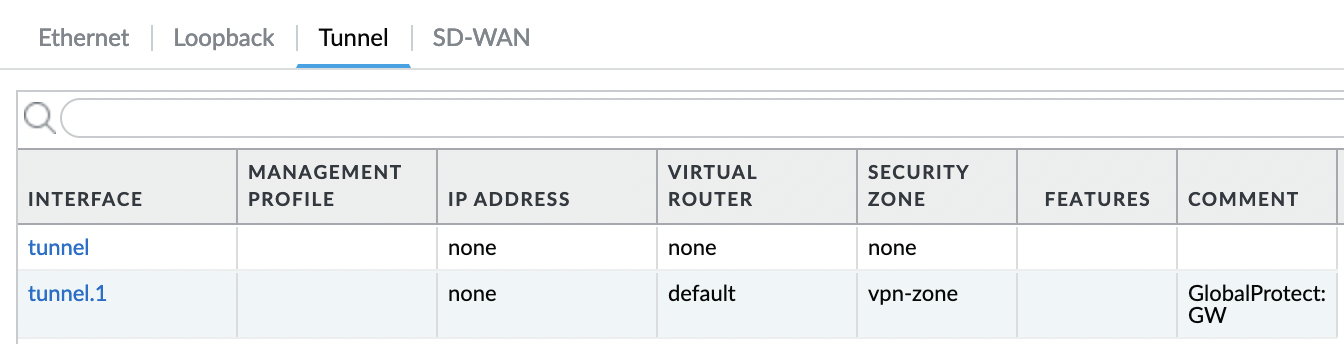
Click "OK" and check the created interface.
Static routes
Internal networks according to our scheme can be accessed through the "trust" interface, for this, needs to create 2 static routes.
To do this, go to the "Network" -> "Virtual Routers" tab and select the "default" router.
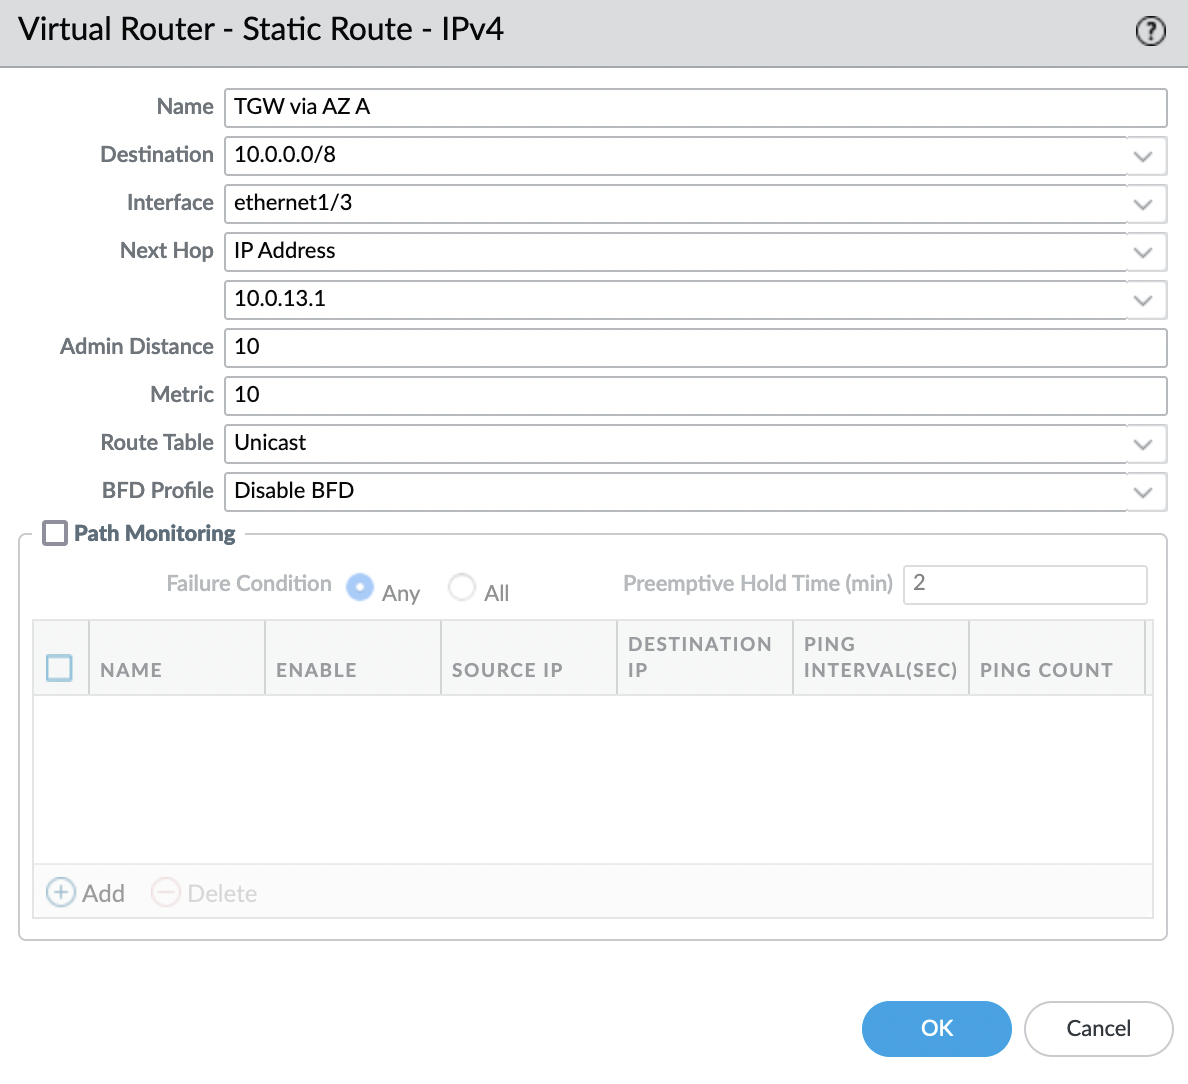
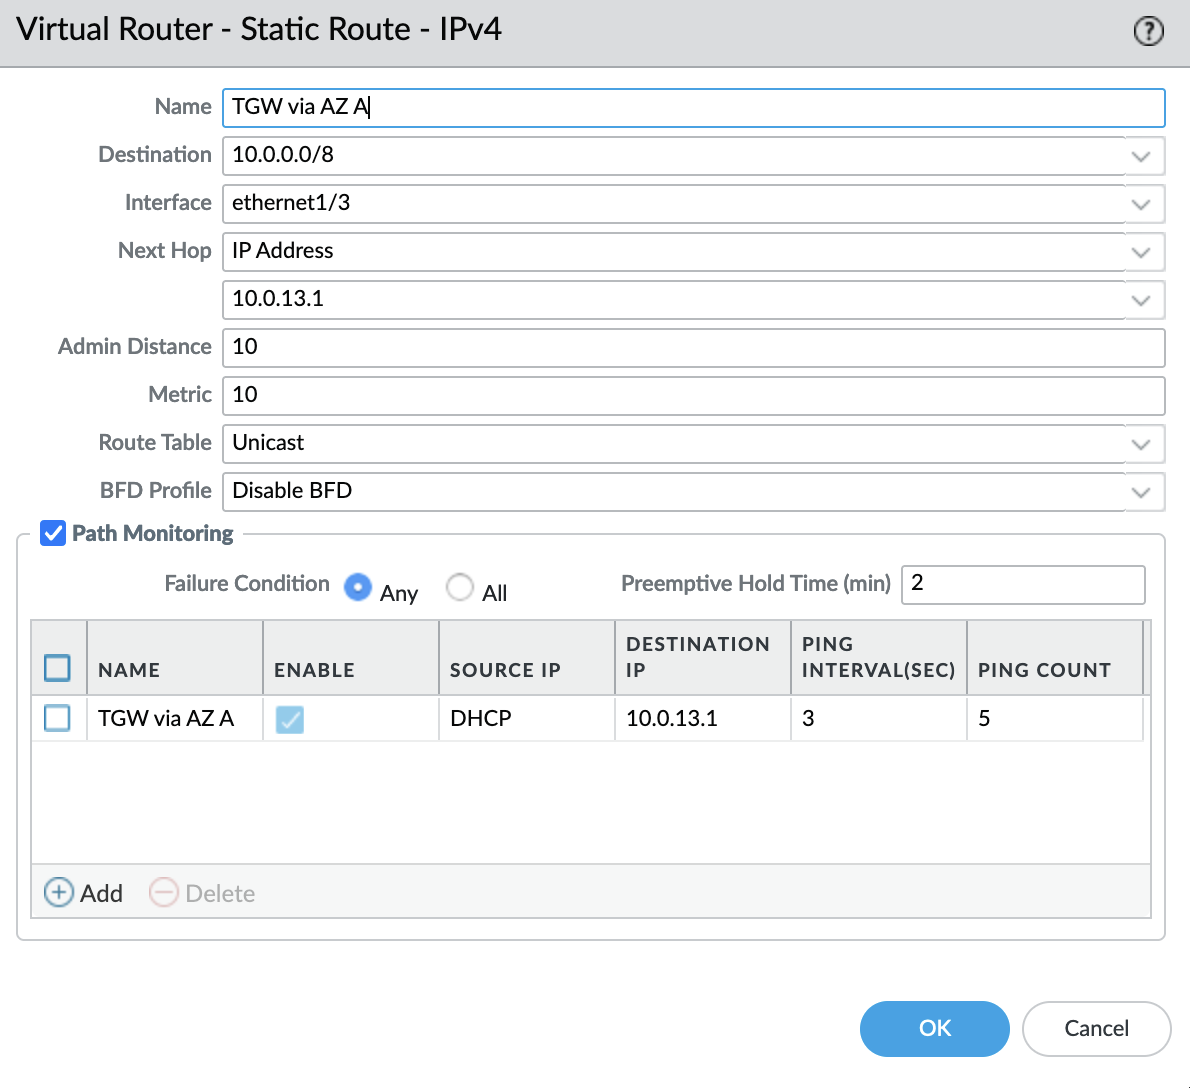
Go to the "Static Routes" tab and add a route
- Destination: "10.0.0.0/8"
- Interface: "ethernet1/3" (trusted-zone)
- Next Hop: "IP Address" – "10.0.13.1"
- Admin Distance: "10"
- Metric: "10"
Where "10.0.13.1" – AWS gateway for "GP-TRUST-A" subnet
There is such a moment, in the "Active-Passive" mode, static routes are synchronized between instances, as well as "Admin Distance" and "Metric" are synchronized, so we cannot influence the choice of route for each instance in this way. The route with the lower "Admin Distance" and "Metric" will be chosen as the route, and since the "Next Hop" parameter is required, it may turn out that the instance in AZ A will have a route through AZ B, which will not work. To get around this point, you can use "Path Monitoring Destination", the point is the following, we will check the availability of the gateway, and if it is not available, we do not use this route. Thus, on an instance in AZ A, the active route will be through AZ A, and on an instance of AZ B through AZ B, respectively.
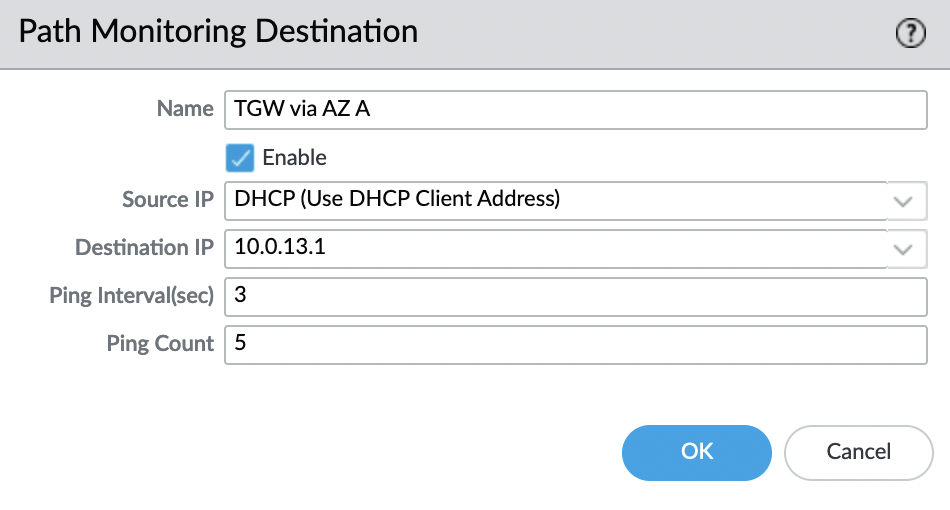
Check the created route and path monitoring.
Create a second route through AZ B:
- Destination: "10.0.0.0/8"
- Interface: "ethernet1/3" (trusted-zone)
- Next Hop: "IP Address" – "10.0.23.1"
- Admin Distance: "20"
- Metric: "20"
Where "10.0.23.1" – AWS gateway for "GP-TRUST-B" subnet
And also add monitoring for it, as "Destination IP" we specify "10.0.23.1"
GlobalProtect: Portal
Go to tab "Network" -> "GlobalProtect" -> "Portals" and click "Add".
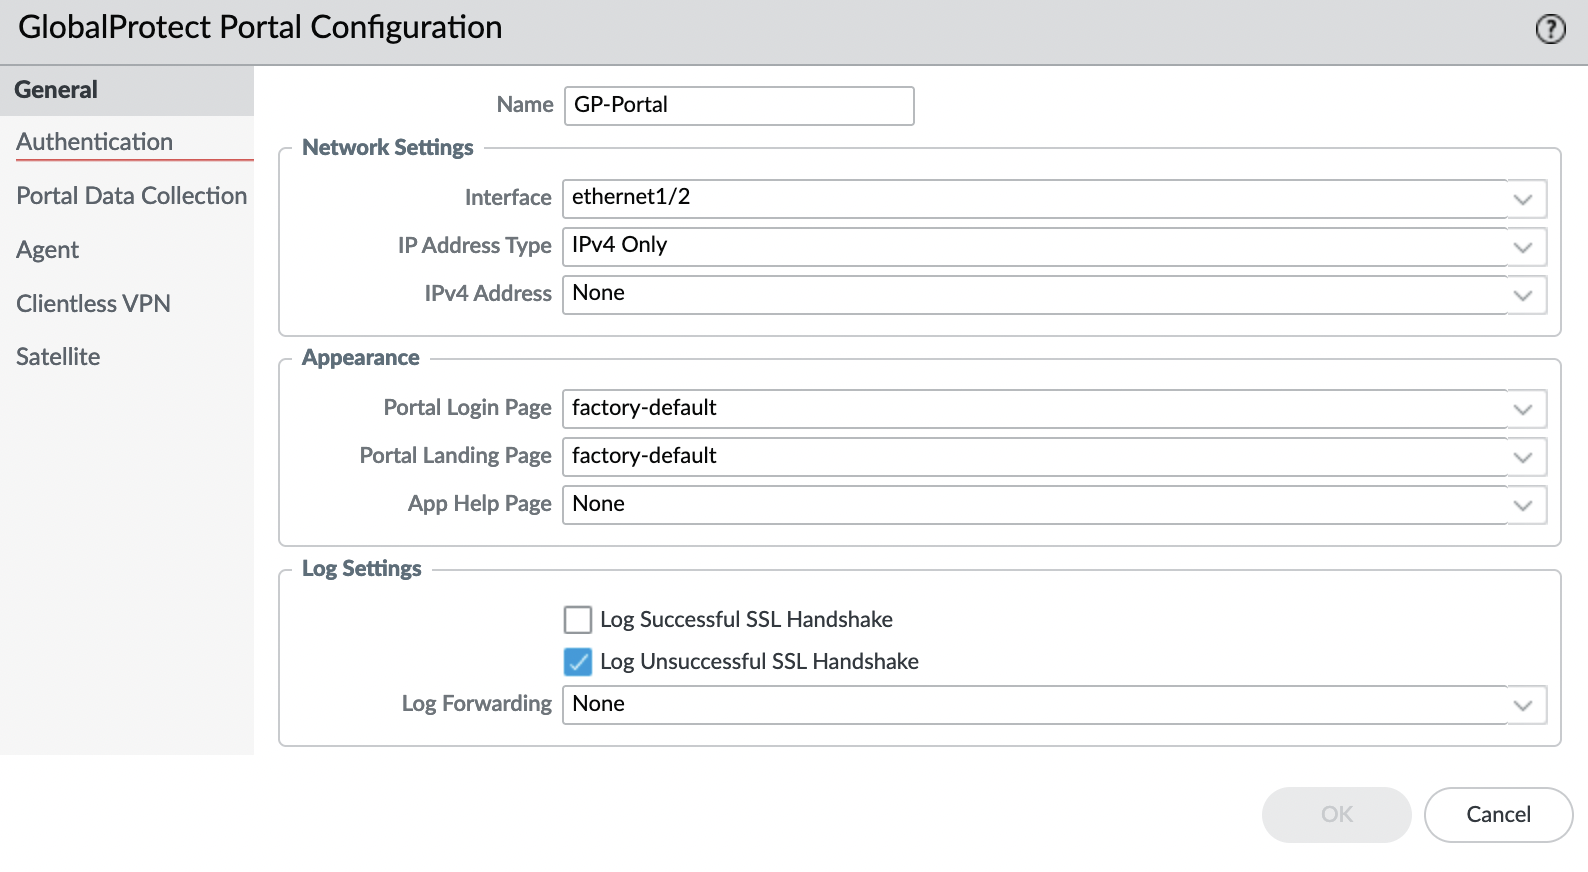
"General" tab
Set the name and specify in the "Interface" field – "ethernet1/2" (untrusted-zone).
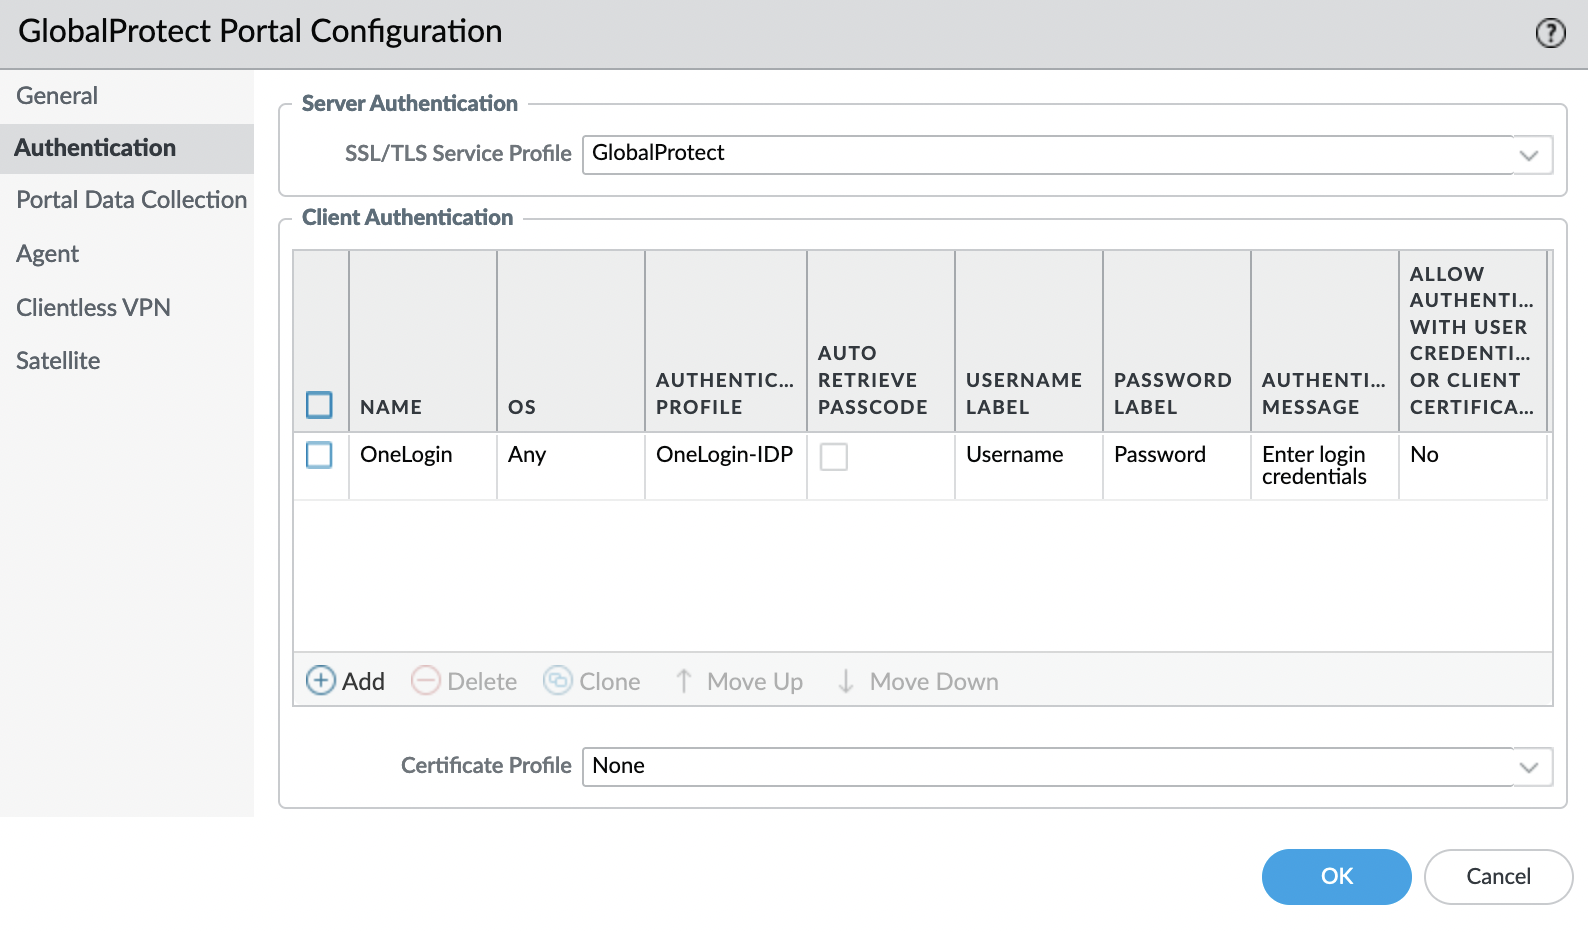
"Authentication" tab
Select "SSL/TLS Service Profile".
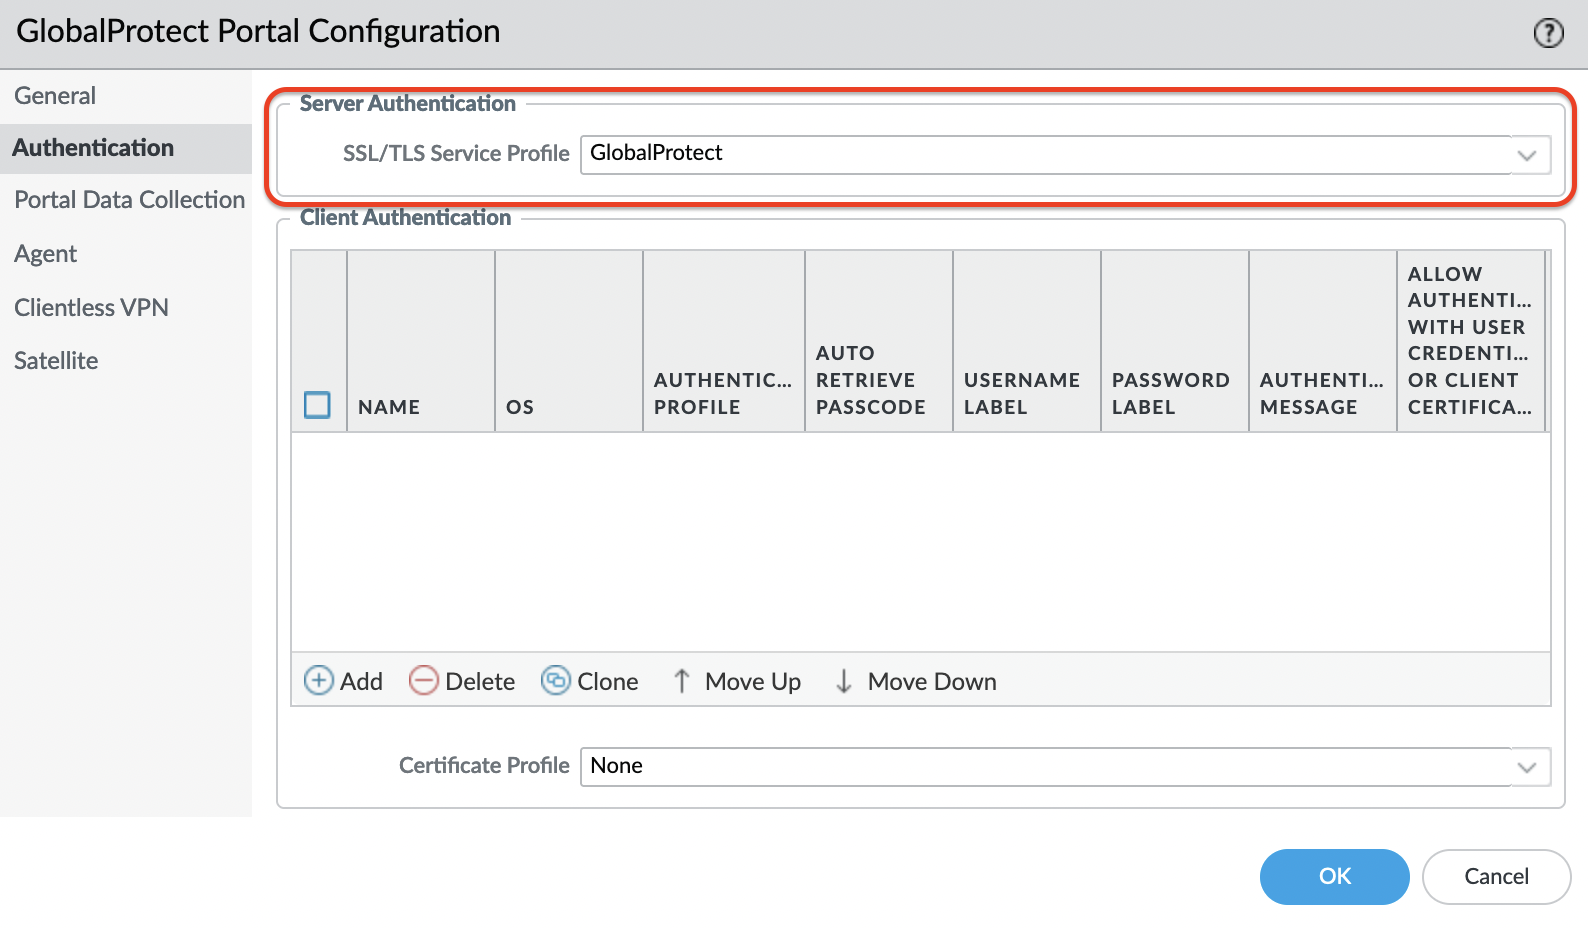
Add "Client Authentication"
Specify a name and select a profile, in this example, OneLogin is used as authentication.
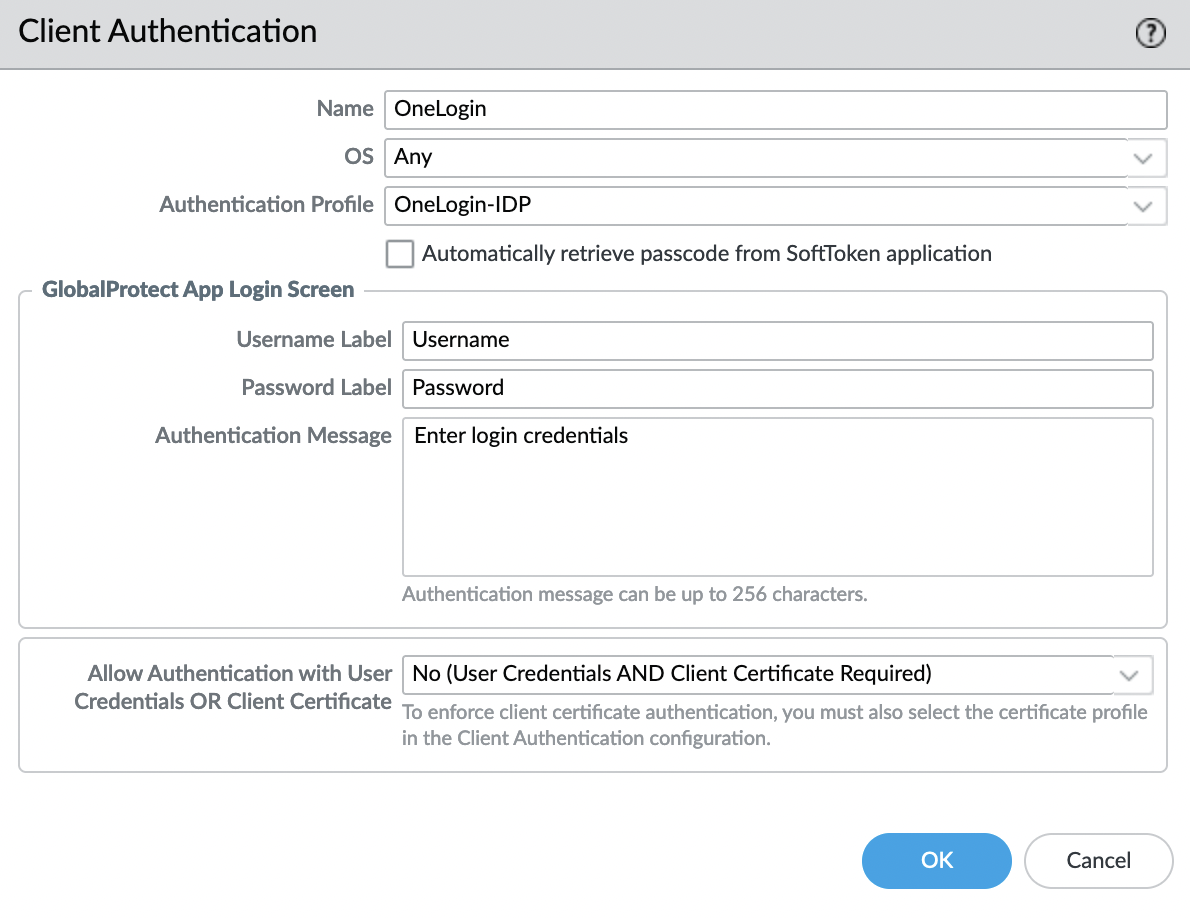
Save and check.
"Agent" tab
Create agent configuration "Agent" -> "Add".
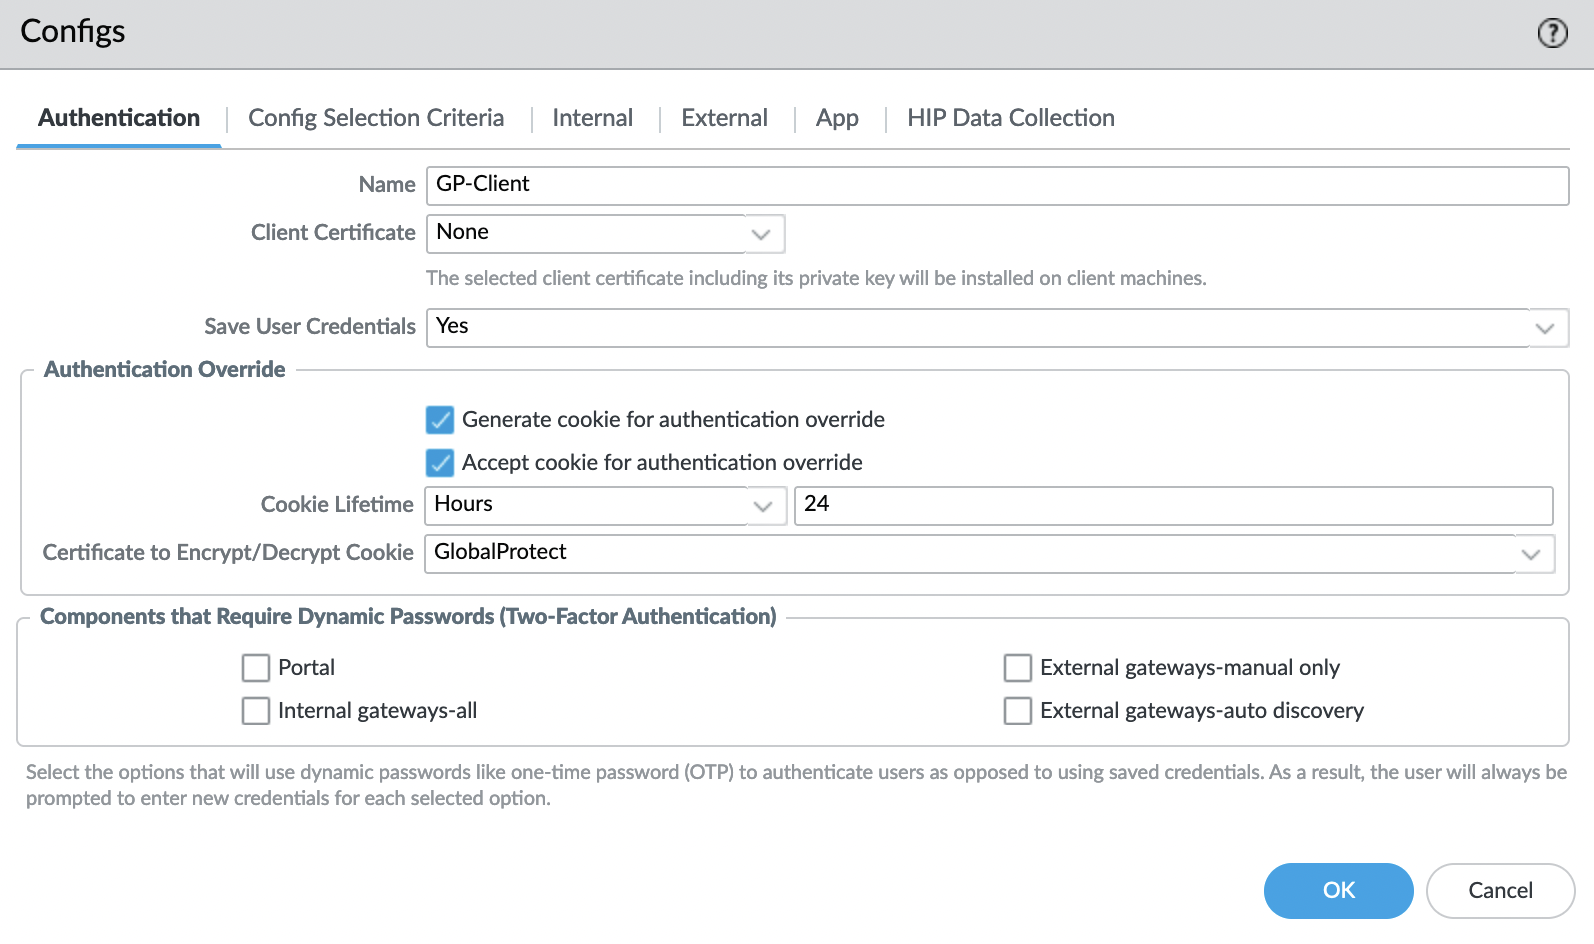
"Authentication" tab
Set the name.
(optional)
You can use cookies to avoid double authentication (first to the portal, then to the gateway), or set different cookie lifetimes for the portal and gateway. Read more here.
"External" tab
Add a gateway, for this, in the "External Gateways" block, click "Add".
Specify the name and DNS name. Set the region – "Any".
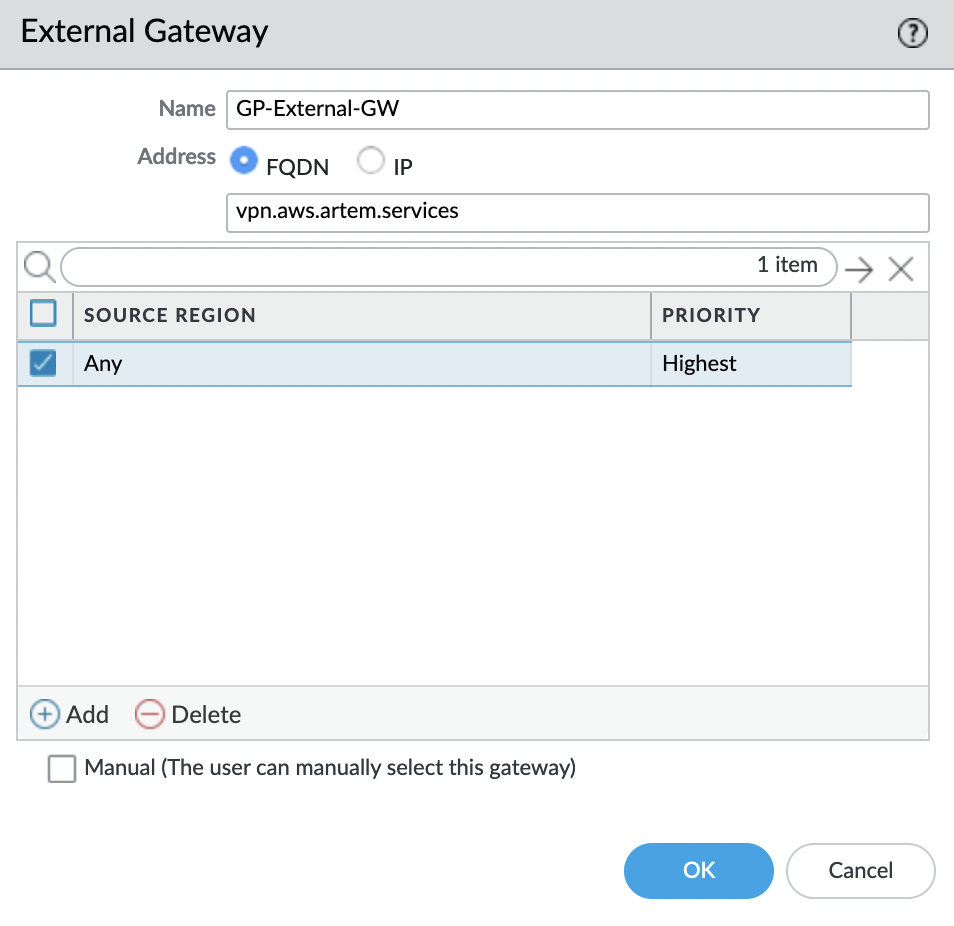
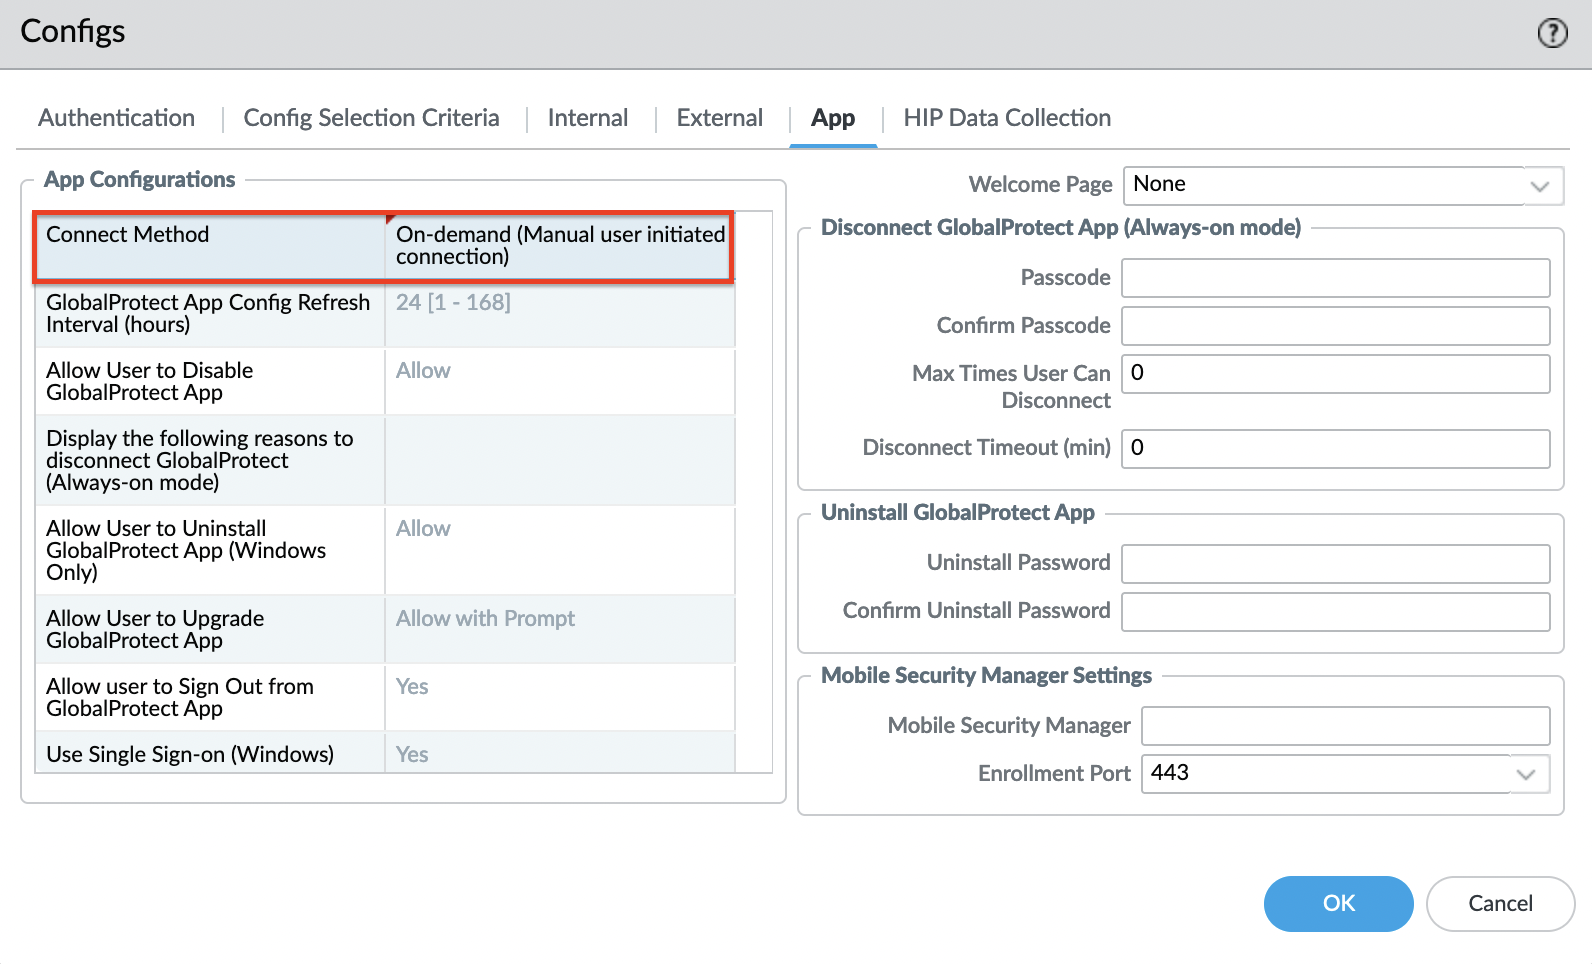
Set "Connect Method" to "On-demand (Manual user initiated connection)".
On-demand – adds the ability to disable VPN to the client, and when the client starts, it does not automatically connect.
This completes the portal setup.

GlobalProtect: Gateway
Go to the tab "Network" -> "GlobalProtect" -> "Gateways" and click "Add".
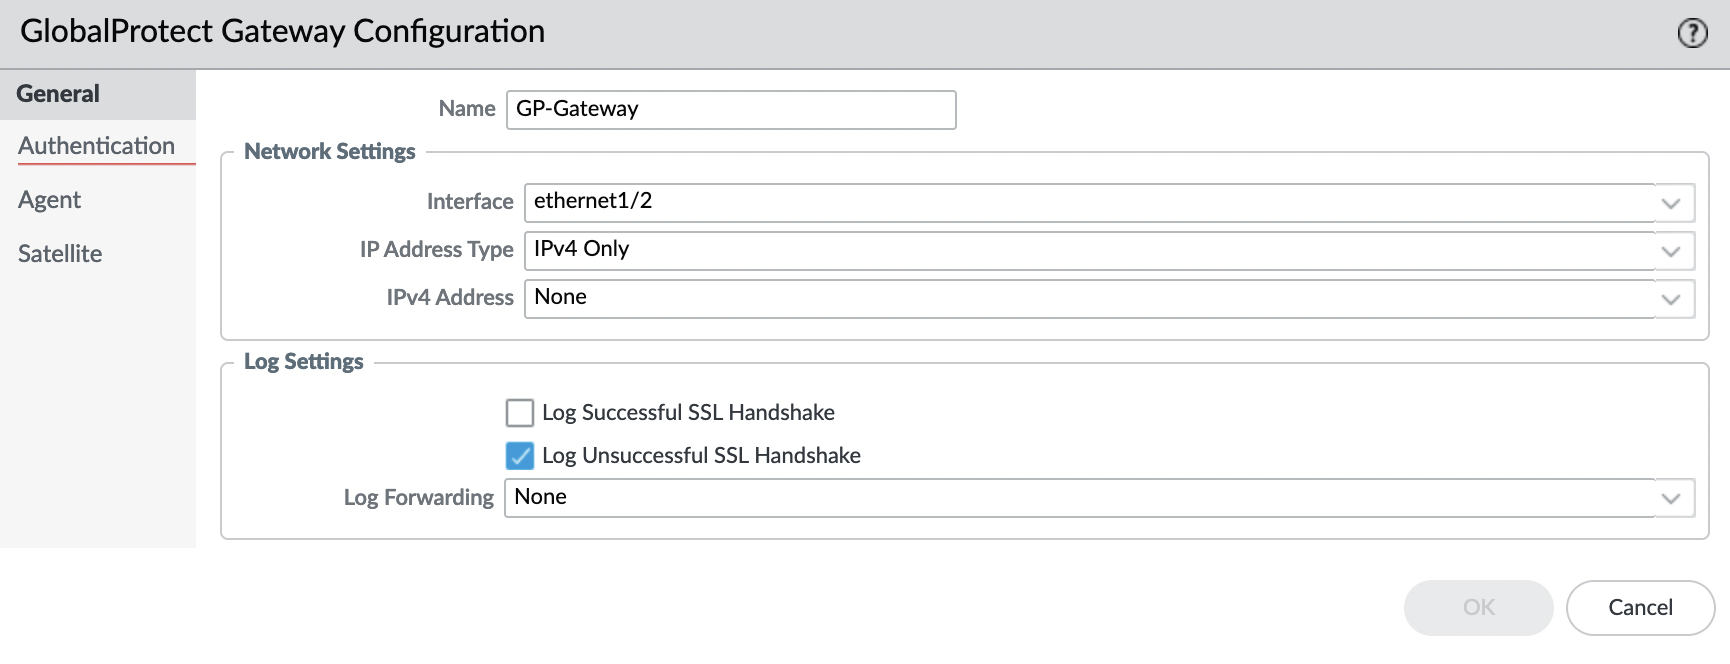
"General" tab
Set the name and specify in the "Interface" field – "ethernet1/2" (untrusted-zone).
"Authentication" tab
Select "SSL/TLS Service Profile".
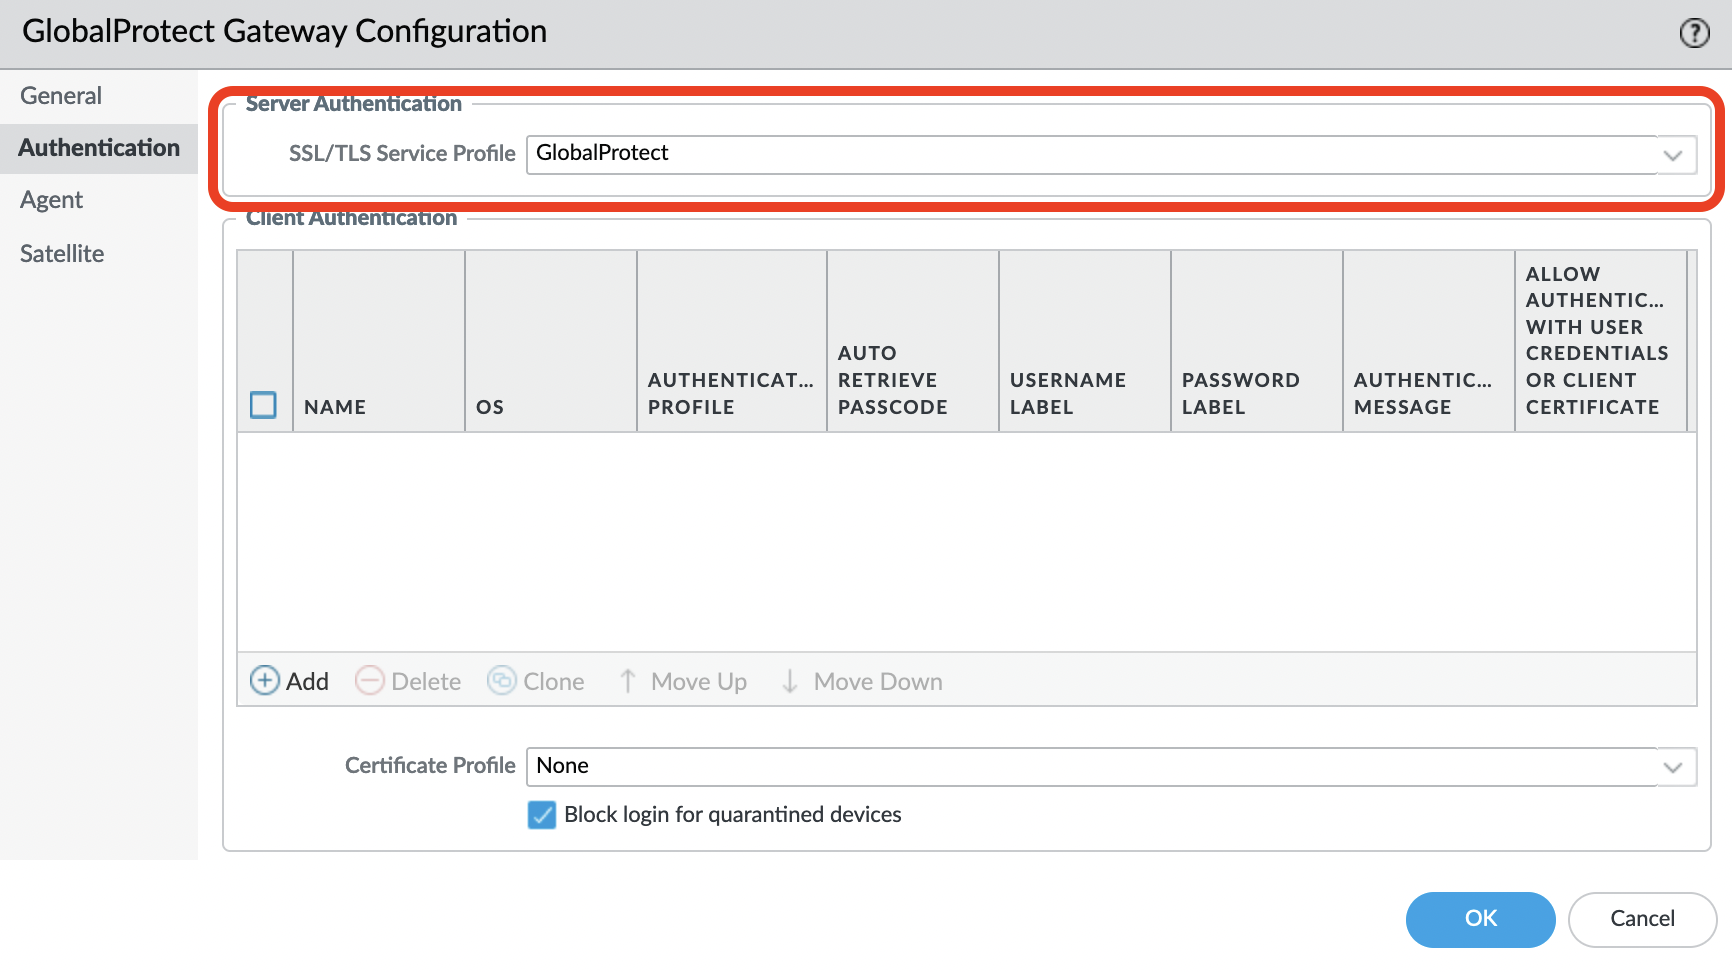
Add "Client Authentication".
Specify a name and select a profile, in this example, OneLogin is used as authentication.

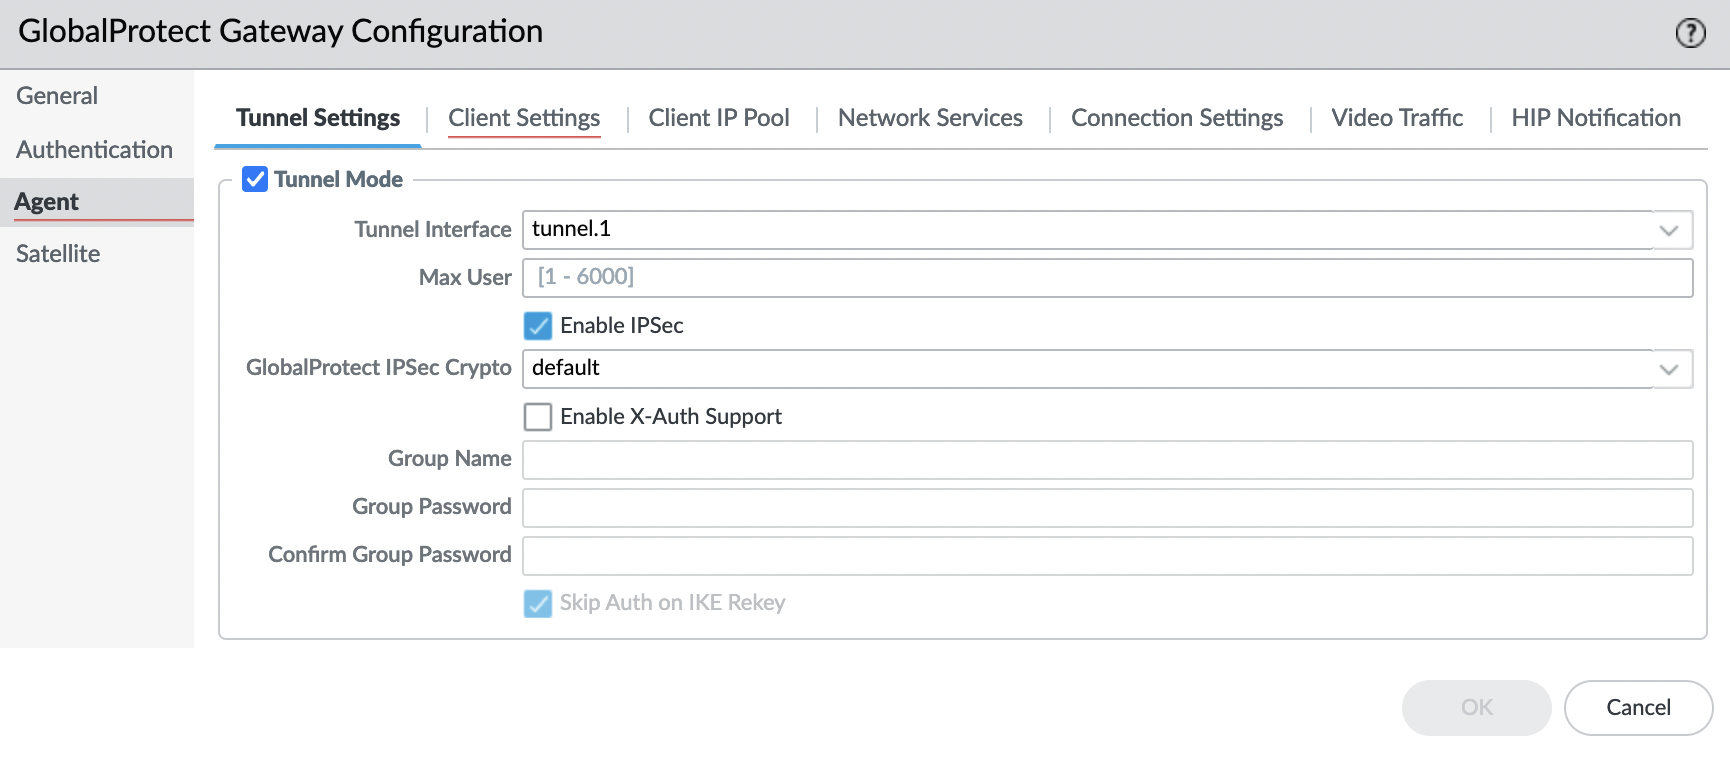
Tab "Agent" -> "Tunnel Settings"
Turn on the "Tunnel Mode" and specify the tunnel interface that we created.
Go to the "Client Settings" tab and click "Add".
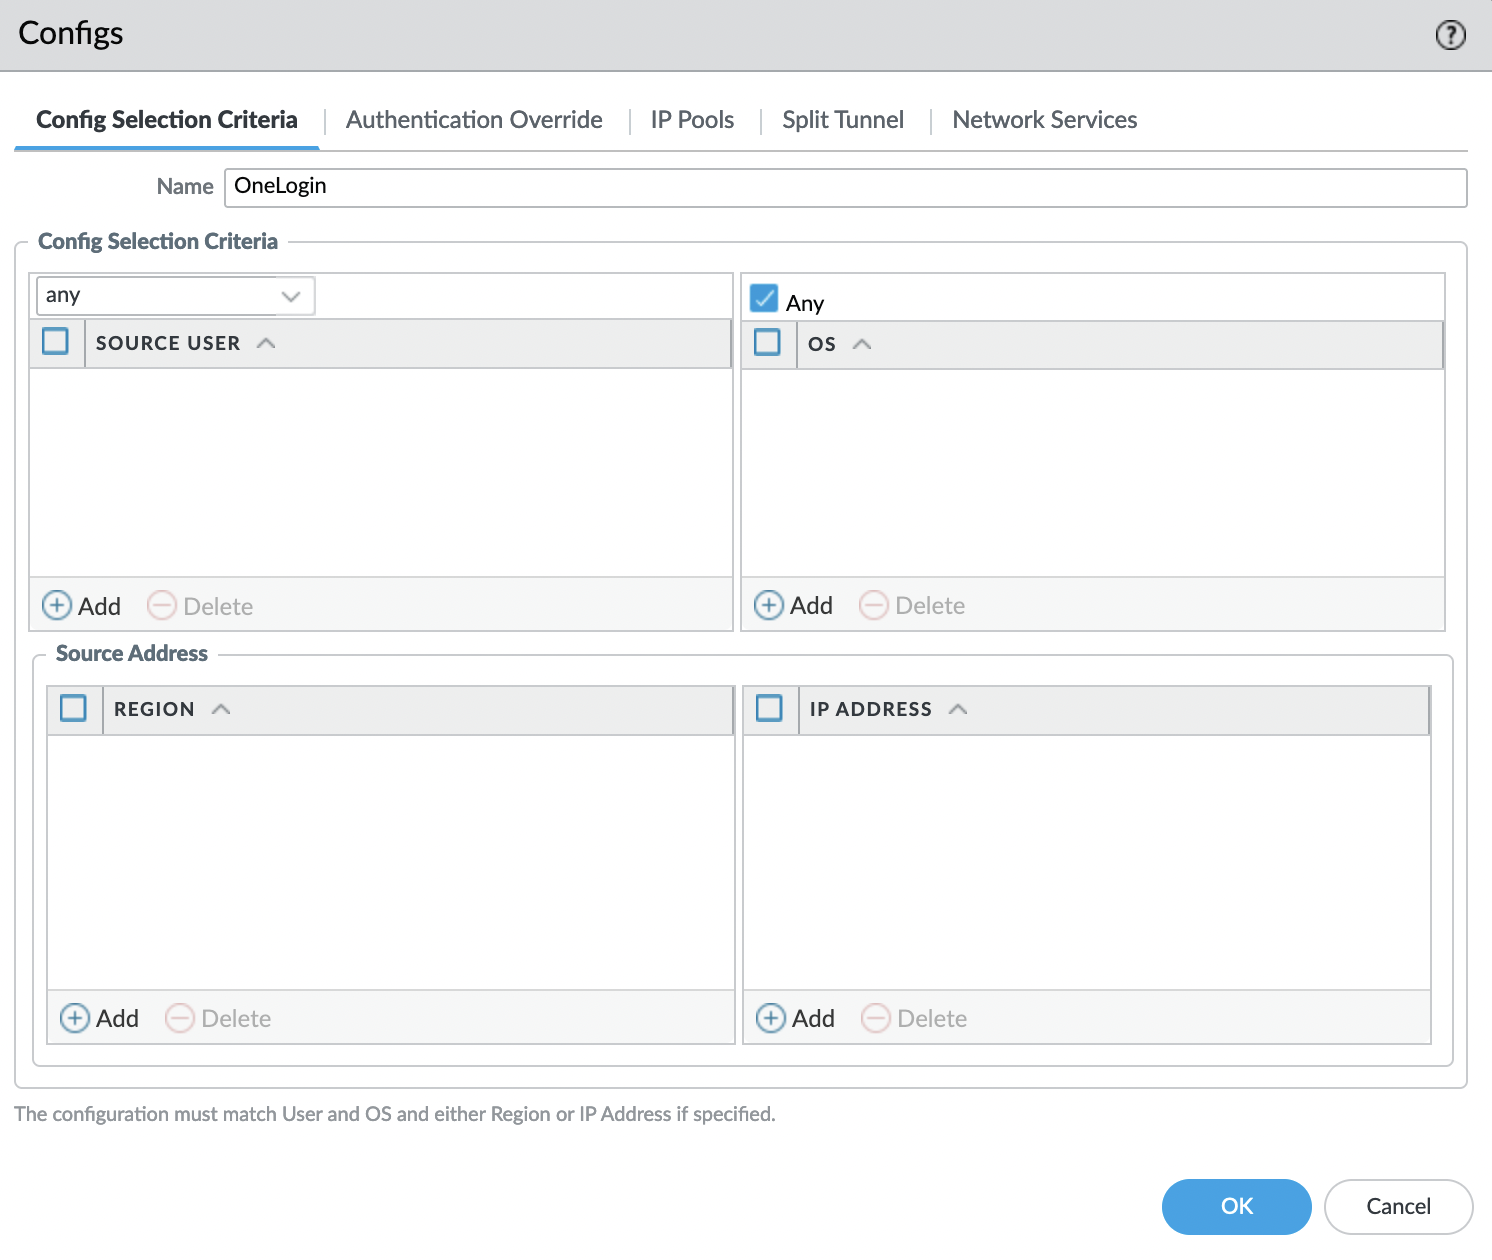
"Config Selection Criteria" tab
Set the name, and leave all criteria by default.
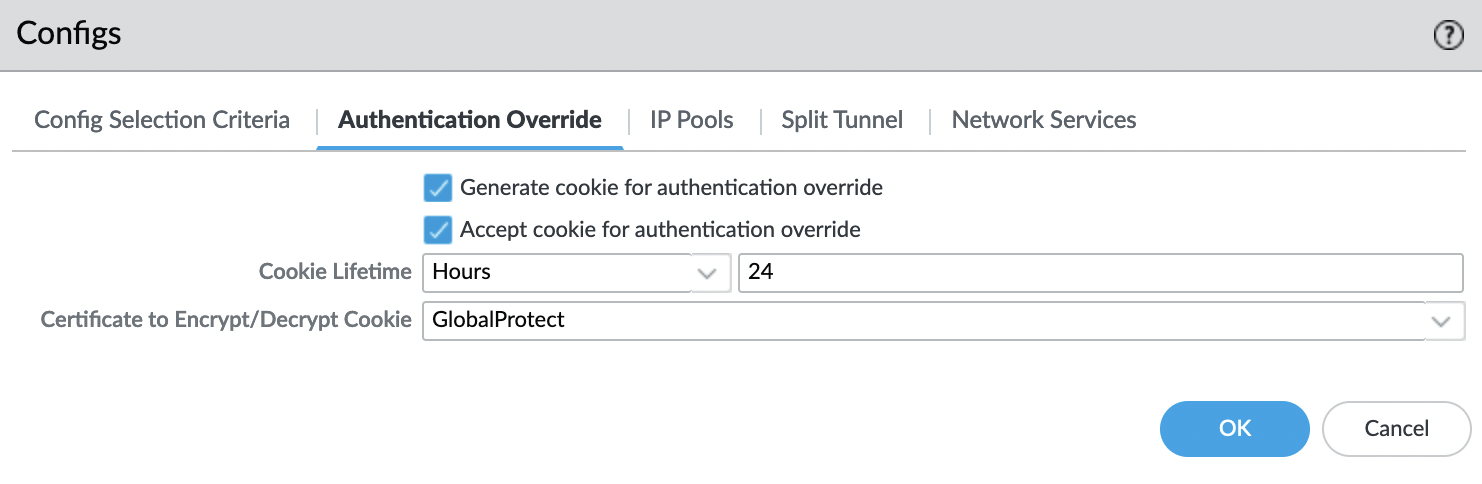
(optional) "Authentication Override" tab
Check the boxes next to the fields:
- Generate cookie for authentication override
- Accept cookie for authentication override
And specify the certificate for GlobalProtect.
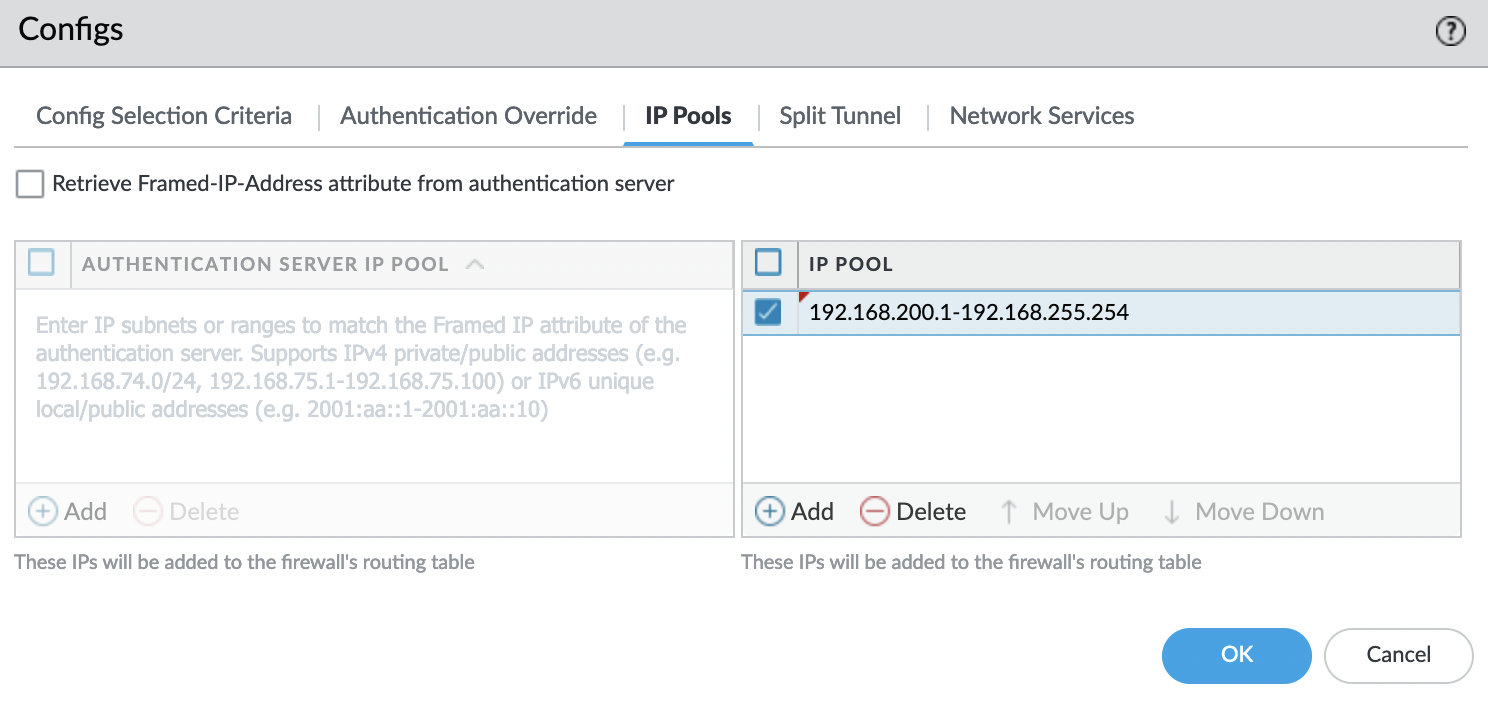
Tab "IP Pools" -> "IP POOL" and click "Add". Set the IP addresses that will be issued to VPN clients.
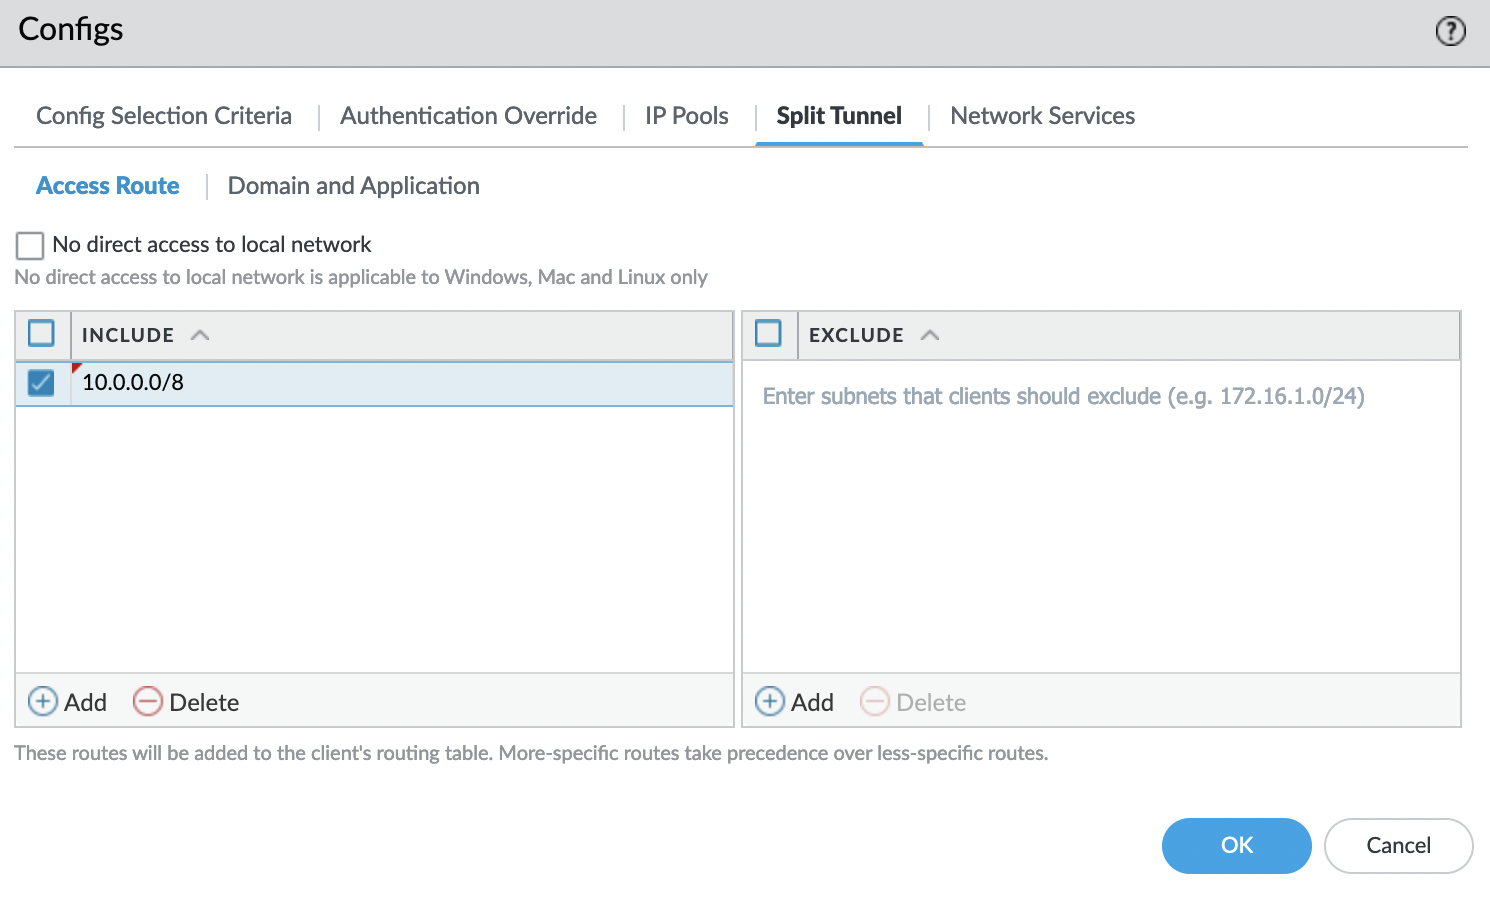
In the "Split Tunnel" tab, specify the networks that the VPN server will announce. In this case "10.0.0.0/8". Also, if necessary, you can exclude networks that do not need to be announced.
This completes the gateway setup.
Security policy
Now needs to create a security policy for the VPN zone. Go to the "Policies" -> "Security" tab and click "Add".
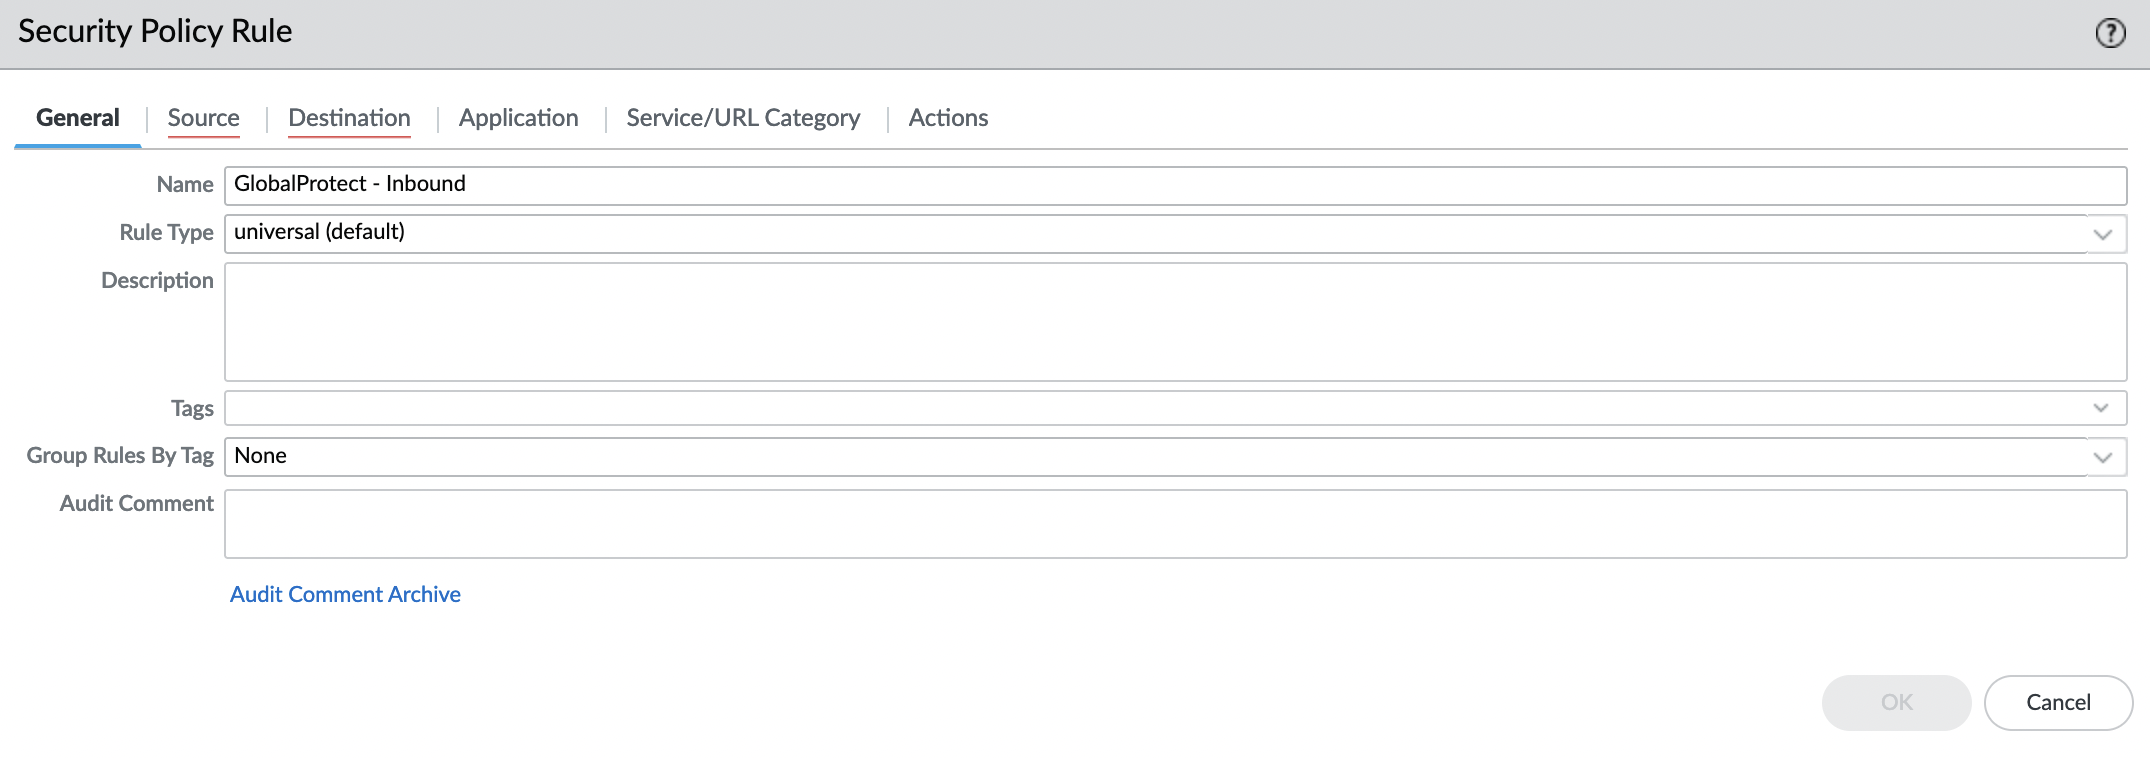
"General" tab. Give it a name and check that "Rule Type" is "universal (default)".
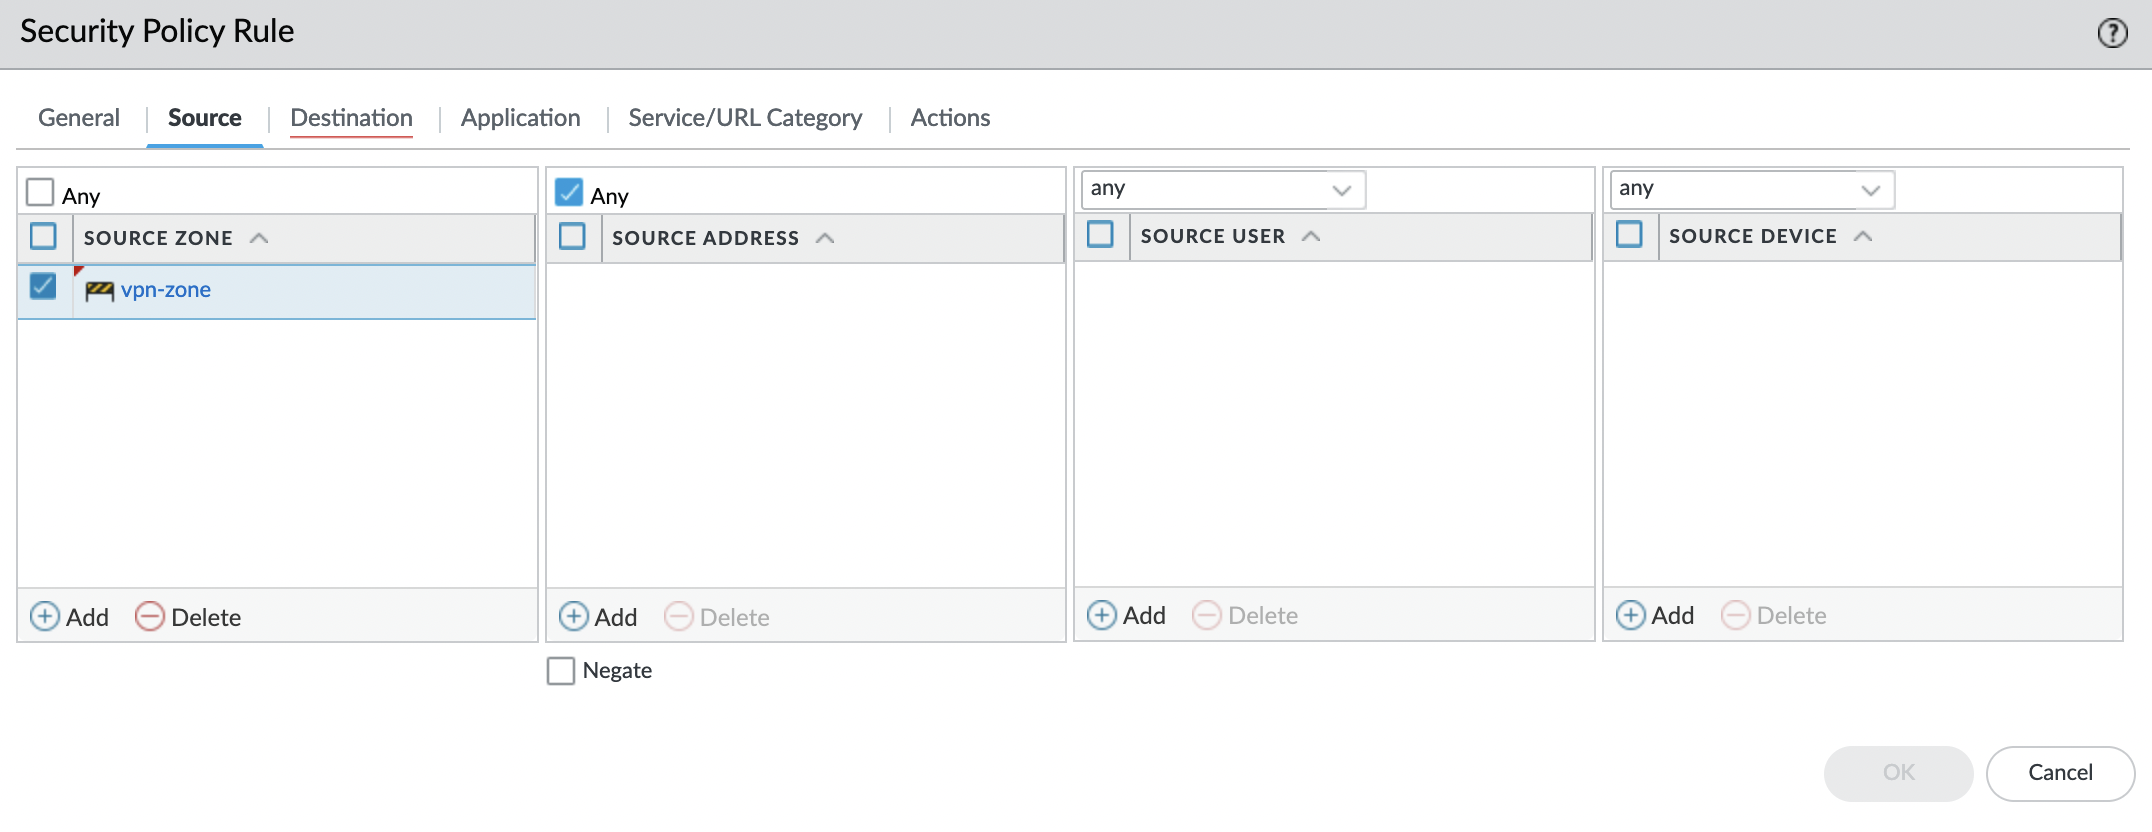
"Source" tab. In "SOURCE ZONE" needs to add the security zone created for VPN connections, in this case, it’s "vpn-zone".
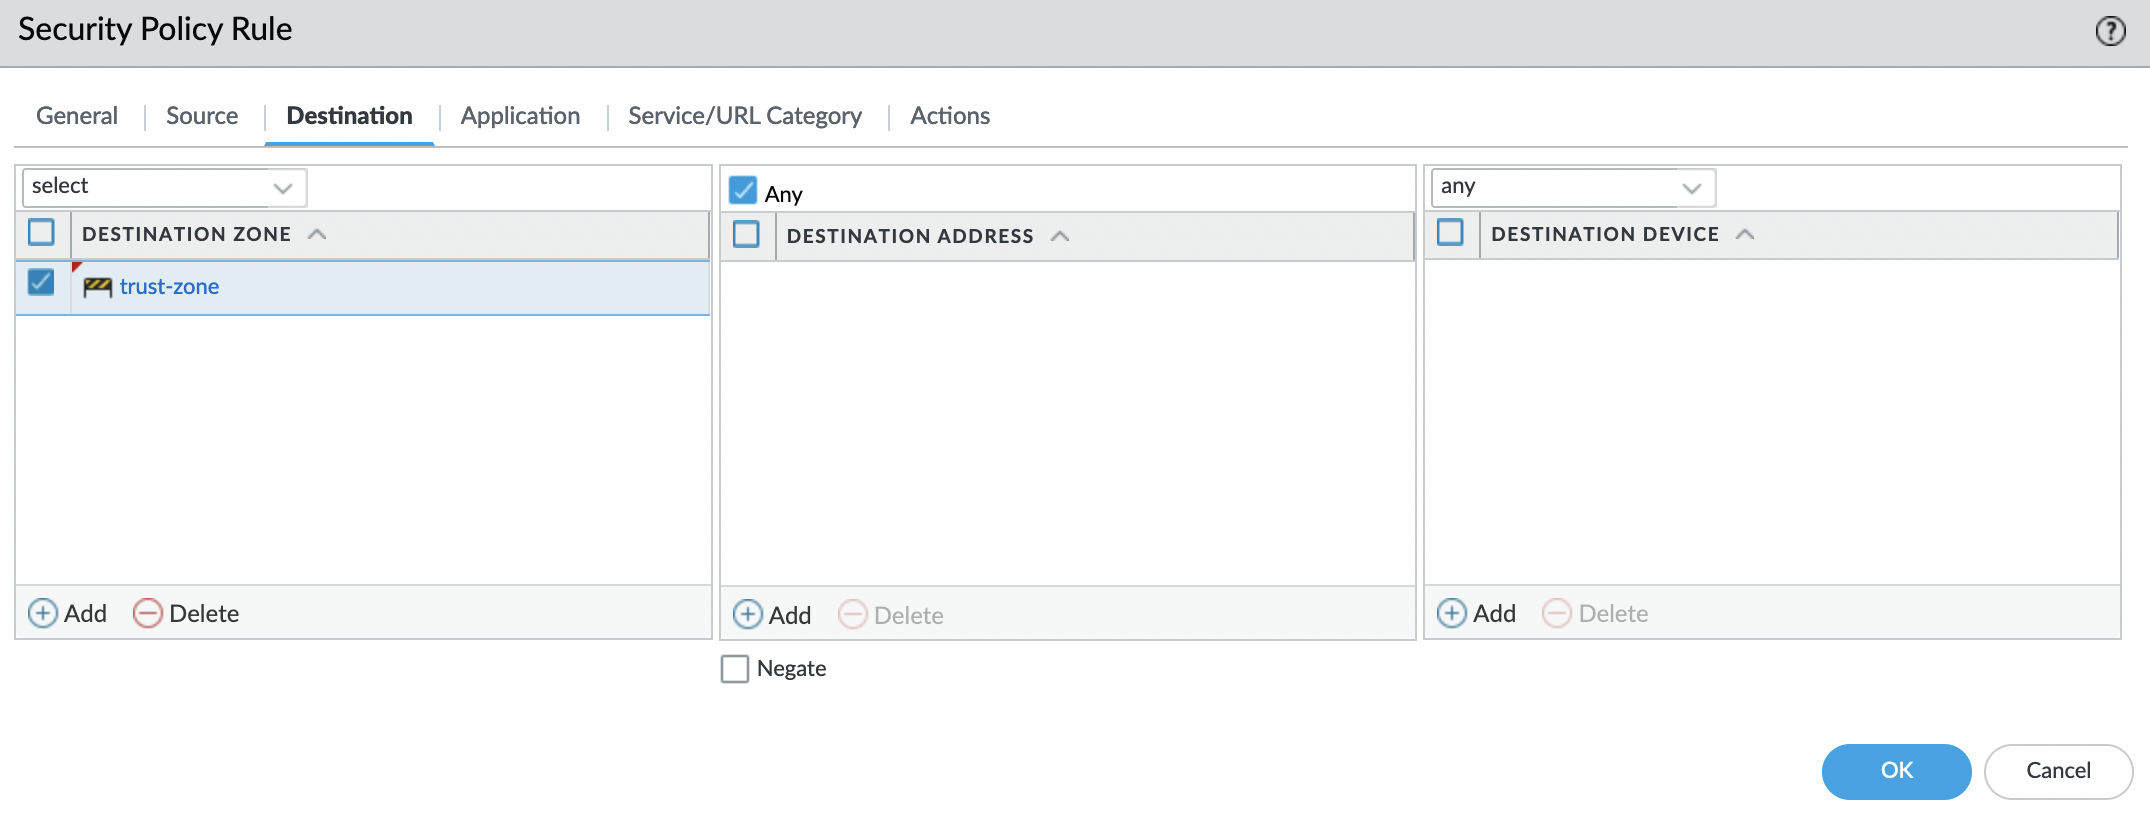
"Destination" tab. In "DESTINATION ZONE" needs to add the security zone created for internal networks, in this case, it’s "trust-zone".
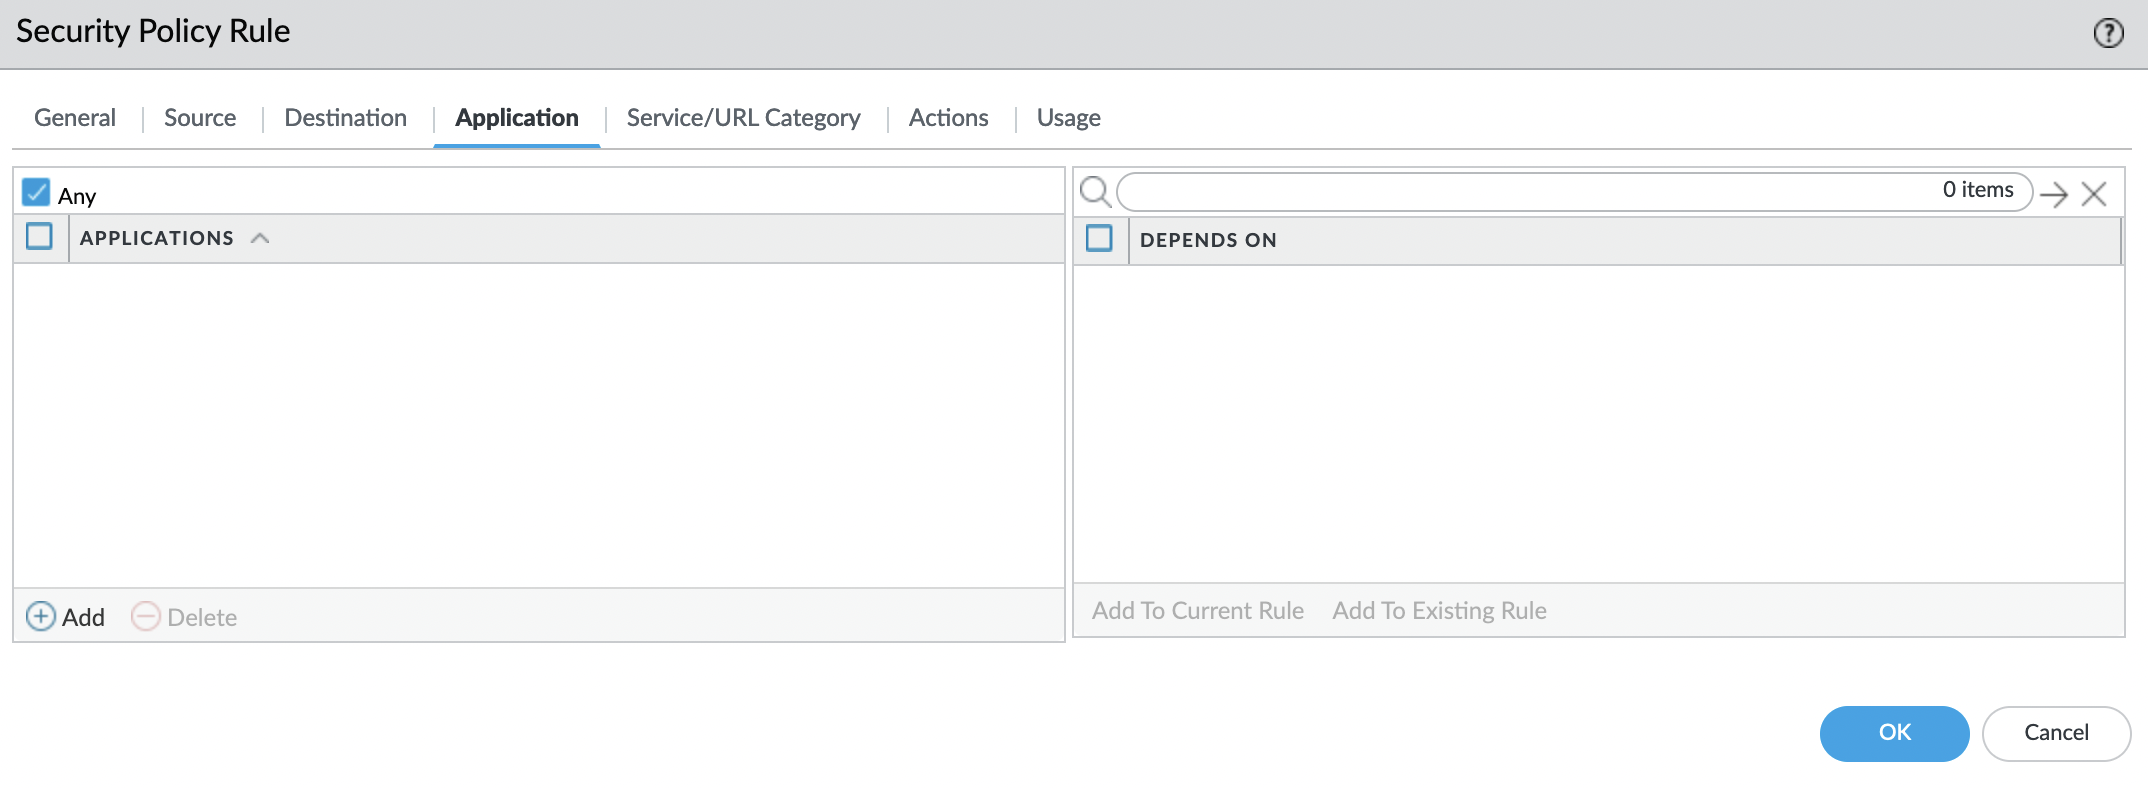
"Application" tab. Check that "Any" is indicated as applications.
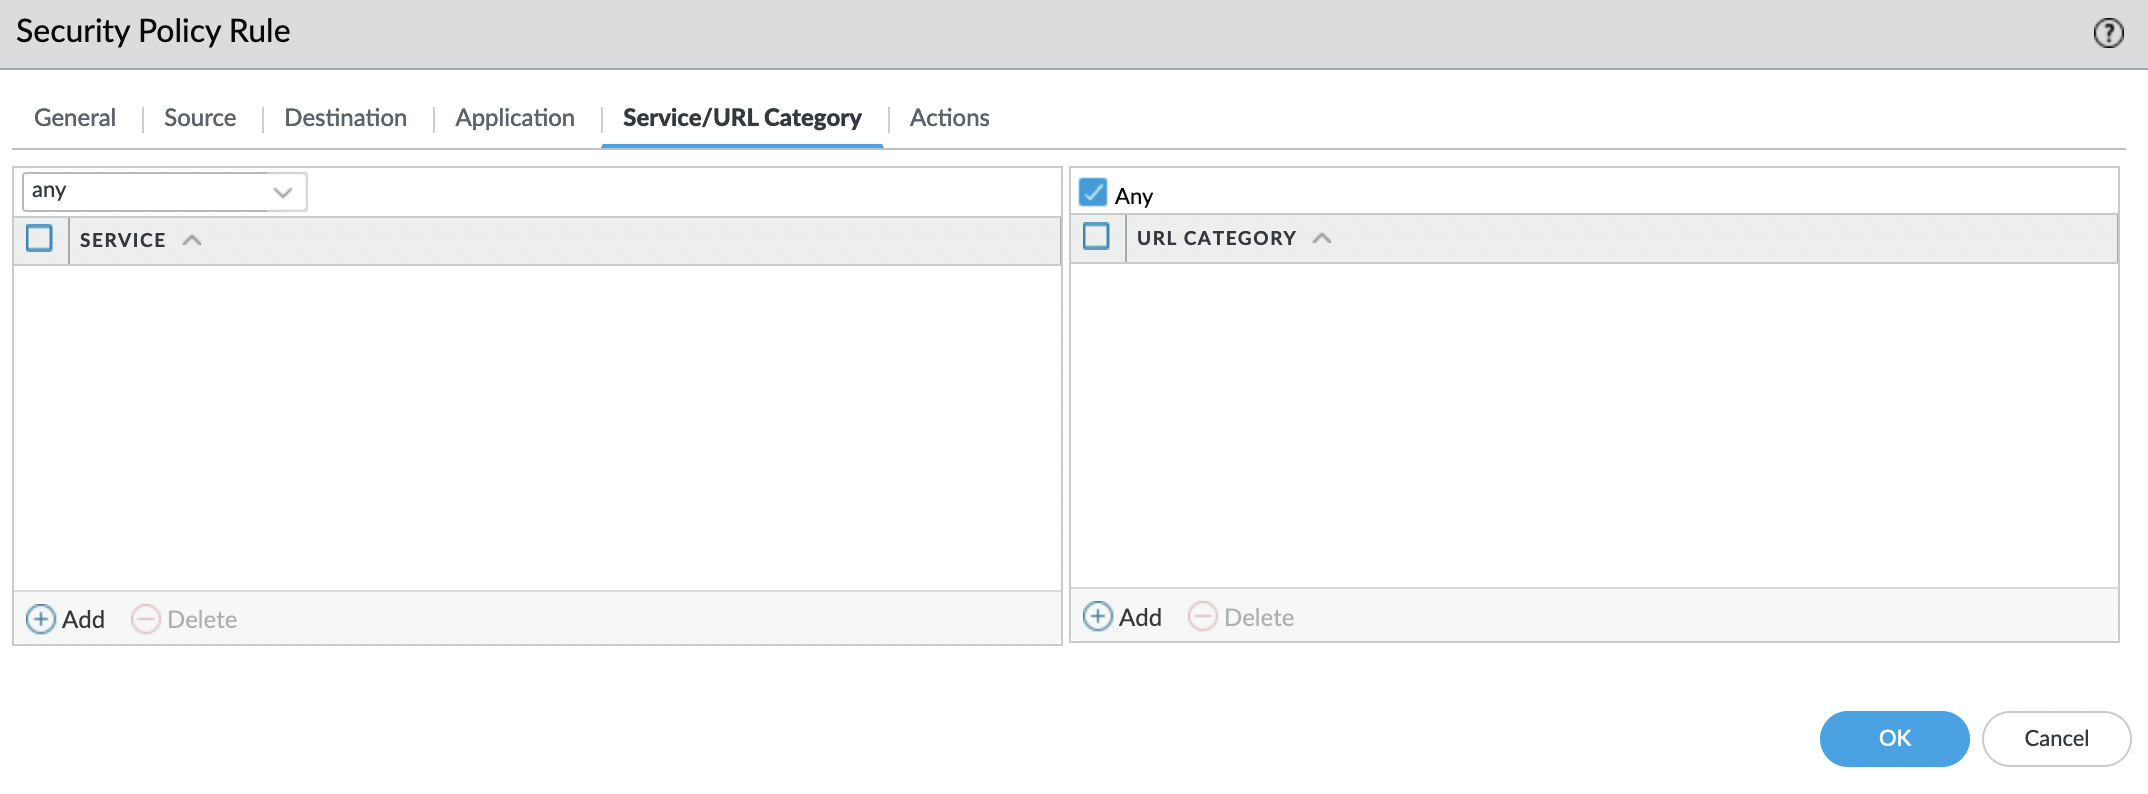
"Service/URL Category" tab
Set "Any", as services.
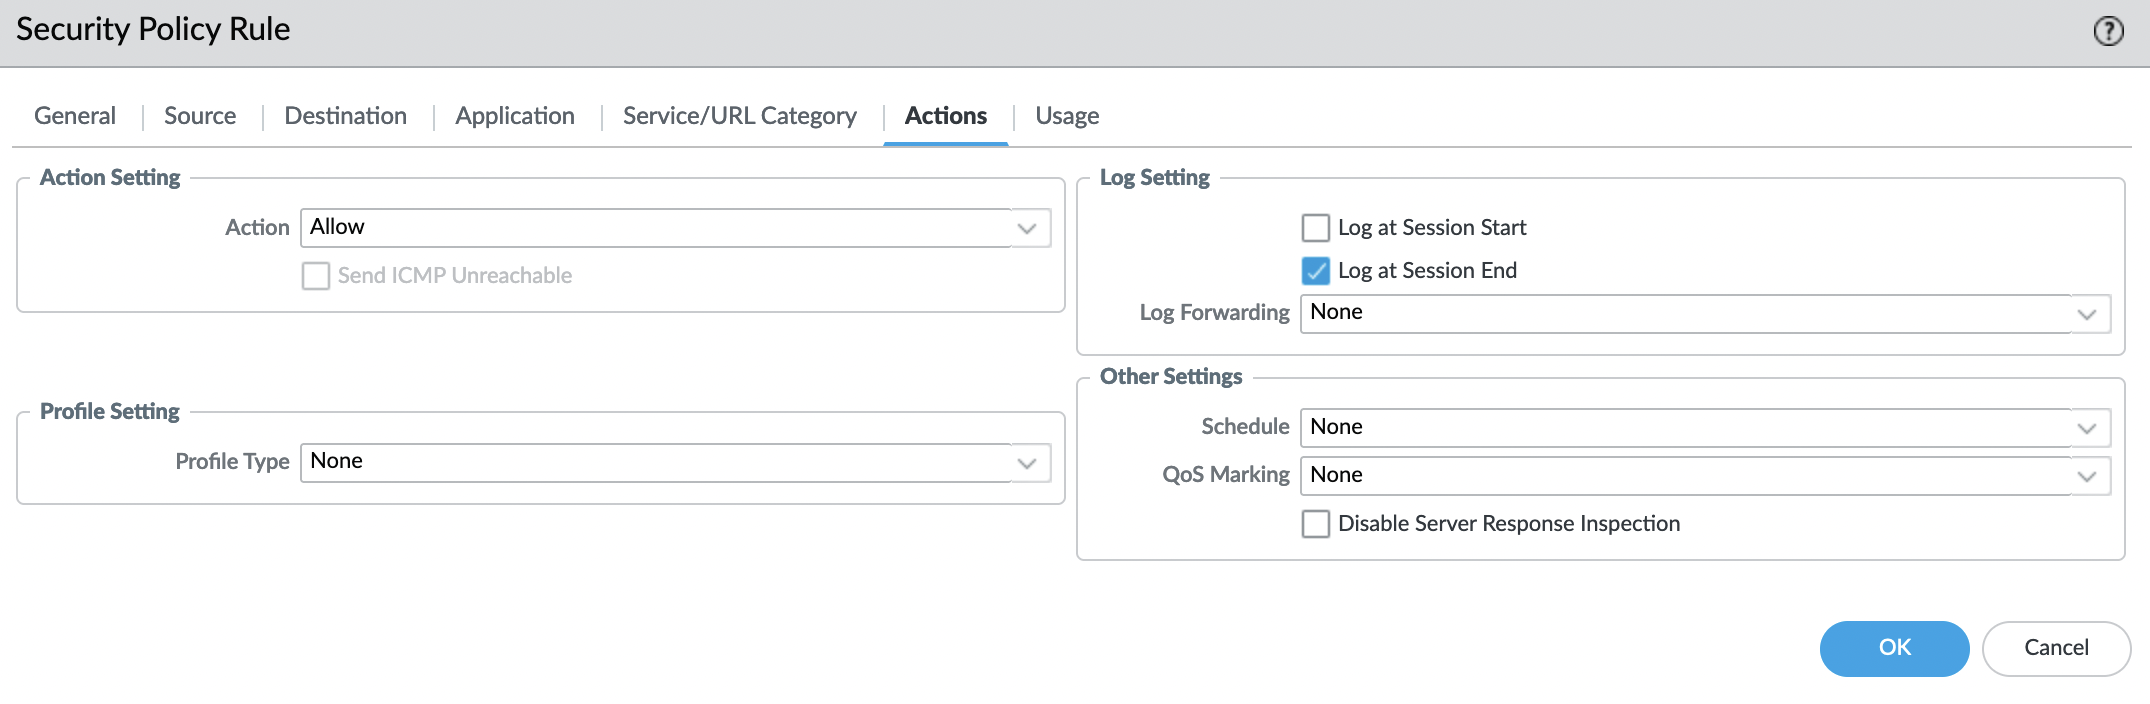
"Actions" tab
Make sure the action is set to "Allow".
Save the security policy and check that it is in front of the default policies.

NAT Policy
Now needs to create a NAT policy, for this go to the "Policies" -> "NAT" tab and click "Add".
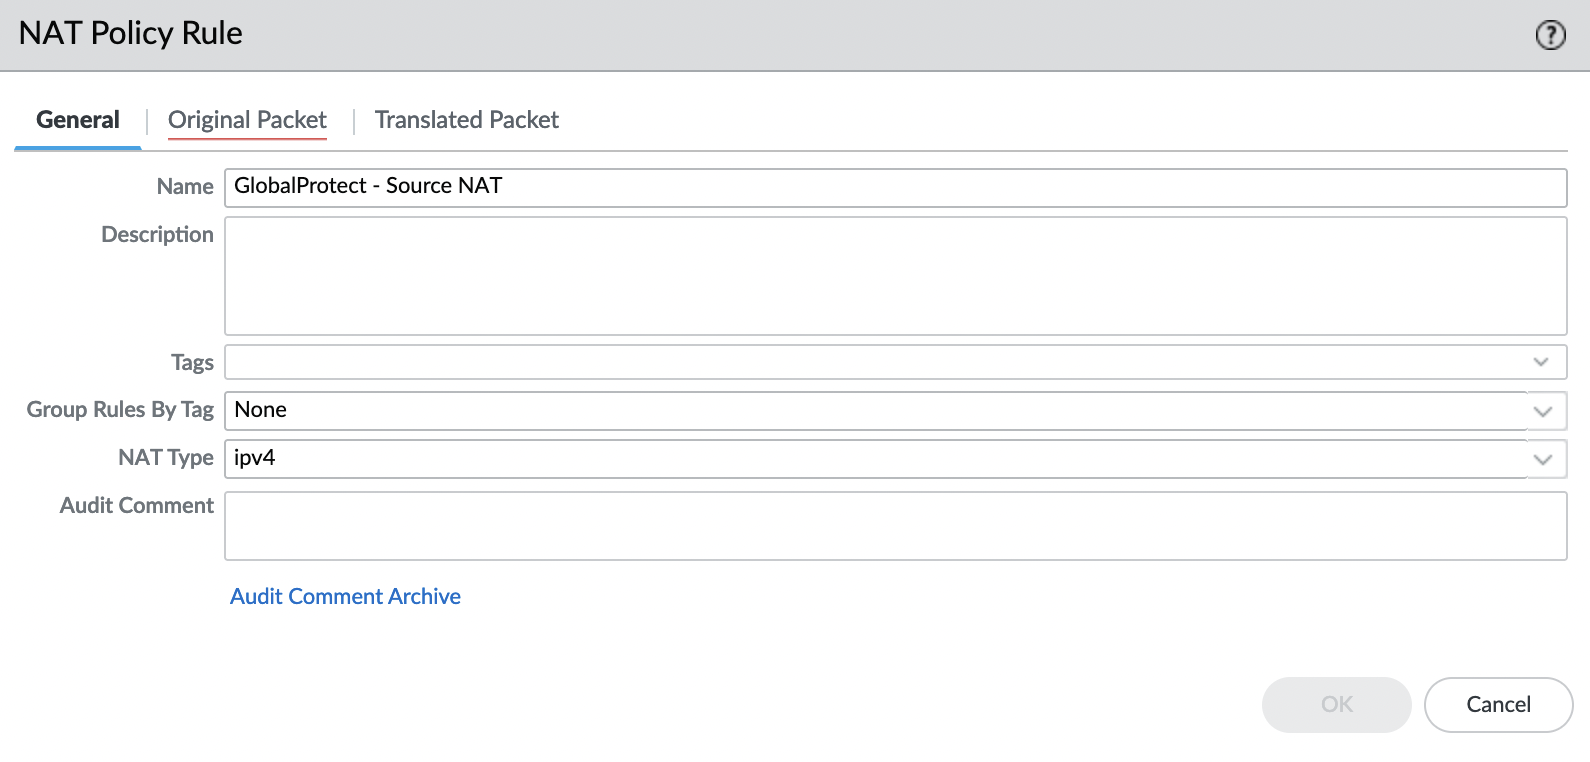
"General" tab
Set the name, and leave the rest as default.
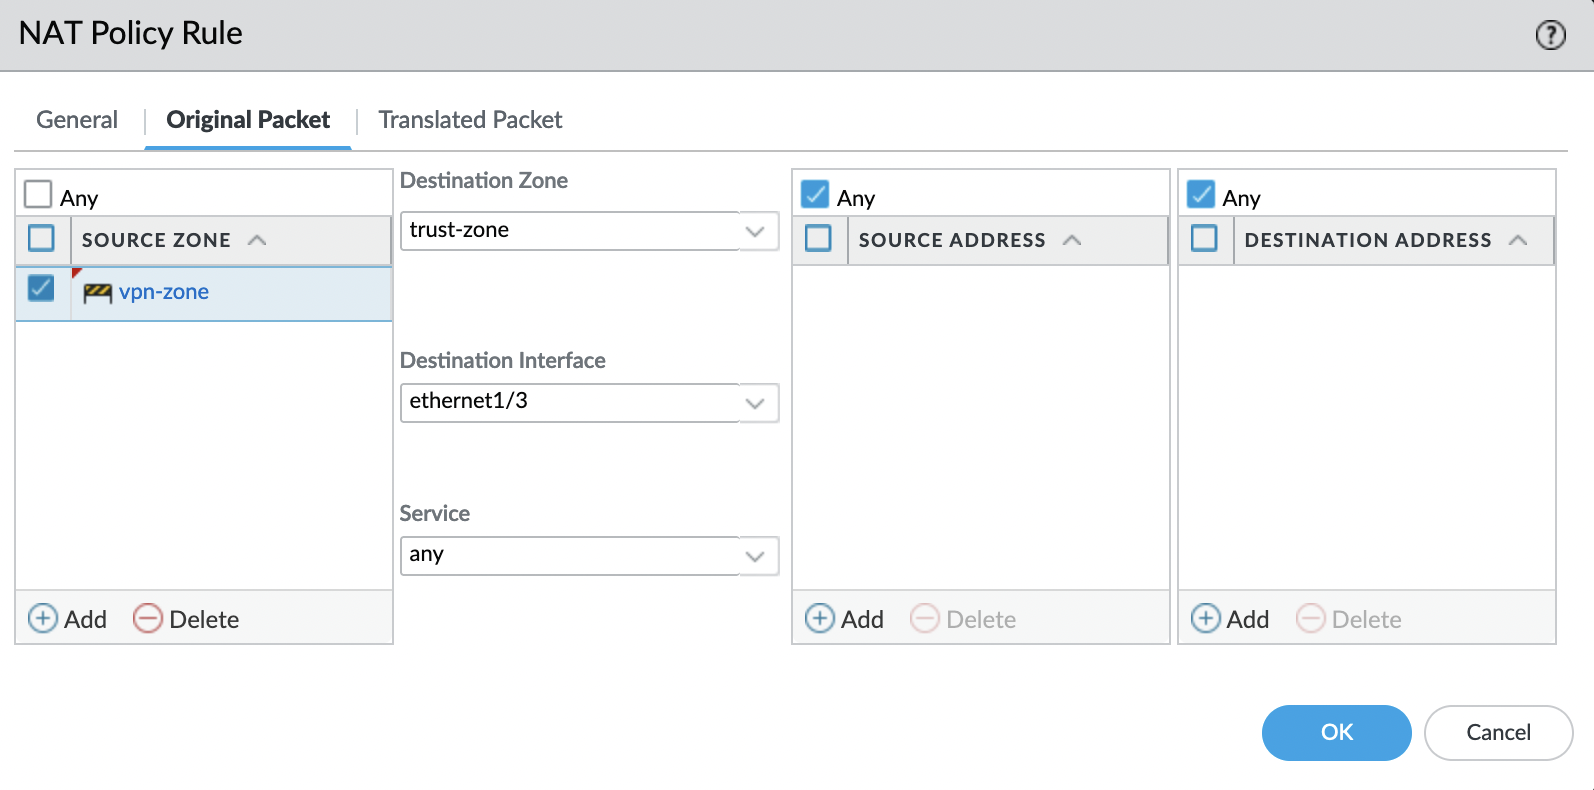
 "Original Packet" tab
"SOURCE ZONE" – add a security zone created for VPN connections, in this case, it’s "vpn-zone".
"Destination Zone" – select the security zone created for internal networks, in this case, it’s "trust-zone".
"Destination Interface" – select the interface in the "trust-zone", in this case, it’s "ethernet1/3".
"Service", "SOURCE ADDRESS" and "DESTINATION ADDRESS" – set "Any".
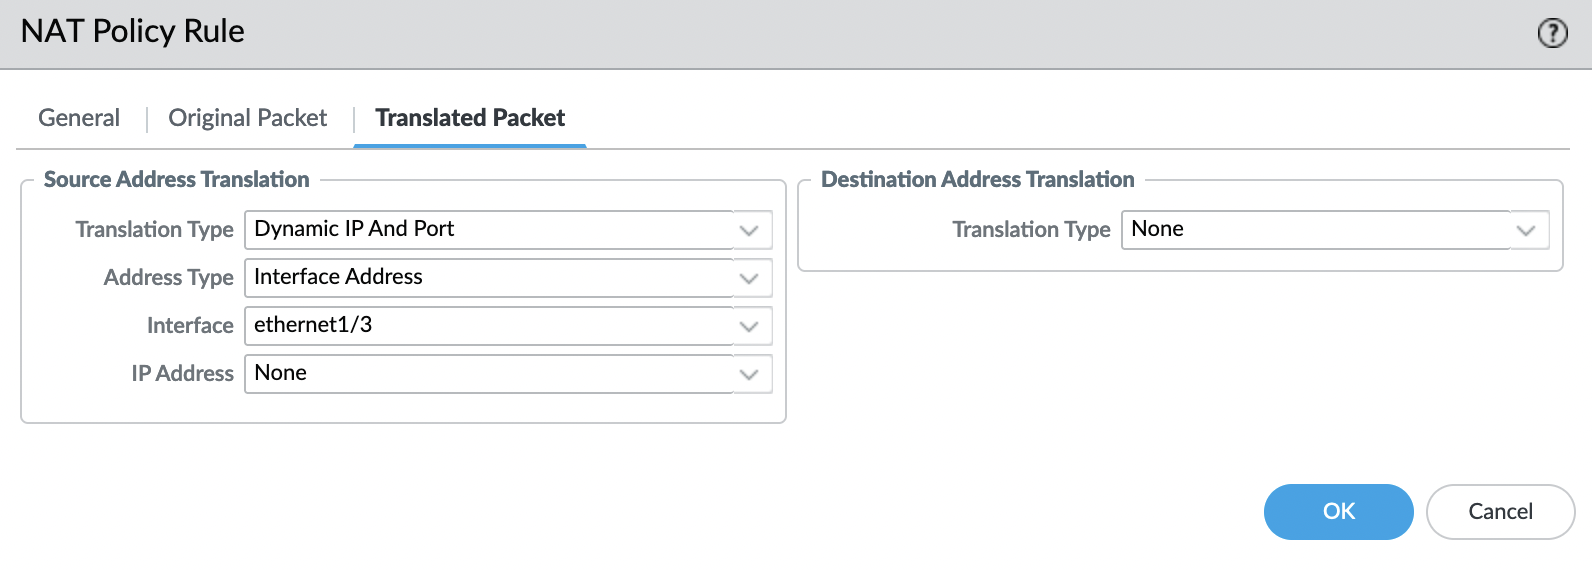
"Translated Packet" tab
Source Address Translation:
- Translation Type: "Dynamic IP And Port"
- Address Type: "Interface Address"
- Interface: "ethernet1/3" (trusted-zone)
- IP Address: "None" (because IP address assigned by DHCP server)
Destination Address Translation:
- Translation Type: "None"
Save and check.

GlobalProtect Client
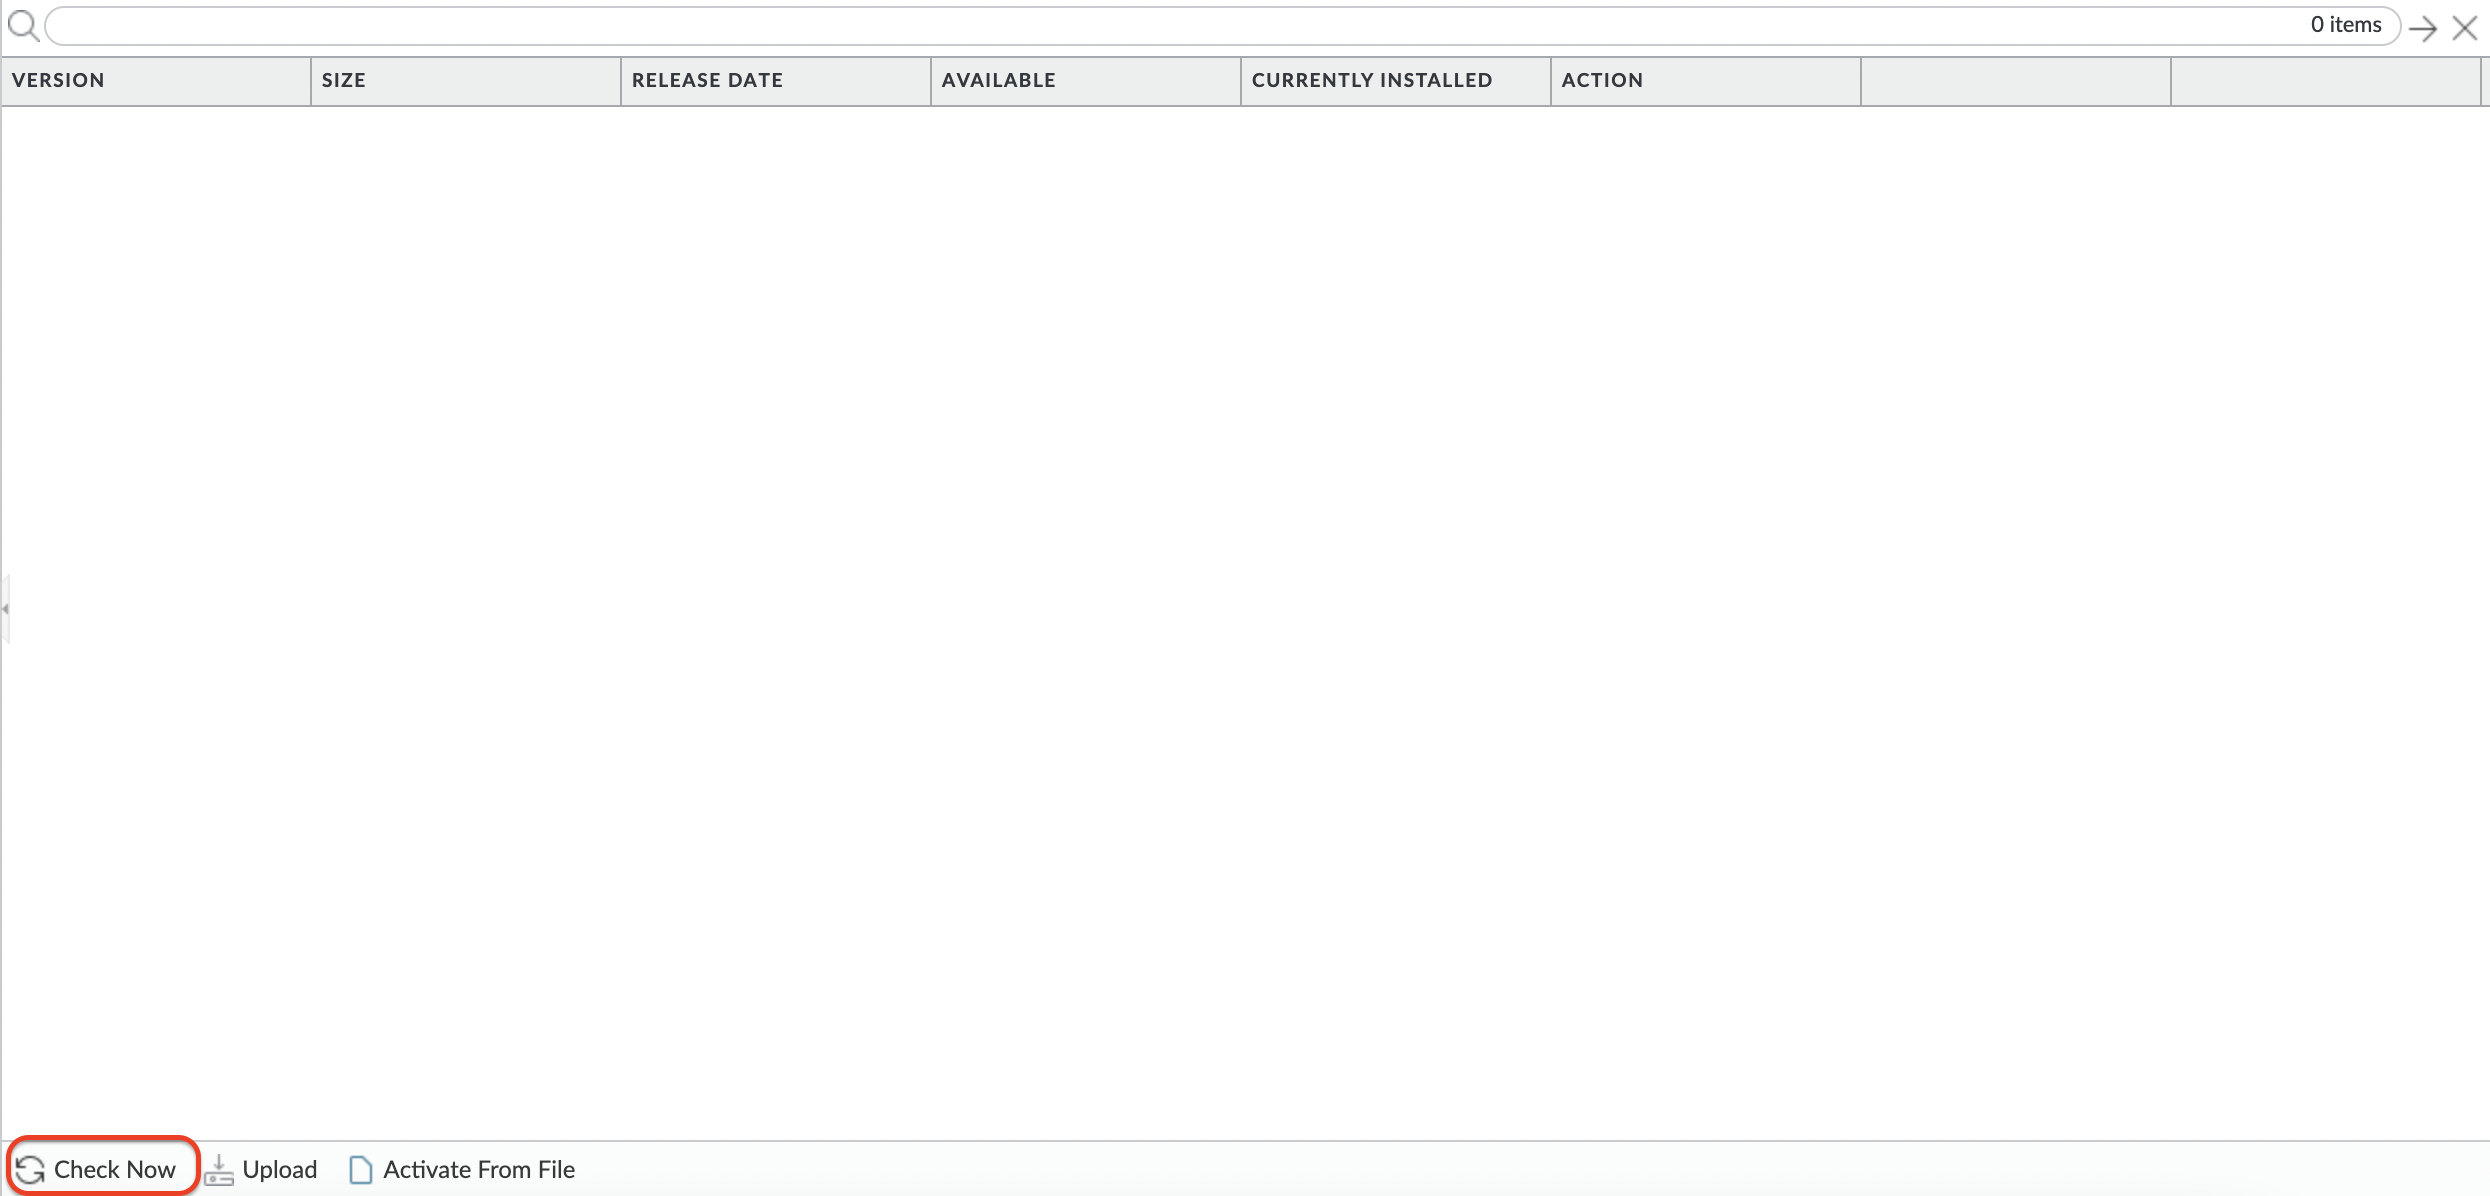
Go to the "Device" tab and find the "GlobalProtect Client" item on the right and download the list of client versions by clicking "Check Now".
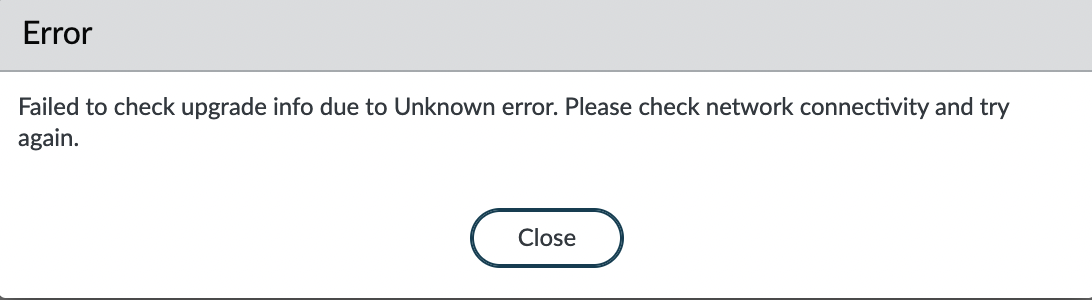
If you see a similar message, then you have not completed the license activation. And since BYOL AMI is used, nothing will work without activating the license. Also, if you download the bundle from the Palo Alto support center and import it, you will get an error regarding the license at the activation stage.
After receiving the list of versions, you need to download and install the required version, for example – the latest. After you have installed it, you need to activate it.
Activation is not synchronized and must be performed on both GlobalProtect instances.

It remains to save changes, for this, in the upper right corner, click "Commit".
GlobalProtect: Connection
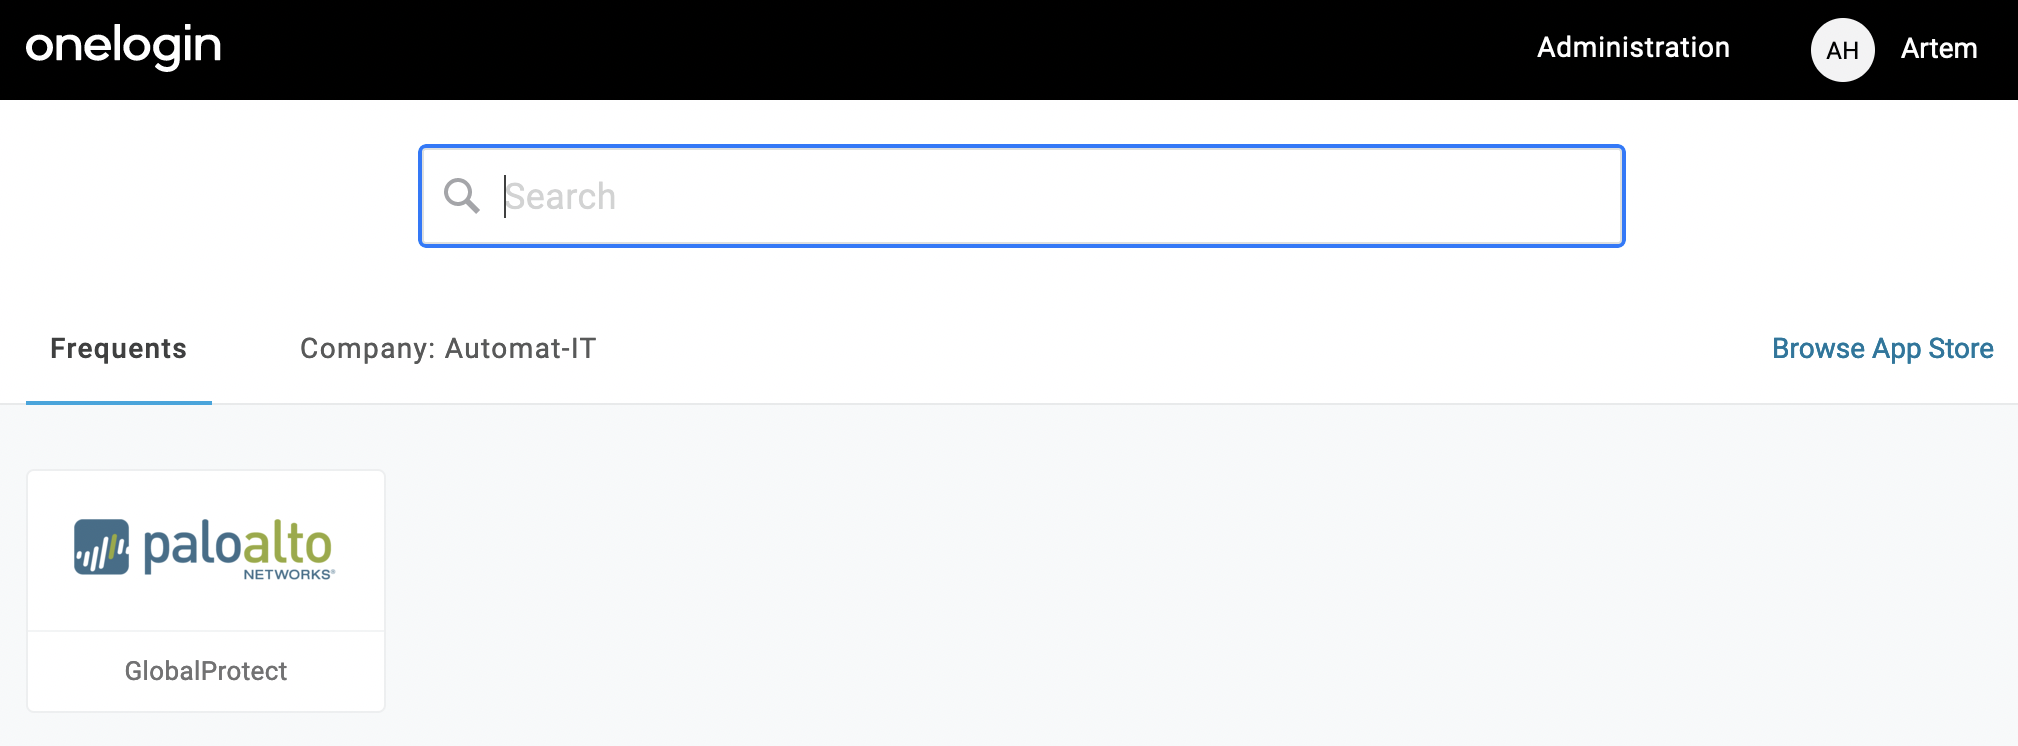
Now we go to the IdP portal, in this case, it’s OneLogin.
If you set up a local user base, then you need to follow the link:
https://YOUR_GP_DOMAIN/global-protect/getsoftwarepage.esp
Client download page available even without authentication
If click on GlobalProtect application, you will be redirected to the client download page.
After downloading and installing the client as a portal, specify the domain name for GlobalProtect and the credentials configured in the SAML provider.