MS SQL – Creating a user with full permissions to the database

Create the user “admin_web” with the username “admin_web“, password “password1234” and provide the owner permissions to the database “artem_services

Create LOGIN:

CREATE LOGIN admin_web with Password ='password1234';
GO


Use necessary database:

USE artem_services;
GO


Create a USER for the previously created LOGIN:

CREATE USER admin_web FOR LOGIN admin_web;
GO


Add a USER to the database owners group:

ALTER ROLE db_owner ADD MEMBER admin_web;
GO

Jenkins – Check for the existence of a variable


If a variable is used in Jenkins Pipeline that is created on the basis of a Webhook or etc, then a task will fail with a manual start. To avoid this, you can add a check for the existence of a variable and set its value.

pipeline {
  agent any
    stage('Check ENV') {
      when { expression { env.GIT_COMMIT_ID == null } }
      steps {
        script {
          echo "COMMIT ID IS NOT SET"
          env.GIT_COMMIT_ID = sh(script: 'git log --format="%H" -n 1', returnStdout: true).trim()
        }
      }
    }
  }
}  


In this example, the presence of the variable “GIT_COMMIT_ID” is checked, and if it is absent, a script is executed that sets this variable with the value of the last HASH commit for this branch. This check should be performed only after the “checkout” stage.

 Nginx – Jenkins reverse proxy


jenkins.conf

 server {
    listen [::]:80;
    listen 80;

    server_name jenkins.{YOUR_DOMAIN_NAME};

    location / {
        proxy_set_header        Host $host:$server_port;
        proxy_set_header        X-Real-IP $remote_addr;
        proxy_set_header        X-Forwarded-For $proxy_add_x_forwarded_for;
        proxy_set_header        X-Forwarded-Proto $scheme;

        proxy_pass          http://127.0.0.1:8080;
        proxy_read_timeout  90;

        proxy_redirect      http://127.0.0.1:8080 http://jenkins.{YOUR_DOMAIN_NAME};

        proxy_http_version 1.1;
        proxy_request_buffering off;
        add_header 'X-SSH-Endpoint' 'jenkins.{YOUR_DOMAIN_NAME}:50022' always;
    } 
}

 AWS SNS – HTTP(S) Subscription: manual confirmation

When creating an HTTP/HTTPS subscription in AWS SNS, you can observe that the subscription is hanging in the status: “Pending confirmation


SNS to the specified URL makes a POST request in which it sends data in JSON format and expects to receive a key value in response: “SubscribeURL“. But if the application does not know how to respond to SNS, then you can enter the confirmation URL manually, but for this you need to find out.

To do this, you can use Nginx and its access_log.

Since the body of the POST request is written to the log only when using “proxy_pass“, we model proxing to the backend.

nginx.conf

user  nginx;
worker_processes  1;

error_log  /var/log/nginx/error.log warn;
pid        /var/run/nginx.pid;


events {
    worker_connections  1024;
}

http {
    log_format postdata escape=json '"$request_body"';

    server {
        listen       80;
        server_name  _;

        location /success {
            return 200;
        }

        location / {
            proxy_redirect off;
            proxy_pass_request_body on;
            proxy_pass $scheme://127.0.0.1:$server_port/success;
            add_header X-Body $request_body;
            access_log  /var/log/nginx/post.log postdata;
        }
    }
}


In the example, the configuration is for the HTTP protocol, if you have HTTPS, add the parts of the configuration that are related to SSL.


Reload the Nginx configuration:

systemctl reload nginx


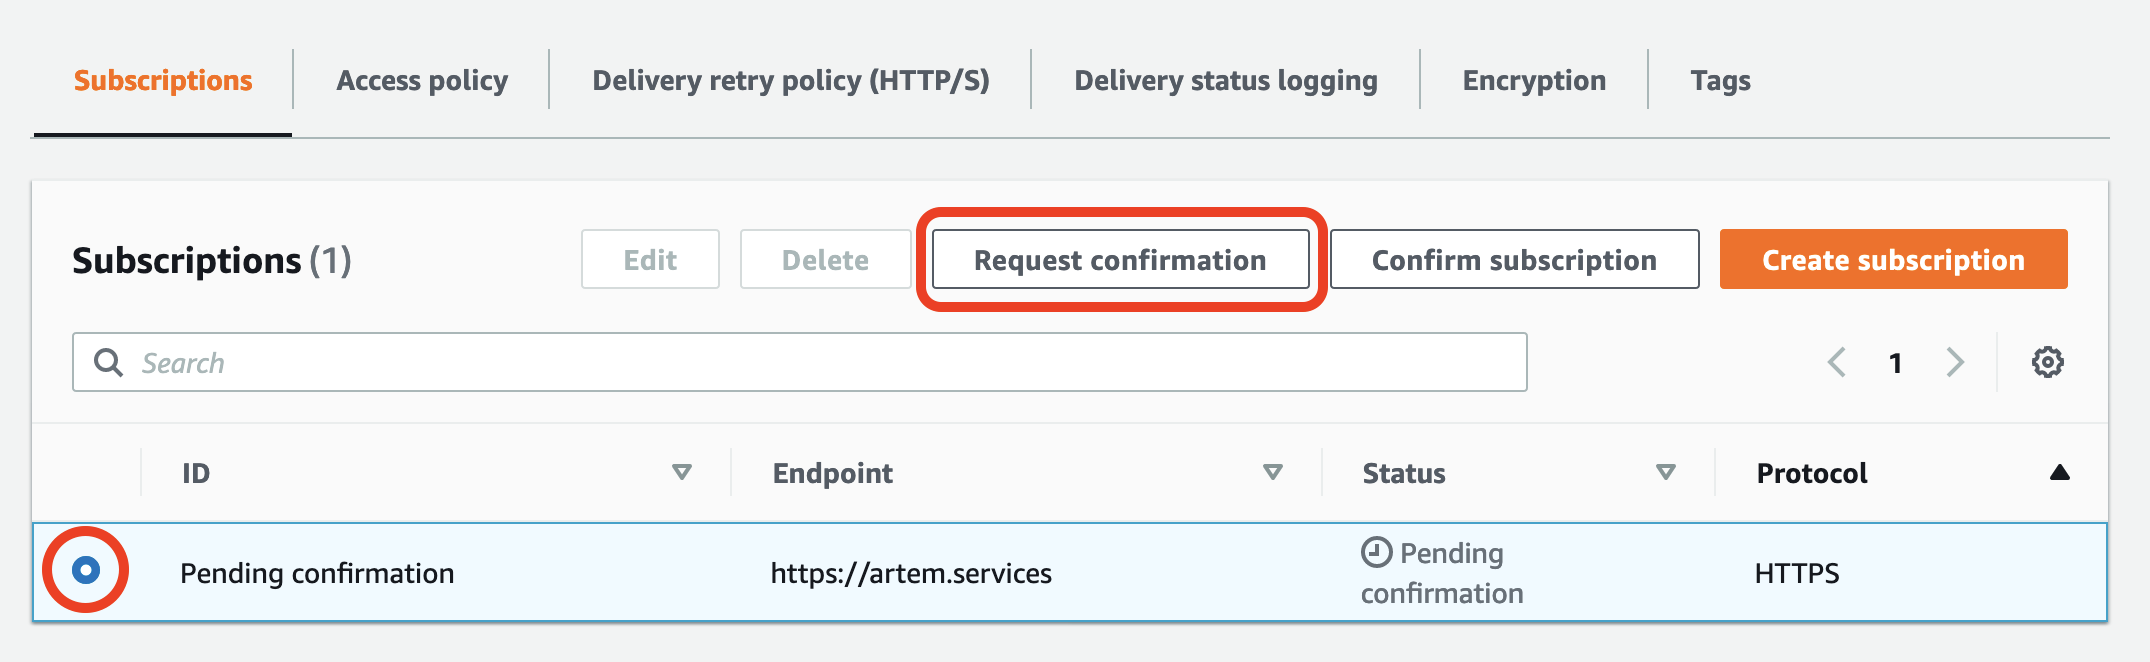
After we return to the AWS console and select the necessary one in SNS subscriptions and make a one more request  “Request Confirmation


Follow to Nginx log:

cat /var/log/nginx/post.log


Interested in the value of the key: “SubscribeURL“, it will be of the form:

https://sns.{REGION}.amazonaws.com/?Action=ConfirmSubscription&TopicArn=arn:aws:sns:{REGION}:{YOUR_ACCOUNT_ID}:{YOUR_TOPIC_NAME}&Token={YOUR_TOKEN}


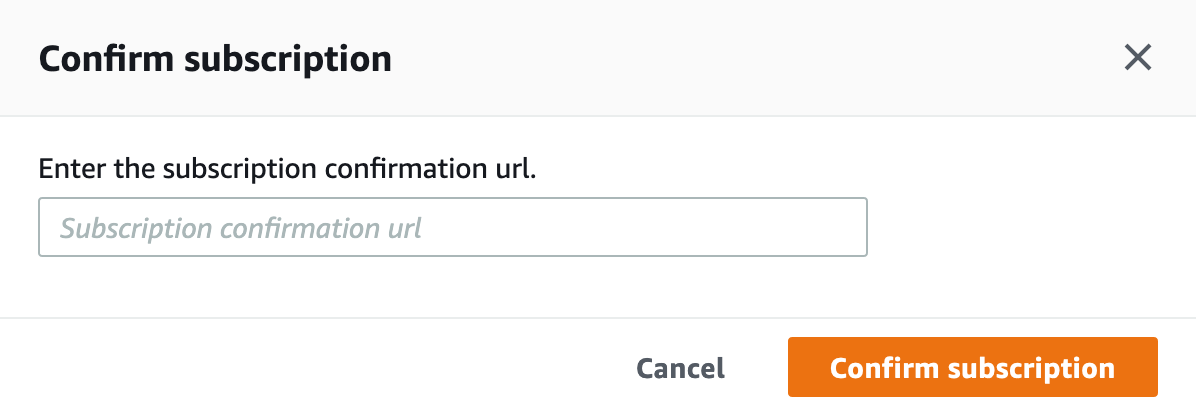
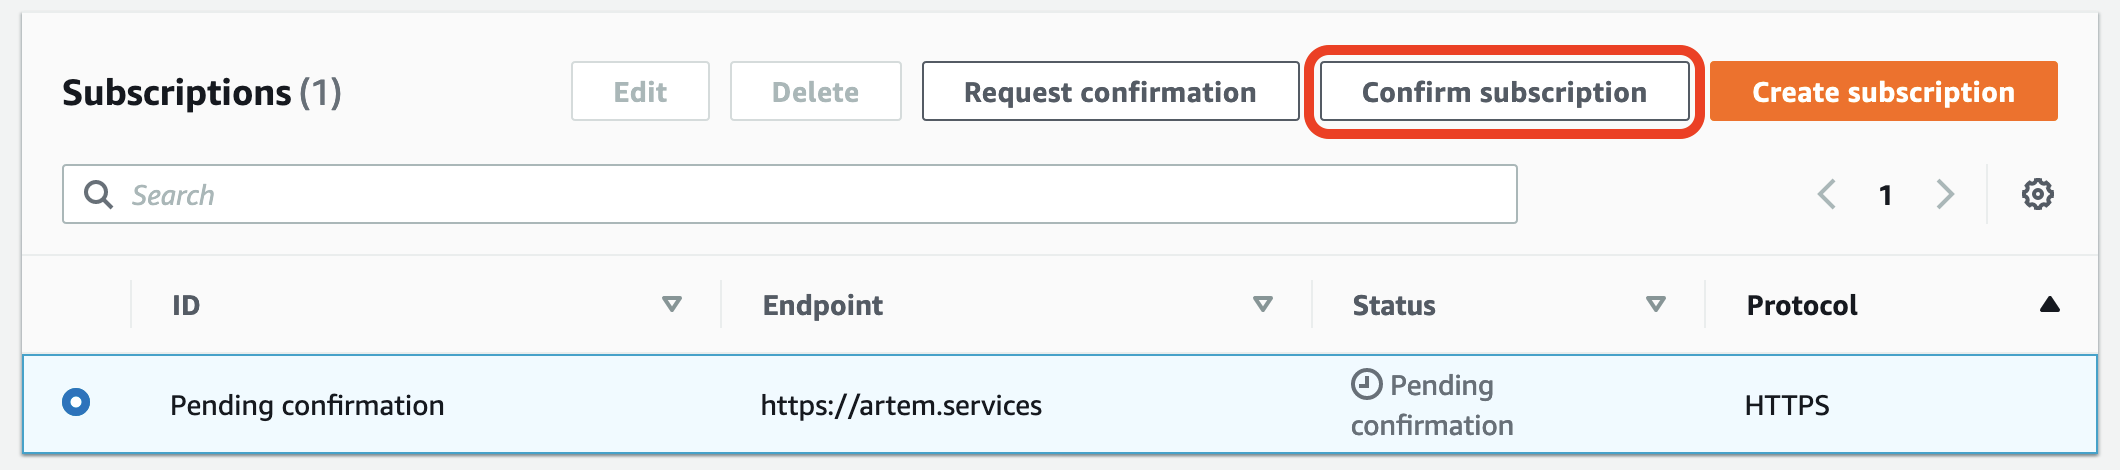
We copy it and return to AWS SNS. Select “Confirm Subscription


Insert the value “SubscribeURL” and confirm.


 BASH – The variable content of which refers to another variable


For example, there is the N number of variables, “var_1“, “var_2” and so on, the script takes as arguments only the number of the variable, and its contents should be in the new var variable.

If you execute this script, passing it as argument “1“:

./my_script.sh 1


my_script.sh

#!/bin/bash

var_1='MY_VAR_NUMBER_1'
var_2='MY_VAR_NUMBER_2'
var_3='MY_VAR_NUMBER_3'

var="var_$1"
echo $var


That script will return:

var_1


And we need the contents of the variable “var_1“. To do this, the “echo” command should look like this:

echo "${!var}"


In this case, it will return:

MY_VAR_NUMBER_1

CentOS 7 – Jenkins install

Install Java OpenJDK, as it is a dependency for Jenkins. The latest versions of Jenkins are compatible with version 11, so let’s install it.

sudo yum install -y java-11-openjdk


To add the Jenkins repository, you will need the “wget” utility, if it is not installed, then install:

sudo yum install -y wget


Add the repository and import its key:

sudo wget -O /etc/yum.repos.d/jenkins.repo https://pkg.jenkins.io/redhat-stable/jenkins.repo
sudo rpm --import https://pkg.jenkins.io/redhat-stable/jenkins.io.key


Install Jenkins:

sudo yum install -y jenkins


Start Jenkins:

sudo systemctl start jenkins


Check the status of the service:

sudo systemctl status jenkins


If all is well, add to autorun:

sudo systemctl enable jenkins


To continue the installation, you need to go to the “8080” port on the server IP address in the browser

 FIX ERROR – Terraform: Blocks of type “tags” are not expected here.

When trying to make a terraform plan or  terraform apply, terraform returns the following error:

Error: Unsupported block type

Blocks of type "tags" are not expected here. Did you mean to define argument
"tags"? If so, use the equals sign to assign it a value.


Solution:

In terraform versions below the 12, the following syntax was used for “tags“:

  tags {
    Name = "MY_TAG_NAME"
  }


Now after “tags” you need to add “=”

  tags = {
    Name = "MY_TAG_NAME"
  }