![]()
AWS Transfer supports 3 protocols: SFTP, FTP, and FTPS. And only SFTP can have a public endpoint, FTP/FTPS can only be run inside a VPC. Also for login/password authorization, you must use a custom provider, you can find more information about this here.
Goal:
Create an AWS Transfer server for the FTP protocol, the service must be public and authorization must also be by login / password.
FTP is insecure and AWS does not recommend using it on public networks.
The first thing you need is the AWS SAM CLI installed.
Create a directory where we will download the template, go to it and download:
wget https://s3.amazonaws.com/aws-transfer-resources/custom-idp-templates/aws-transfer-custom-idp-secrets-manager-sourceip-protocol-support-apig.zip
Unzip and run the following command:
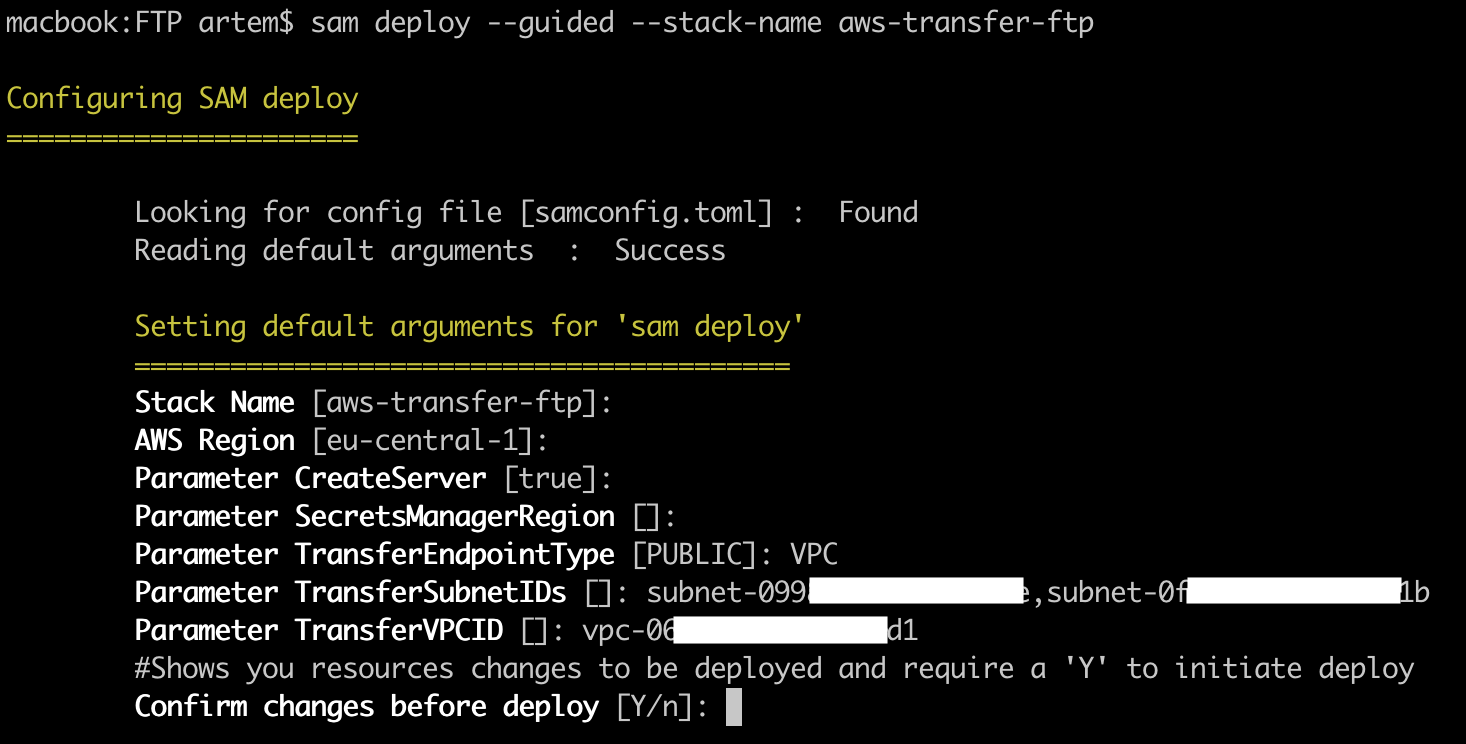
sam deploy --guided --stack-name aws-transfer-ftp
Where, “aws-transfer-ftp” is the name of the created CloudFormation stack, if you specify the name of an existing one, it will update it.
Then the interactive installation will start, where you will be prompted to specify the following parameters:
- Stack Name – the name of the CloudFormation stack, the default is the value of the “–stack-name” key parameter;
- AWS Region – the region where the CloudFormation stack will be deployed;
- Parameter CreateServer – whether AWS Transfer service will be created (by default – true);
- Parameter SecretManagerRegion – if your region does not support SecretsManager, then you can specify a separate region for it;
- Parameter TransferEndpointType – PUBLIC or VPC, since FTP does not support public endpoints, specify VPC;
- Parameter TransferSubnetIDs – ID‘s of the subnets in which the AWS Transfer endpoint will be;
- Parameter TransferVPCID – VPC ID where the subnets specified in the previous parameter are located.
Let’s create a SecurityGroup for the FTP service in the required VPC. And we will allow incoming traffic to TCP ports 21 and 8192–8200 from any address. While we save the created SG, we will attach it in the future.
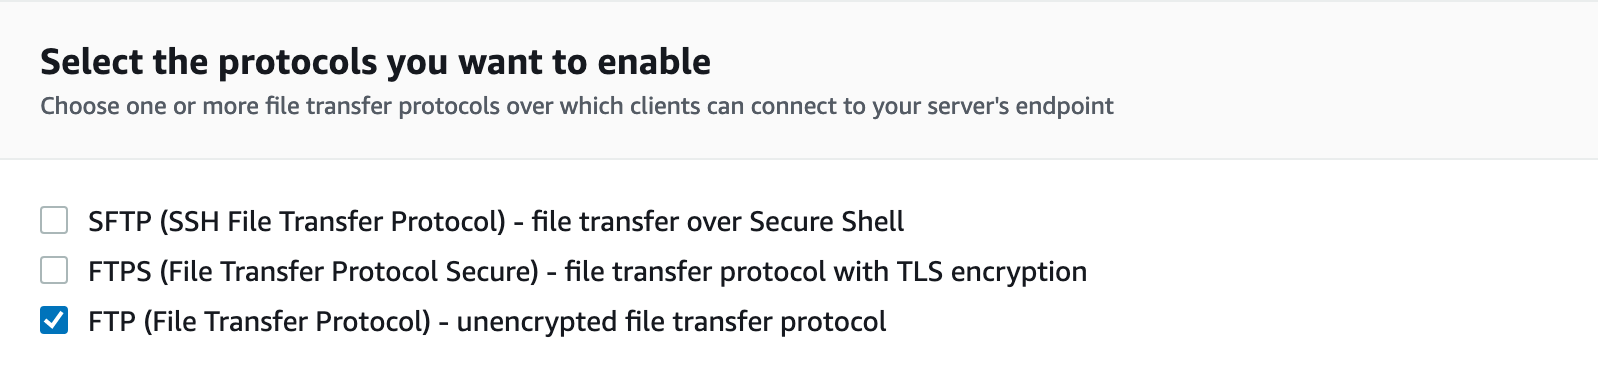
Then go to the AWS Console – “AWS Transfer Family“, find the server created by AWS Transfer and edit its protocol, uncheck the “SFTP” protocol and select “FTP” protocol, and save the changes.
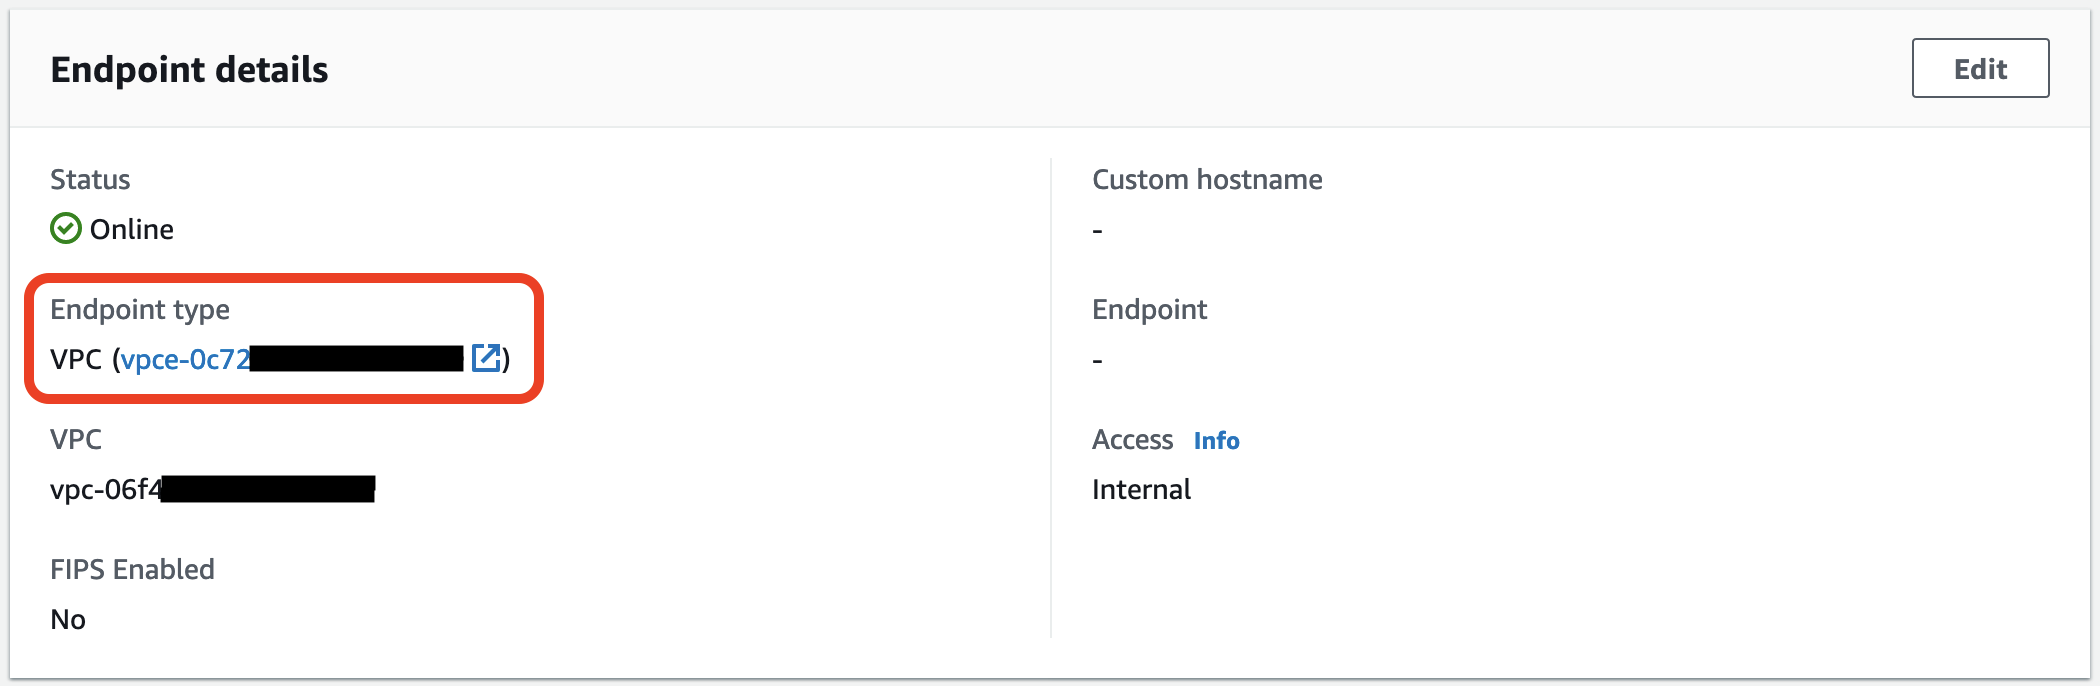
Now we need to add access to FTP from the world, for this we will use NLB. First, let’s find out the private IP addresses of VPC endpoint for AWS Transfer, for this in the “Endpoint details” block, click on the link to the VPC endpoint.
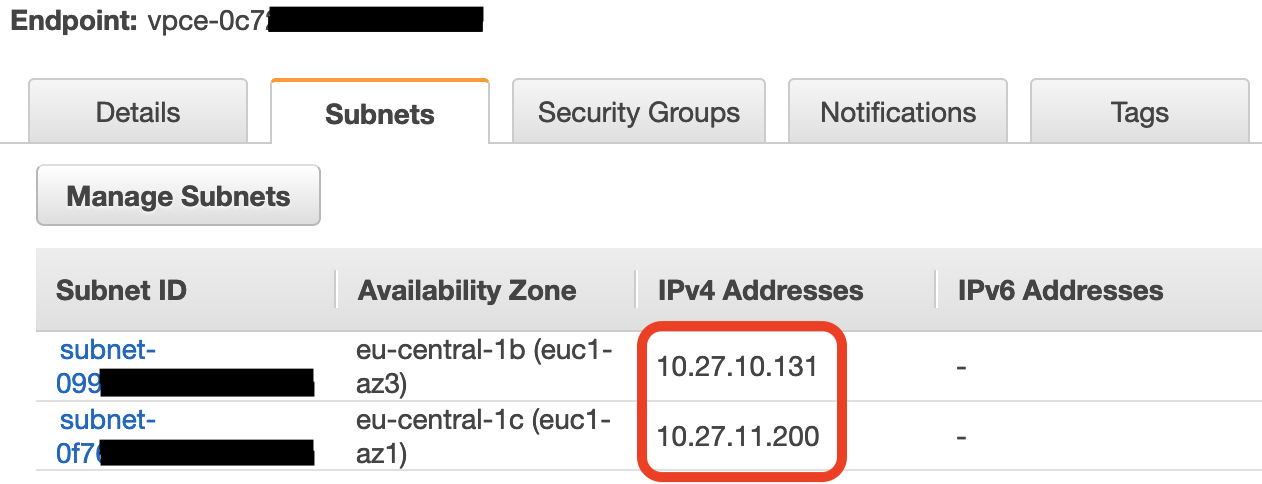
Go to the “Subnets” tab and copy all the IP addresses, they will be needed to create target groups.
Go to the “Security Groups” tab and change the default security group to the one created earlier.
Now let’s create a target group, for this in the AWS console go to “EC2” -> “Load Balancing” -> “Target Groups” and create the first target group for TCP port 21.
- Target type: IP address
- Protocol: TCP
- Port: 21
It is better to indicate the port number in the name of the target group at the end, since there will be 10 of them and you can easily get confused.
We will also indicate the VPC in which the AWS Transfer service was created. In the next tab, one by one, we will indicate the IP addresses of the VPC endpoint, which we looked at earlier. We save the target group.
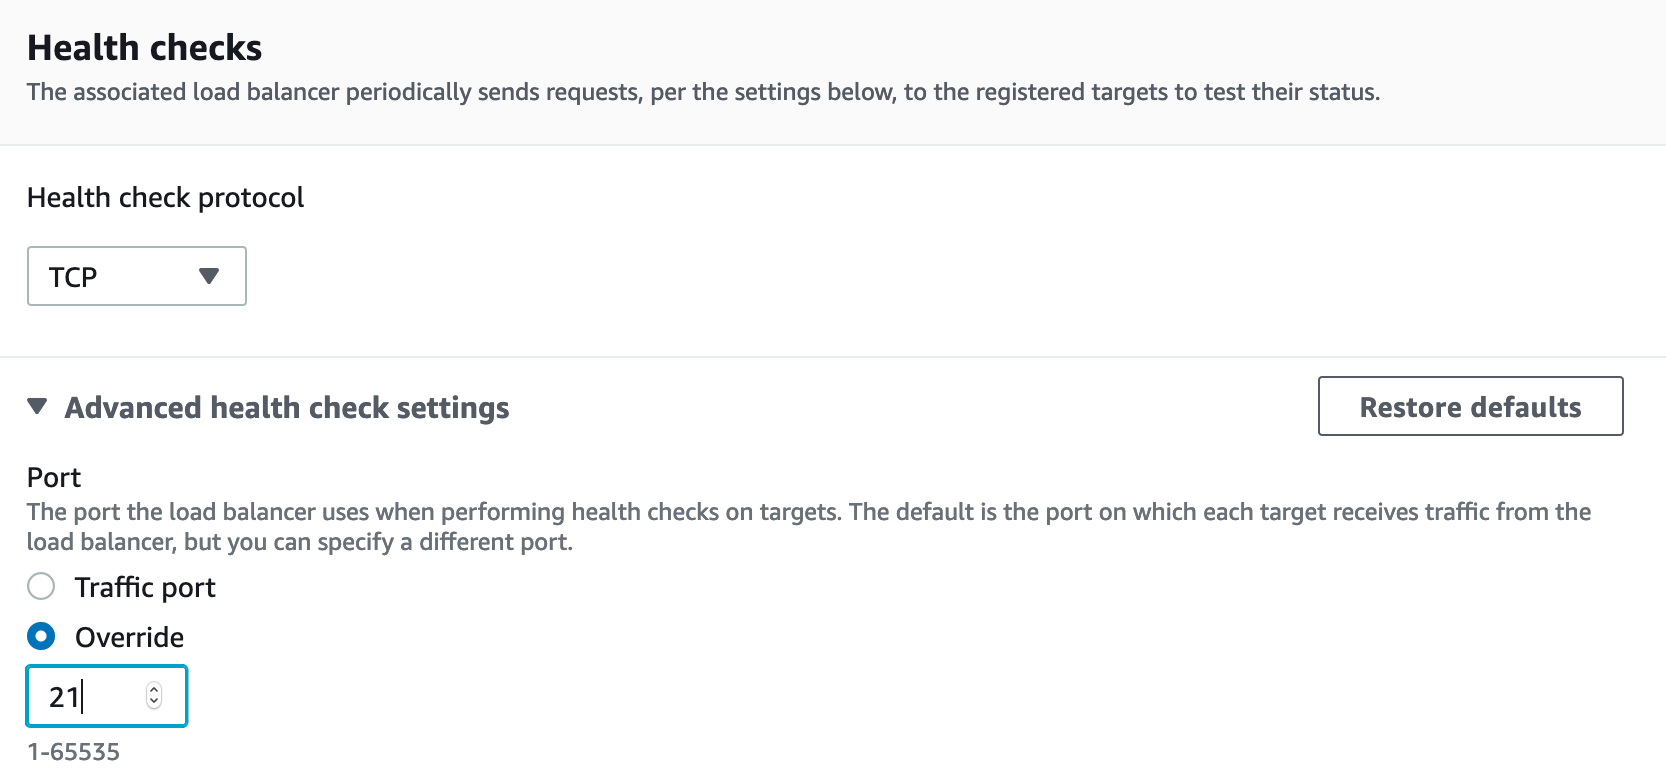
Now you need to create 9 more target groups for the port range: TCP 8192–8200. The procedure is the same as for the target group for port 21, except that you need to specify port 21 for HeathCheck. To do this, in the “Health checks” block, open the “Advanced health check setting” tab, select “Overrive” and specify the port number – 21.
After we are done with target groups, we need to create an “internet-facing” Network Load Balancer and place it on public networks of the same VPC where the AWS Transfer service is. We also create 10 listeners, for TCP ports 21, and for the range 8192–8200, and for each listener we point the desired target group corresponding to the port number. After which the FTP service must be accessible from outside.
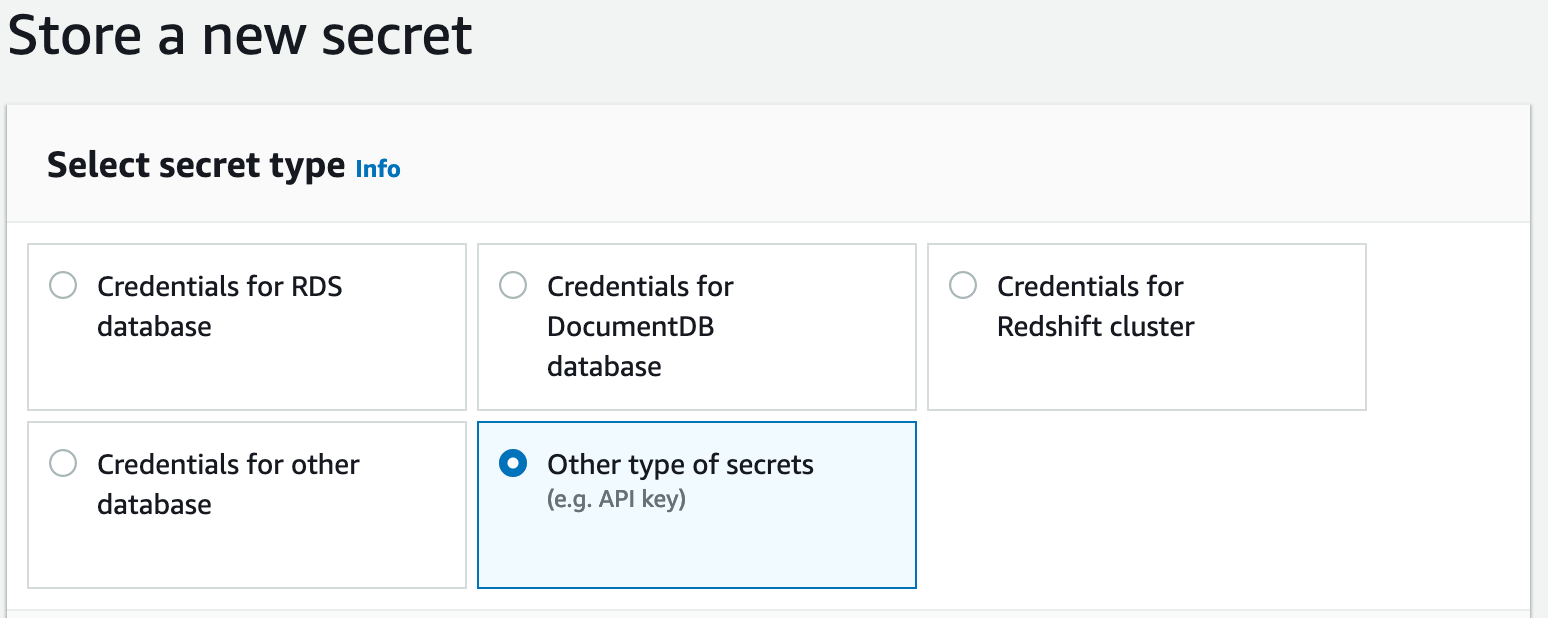
In order to add an FTP user, go to the “Secrets Manager” in the AWS console and create a secret with the “Other type of secrets” type.
Create 3 “key/value” pairs:
- Password – password for the new FTP user;
- Role – ARN of the role that has write permission to the required S3 bucket;
- HomeDirectoryDetails – [{“Entry”: “/”, “Target”: “/s3-bucket/user-name”}]
Where “s3-bucket” is the name of the S3 bucket, “user-name” is the name of the directory that the user will go to when connecting to the FTP server (the directory name does not have to match the username, and may also be located outside the root of the bucket)
We must save the secret with a name in the format: “server_id/user_name“, where “server_id” is the AWS Transfer server ID, “user_name” is the username that will be used to connect to the FTP server.
For convenience, you can also create a DNS CNAME record for the NLB record.